

 Français
 Deutsch
 Español
 Italiano
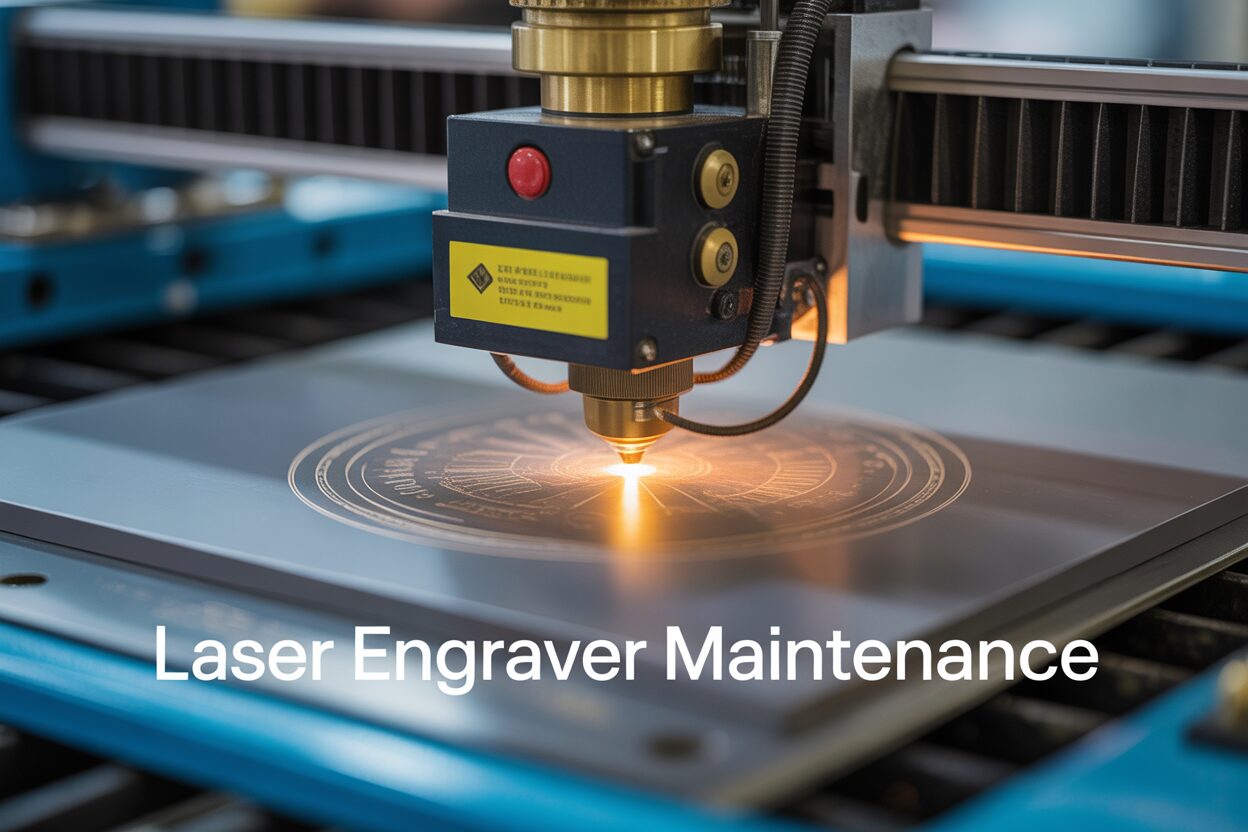
Maintaining Your Laser Engraver for Peak Performance
Jul
Estimated Reading Time: 17 minutes
Key Takeaways
- Preventative Maintenance is Crucial: Regular upkeep prevents costly breakdowns, extends machine lifespan, and ensures consistent high-quality output.
- Optical & Cooling Systems are Core: Meticulous cleaning of lenses and mirrors, along with proper chiller maintenance, directly impacts laser precision and tube longevity.
- Mechanical & Environmental Factors Matter: Keeping belts tensioned, rails lubricated, and the workspace clean reduces wear, improves accuracy, and minimizes dust-related issues.
- Exhaust & Workbed Cleaning is Vital: An efficient exhaust system ensures safety and internal cleanliness, while a clean workbed prevents focusing issues and fire hazards.
- Holistic Approach & Updates: Combining physical maintenance with firmware/software updates ensures peak performance, reliability, and superior results on diverse materials.
Table of Contents
Regular maintenance is crucial for any laser engraving machine to ensure its longevity and consistent performance. This guide will walk you through the essential steps and best practices for keeping your laser engraver in top condition, leading to flawless designs and maximizing your investment.
Fundamental Importance of Laser Engraver Maintenance
Proactive maintenance of your laser engraving machine is not merely a suggestion; it is an absolute necessity for anyone serious about consistent quality and maximizing their investment. Think of your laser engraver as a highly specialized vehicle. Just as a car needs regular oil changes and tire rotations to perform optimally and avoid costly breakdowns, your laser engraver requires diligent attention to its various components. Neglecting maintenance inevitably leads to diminished performance, increased downtime, and ultimately, a significantly shorter lifespan for your valuable equipment. The precision involved in laser engraving demands that every part of the machine functions flawlessly. A slight misalignment, a build-up of debris, or a worn component can dramatically impact the laser beam’s efficiency and accuracy, leading to unsatisfactory results and wasted material.
Routine laser engraver checks are the cornerstone of preventing catastrophic breakdowns and ensuring a continuous stream of high-quality output. These checks are designed to identify minor issues before they escalate into major problems requiring expensive repairs or extended periods of downtime. For instance, regularly inspecting the optics for dust and residue, verifying the alignment of the laser beam, and checking the tension of the belts might seem like small tasks, but their collective impact is profound. A dirty lens can diffuse the laser beam, reducing its power and clarity. A misaligned beam can lead to uneven engraving and lost efficiency. Loose belts can cause inaccurate movements of the laser head, resulting in distorted designs. By consistently performing these fundamental checks, you maintain the machine’s pristine operating condition, ensuring that each engraving job is executed with the power and precision it demands. This proactive approach minimizes unexpected interruptions, allowing you to meet deadlines and maintain a consistent production schedule, which is crucial for any professional operation.
The benefits of proper care for your laser engraver extend far beyond simply keeping it running. It directly translates to the machine’s longevity and the undeniable quality of your engraved products. A well-maintained machine experiences less wear and tear on its critical components, delaying the need for costly replacements and extending its overall service life. This means your initial investment continues to pay dividends for many years to come. Furthermore, the quality of your engraving work is intrinsically linked to the health of your machine. Crisp lines, uniform shading, and precise detailing are hallmarks of a properly functioning laser engraver. Conversely, a neglected machine will struggle to produce consistent results, leading to blurry edges, inconsistent depth, and overall subpar output that can damage your reputation and lead to costly re-works.
The impact of maintenance is particularly evident when engraving on diverse materials like wood and slate. Wood engraving, for example, relies on consistent power and precise beam focus to achieve varying depths and tones. A dirty lens or a misaligned laser can cause uneven burning, leaving unsightly scorch marks or patchy engraving that completely ruins the aesthetic of the piece. For delicate details on wood, even a slight degradation in beam quality can be disastrous. Similarly, slate, with its natural variations and challenging surface, requires an extremely stable and powerful beam for clean and consistent etching. Dust on mirrors or lenses can scatter the laser, resulting in a fuzzy or incomplete etch that doesn’t pop against the dark slate background. Maintaining pristine optics and proper machine alignment ensures that the laser energy is delivered precisely where it’s needed, yielding the sharp, clear, and durable engravings expected on both these distinct materials. This attention to detail is what separates professional, high-quality output from amateur, inconsistent results, underscoring the fundamental importance of continuous laser engraver maintenance.
Cleaning Your Laser Engraver: A Comprehensive Guide
Cleaning your laser engraver goes far beyond a simple wipe-down; it’s a meticulous process that directly impacts the quality of your output and the lifespan of your machine. The machine’s interior, specifically the lens and mirrors, are the most critical components requiring regular, gentle cleaning. These optical elements are responsible for guiding and focusing the laser beam. Even a tiny speck of dust or a smudge can diffuse the laser, reducing its power and creating blurred or inconsistent engraving. Always use lint-free optical wipes and approved lens cleaning solutions, applying the solution to the cloth first, never directly to the optics. For mirrors, a gentle dusting with a bulb blower or a camel-hair brush before wiping is crucial to remove loose particles without scratching. The gantry system, including rails and linear bearings, also needs attention. Dust and debris can accumulate on these moving parts, leading to increased friction and potentially impeding the smooth movement of the laser head. Use a soft brush or compressed air to dislodge particles, followed by wiping with a clean cloth. Occasionally, a very light application of manufacturer-recommended lubricant may be necessary on the rails, but avoid over-lubricating, as it can attract more dust. The goal is to ensure the laser head moves freely and precisely across the entire work area, which is fundamental for accurate engraving.
The exhaust system is often overlooked but critically important for both machine performance and operator safety. Over time, the exhaust fan and ducting will accumulate residue from engraved materials, particularly from plastics and wood. This build-up restricts airflow, causing the system to run less efficiently, and potentially allowing smoke and fumes to escape into the work area. A reduced exhaust flow also means more particulate matter is deposited inside the engraving chamber, increasing the frequency with which you need to clean optics and other internal components. Regularly inspect the exhaust fan blades for caked-on residue and gently clean them using a brush or a damp cloth, ensuring the fan is powered off and disconnected first. The exhaust hose or ducting should also be checked for kinks, blockages, or excessive build-up. In some cases, complete removal and cleaning or replacement of the ducting may be necessary. A powerful, unimpeded exhaust system not only keeps your machine cleaner but also protects your health by effectively removing noxious fumes and particulates generated during the engraving process.
The workbed, whether it’s a honeycomb or slatted design, is a primary collection point for debris, dross, and small cut-offs. Neglecting the workbed can lead to several performance issues. Accumulated material can interfere with proper focusing, especially if objects are not sitting perfectly flat. It can also pose a fire risk, particularly when working with flammable materials like wood. For honeycomb beds, use a vacuum cleaner with a narrow attachment to remove small pieces of debris frequently. For stubborn, stuck-on residue, a stiff brush or a designated honeycomb cleaning tool can be effective. If your machine has a slatted bed, ensure regular removal of the slats to clean the underlying tray, which can collect a significant amount of material. Maintaining a clean workbed ensures optimal air circulation during engraving, which helps dissipate heat and prevent charring, while also providing a stable and level surface for your materials.
Beyond the machine itself, maintaining a clean environment around your laser engraver is equally significant. Dust and ambient debris are your laser engraver’s silent enemies. They inevitably find their way into the machine’s interior, settling on optical components, motors, and electronic boards. Positioning your engraver in a relatively dust-free area, or at least ensuring the surrounding workspace is regularly cleaned, will significantly reduce the ingress of airborne particles. Using dust covers when the machine is not in use is a simple yet highly effective preventative measure. This dedication to cleanliness directly contributes to maintaining precision in intricate projects like custom photo engraving and charcuterie boards. In photo engraving, the ability to achieve subtle tonal variations and fine details hinges on a clean, focused laser beam. Any compromise in this regard, due to dirty optics, will result in blurry images or lost detail. Similarly, when engraving intricate designs on charcuterie boards, crisp, clean lines and uniform depth are essential for a professional finish. Particulates on the workbed could cause uneven engraving, while a dirty laser path could lead to inconsistent burning, ruining the aesthetic appeal of the board. A meticulously clean machine ensures that the laser performs as intended, providing the accuracy and consistency demanded by these detailed applications.
Interested in more Custom Photo? Check out our Custom Photo laser file designs: Click here!
Essential Care for Optical Components and Laser Tube
The focal lens and mirrors are the eyes of your laser engraver, directly governing the precision and intensity of the laser beam that interacts with your material. Their pristine condition is paramount for achieving optimal engraving results. Neglecting these critical optical components is akin to attempting intricate surgery with blurry vision – the outcome will be compromised. For focal lens maintenance, regular cleaning is non-negotiable. Begin by powering down your machine and ensuring it’s completely cool. Carefully remove the lens from its housing, touching only the edges to avoid fingerprints on the optical surfaces. Inspect the lens for any visible debris, dust, or smudges. For cleaning, use only specialized optical-grade lens tissue or cotton swabs and a laboratory-grade isopropyl alcohol (99.9% pure) or a dedicated optical lens cleaning solution. Apply a drop of the cleaning solution to the tissue or swab, never directly to the lens. Gently wipe the lens surface in a circular motion from the center outwards, or with a straight, overlapping stroke, ensuring you use a fresh part of the tissue for each pass. Never rub aggressively, as this can scratch the delicate surface. For mirrors, the process is similar. Gently blow away any loose dust with a bulb blower (not compressed air, which can contain lubricants or propellants) before carefully wiping with the same optical-grade materials. The key is extreme gentleness and avoiding any abrasive contact. Even microscopic scratches or residues on these surfaces will scatter the laser beam, reducing its power density and leading to uneven, weak, or incomplete engravings.
The laser tube itself, while typically sealed and requiring minimal direct internal cleaning, demands careful handling and observation of its surrounding environment. For CO2 laser tubes, maintaining the proper cooling water temperature is fundamentally important for prolonging its lifespan and ensuring consistent power output. Routinely check your chiller or cooling system to ensure it’s functioning within the manufacturer’s specified temperature range, typically between 18-22°C (64-72°F). Too high a temperature can lead to premature degradation and reduced power, while too low can cause condensation, which is highly detrimental. Periodically inspect the water lines for kinks, leaks, or algae growth, which can impede flow. If your system allows for it, a regular flush of the cooling system with distilled water or a manufacturer-approved coolant additive can prevent build-up. Also, ensure the connections to the laser tube are secure and that the tube itself is not subjected to undue physical stress or vibrations. While you won’t be cleaning the inside of the tube, keeping the external glass surface clean of dust and debris is also good practice, again using gentle optical cleaning methods. The health of your laser tube is directly proportional to the consistency and strength of the laser beam, which, in turn, dictates the quality of your engraving.
Compromised optical components have a severe negative impact on engraving accuracy and the quality of designs, especially for items requiring high precision and detail, such as coasters and 3D illusions. When a focal lens is dirty or scratched, the laser beam it projects becomes diffused and unfocused. Instead of a precise pinpoint of energy, you get a wider, weaker beam. This leads to blurry edges, reduced engraving depth, and an inability to reproduce fine details. For engraved coasters, this means fuzzy text or graphics, inconsistent burn marks on wood or cork, and a generally unprofessional appearance. The crispness and clarity that define a quality coaster instantly disappear. Similarly, for creating intricate 3D illusions, which rely on precise power control and microscopic variations in depth to create the perception of three-dimensionality, compromised optics are ruinous. The laser simply cannot achieve the necessary precision. Instead of smooth tonal gradients and distinct depths, the illusion appears muddled, flat, and lacking the intended visual impact. Proper handling of these delicate components – always wearing gloves to avoid transferring skin oils, using only specified cleaning agents, and following gentle, methodical cleaning procedures – is critical. Investing time in their meticulous care saves significant time and material later by ensuring your laser engraver performs at its peak, delivering the exquisite detail and precise output your projects demand.
Maintaining the Cooling System and Other Key Components
The cooling system is the lifeblood of your laser engraver, particularly for machines equipped with CO2 laser tubes. Its meticulous cooling system upkeep is not merely a recommendation; it is an absolute necessity for extending the life of your expensive laser tube and ensuring consistent power output. The laser tube generates significant heat during operation, and if this heat is not efficiently dissipated, the tube’s performance will degrade rapidly, leading to unstable power, reduced output, and ultimately, premature failure. Overheating is the primary killer of laser tubes, resulting in costly replacements and significant downtime. A well-maintained cooling system prevents this catastrophic scenario by consistently maintaining the laser tube within its optimal operating temperature range, typically between 18-22°C (64-72°F). This stability is critical for the gas mixture inside the tube to remain effective and for the laser to fire consistently at its rated power.
Beyond just preventing overheating, consistent cooling directly impacts the quality and uniformity of your engravings. When the laser tube operates at unstable temperatures, its power output fluctuates, leading to inconsistent burning or cutting. This is particularly problematic for delicate raster engravings where subtle power variations can ruin details, or for precise cuts that require uniform power throughout the entire path. Regularly inspect your chiller or cooling pump for proper function, ensuring there are no leaks, strange noises, or blockages in the tubing. The coolant itself—distilled water or a manufacturer-recommended coolant—should be checked regularly for clarity and topped up as needed. Contaminated or algae-ridden coolant can clog the system and reduce cooling efficiency. Most manufacturers recommend flushing and replacing the coolant every few months, depending on usage, to prevent mineral buildup and microbial growth. Understanding and adhering to your specific chiller’s maintenance schedule is vital. It’s a small investment of time that prevents a much larger financial outlay for a new laser tube down the road.
While the cooling system cares for the heart of your machine, other critical components also demand consistent attention to ensure overall machine health and consistent performance. The belts, which drive the movement of the laser head along the X and Y axes, need regular inspection for proper tension and wear. Loose belts can lead to inaccurate, distorted, or ghosted engravings because the laser head won’t follow its programmed path precisely. Conversely, overly tight belts can put undue strain on bearings and motors, leading to premature wear. Check for signs of fraying, cracking, or stretching, and replace them if necessary according to manufacturer guidelines. Lubrication and cleaning of the linear rails are equally important. These rails ensure the smooth, precise movement of the laser head. Dust and debris can accumulate, causing friction and potentially damaging the rail surfaces, leading to jerky movements and reduced accuracy. Refer to your machine’s manual for recommended lubricants (if any – some rails are self-lubricating) and cleaning frequency. Use a lint-free cloth to wipe down the rails, and apply lubricant sparingly if required, avoiding over-lubrication which can attract more contaminants.
Finally, while often overlooked in physical maintenance, keeping your machine’s firmware and software updated is a vital aspect of comprehensive maintenance. Manufacturer updates often include performance enhancements, bug fixes, and compatibility improvements that can directly impact your machine’s efficiency, speed, and accuracy. Consult your manufacturer’s website regularly for the latest versions and follow their instructions for safe installation. Overall machine health, encompassing meticulous care for the cooling system, precise belt tension, clean and lubricated rails, and updated software, directly translates to consistent performance across a variety of materials. When the machine is operating optimally, the laser beam maintains its consistent power and focus, and the movement system ensures perfect accuracy. This means whether you are delicately engraving intricate designs on wood, where precision and consistent depth are paramount, or etching robust patterns into unforgiving slate, where power consistency prevents uneven results, your machine will deliver flawless output every time. This holistic approach to maintenance ensures reliability and peak performance, allowing you to confidently tackle any project.
Troubleshooting Common Issues and Advanced Maintenance Tips
Even with diligent routine maintenance, laser engraving machines can sometimes encounter issues. Understanding common problems and how regular maintenance acts as a preventative measure is crucial for minimizing downtime. One frequent complaint is “weak or poor quality engraving,” where the laser doesn’t cut or engrave with expected depth or clarity. This often stems from dirty optics (lens or mirrors), misaligned laser beam, or an aging/waning laser tube. Regular cleaning of optics and periodic beam alignment checks, as discussed previously, directly prevent these issues. Another common problem is “inaccurate or distorted engraving,” where designs appear stretched, skewed, or not in the correct position. This is typically due to loose or worn belts, dirty/dry linear rails, or issues with stepper motors. Proper belt tensioning, regular cleaning and lubrication of rails, and ensuring all mechanical connections are secure are the primary preventative maintenance steps. “Machine not responding” or “intermittent operation” can sometimes be traced to loose electrical connections, faulty wiring, or software/firmware glitches. While not strictly mechanical maintenance, ensuring cables are tidy and not pinched, and keeping software updated, can mitigate many such electrical issues. For minor issues, basic troubleshooting involves a systematic check: first, verify all power connections and machine settings (power, speed); then, inspect the optics for cleanliness; next, check the mechanical components (belts, rails) for smooth movement; and finally, check the coolant system for proper temperature and flow. Documenting these checks and the results can quickly pinpoint recurring problems.
For issues beyond simple cleaning or obvious visual inspection, or as part of a robust preventative program, advanced maintenance practices come into play. Lubrication schedules, for example, are crucial for the longevity and smooth operation of linear bearings and guide rails. Not all rails require lubrication, and some are factory-lubricated for life, but those that do often benefit from a specific type of high-performance grease or oil applied at regular intervals (e.g., every 500-1000 hours of operation, depending on manufacturer recommendations and environment). Using the wrong lubricant, or too much, can attract debris and cause more harm than good, so always consult your machine’s manual. Component replacement schedules are another advanced practice. While many parts are designed to last, certain consumables or wear-and-tear items have a finite lifespan. These might include laser tubes (which degrade over thousands of hours of use), mirrors, lenses, certain types of bearings, or power supply units. Proactive monitoring of component performance (e.g., tracking laser tube power output over time) and having spare critical parts can significantly reduce emergency downtime. For instance, a slight decrease in power might indicate an aging tube, allowing you to budget for and order a replacement before it fails completely. Regular inspection of wiring harnesses for any signs of wear, fraying, or loose connections within the control cabinets also falls under advanced maintenance, as electrical integrity is paramount for stable operation.
These advanced maintenance practices, while requiring a deeper understanding of your machine’s mechanics and electronics, directly translate to superior etching quality, especially for intricate designs on challenging materials like medals and trophies. Medals and trophies often feature highly detailed text, fine lines, and subtle graphic elements that demand absolute precision and consistent power from the laser. If the linear rails exhibit even minor stick-slip due to inadequate lubrication or accumulated debris, the laser head’s movement will not be perfectly smooth, resulting in visible “ghosting” or jagged lines, particularly evident in intricate serifs or small lettering. When etching sensitive metallic coatings on trophies, consistent laser power, maintained by a well-cooled and properly-aged laser tube, ensures uniform color change or material removal without over-burning or under-etching specific areas. A worn belt, even slightly, can introduce minute tracking errors that become glaringly obvious when trying to engrave perfectly circular company logos or precise geometric patterns on a medal. By adhering to rigorous lubrication schedules, preemptively replacing wear components before catastrophic failure, and meticulously checking all mechanical and electrical systems, you ensure that the machine’s precision and power delivery are uncompromised. This level of care guarantees that every etching, no matter how complex, achieves the sharpest possible detail and consistent quality, preserving the intended beauty and significance of medals and trophies.
Conclusions
By diligently following these maintenance tips, you can significantly extend the lifespan of your laser engraving machine and ensure it continues to produce high-quality results. Consistent care not only prevents costly repairs but also guarantees optimal performance for all your engraving projects.
FAQ
Q: How often should I clean my laser engraver’s optics?
A: The guide emphasizes regular, gentle cleaning of the lens and mirrors, stating that even a tiny speck of dust can diffuse the laser beam. While a specific frequency isn’t prescribed, the context implies very frequent cleaning, possibly before each critical project or daily/weekly depending on usage and the dusty nature of your working environment, to maintain optimal performance.
Q: What are the main consequences of neglecting laser engraver maintenance?
A: Neglecting maintenance leads to several negative consequences including diminished performance, increased downtime, a significantly shorter lifespan for the equipment, unsatisfactory engraving results (e.g., blurry edges, inconsistent depth), wasted material, and ultimately, costly repairs or premature replacement of the machine.
Q: Why is maintaining the cooling system so crucial for CO2 laser tubes?
A: The cooling system is critical because CO2 laser tubes generate significant heat, and overheating is the primary cause of their premature failure. A well-maintained cooling system consistently keeps the laser tube within its optimal operating temperature range (typically 18-22°C), which is vital for prolonging its lifespan, ensuring stable power output, and preventing inconsistent burning or cutting during engraving.

Subscribe to Our Newsletter
And enjoy FREE Download Files, SALE Alerts and Inspiring TIPS
Pricing Your Laser Engraving Work for Profitability
A Comprehensive Guide to Pricing Your Laser Engraving Services
A Comprehensive Guide on How to Price Laser Engraving Services
Charcuterie Board Engraving File – Wine & Grapes 3D Illusion…
$4.00Original price was: $4.00.$3.00Current price is: $3.00.(25% off)
Bee and Honey Jar Charcuterie Board Engraving File | PNG Download #007…
$4.00Original price was: $4.00.$3.20Current price is: $3.20.(20% off)
Valentine Love Captions: 6 Charcuterie Board Engraving Files…
$8.00Original price was: $8.00.$5.60Current price is: $5.60.(30% off)
American Eagle Flag Laser Engraving File for Charcuterie & Cutting…
$4.00Original price was: $4.00.$2.80Current price is: $2.80.(30% off)