

 Français
 Deutsch
 Español
 Italiano
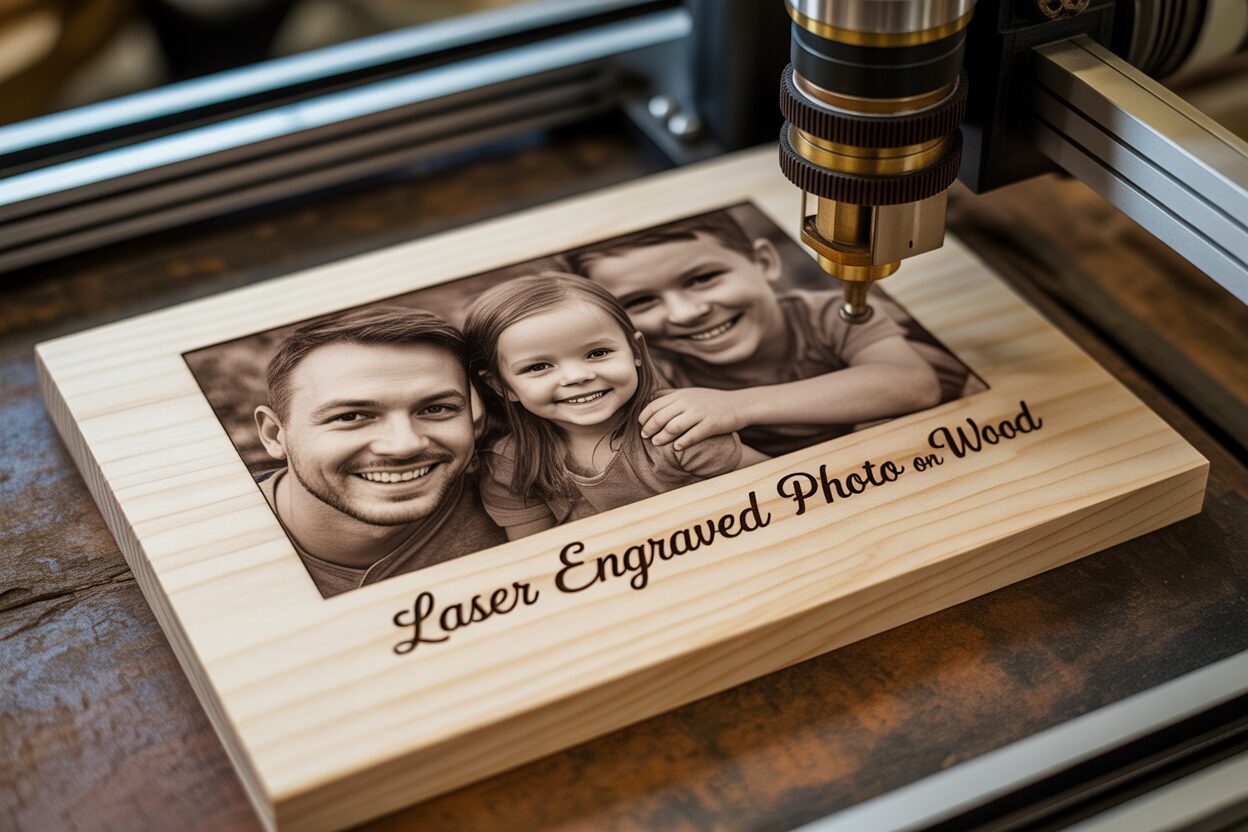
A Detailed Guide to Creating a Laser Engraved Photo on Wood
Oct
Estimated reading time: 10 minutes
Key Takeaways
- Photo Preparation is Paramount: The most critical factor for a great engraving is a high-contrast, sharply focused image that has been converted to grayscale and optimized specifically for the laser.
- Wood Selection Matters: Choose light-colored woods with a minimal, uniform grain like Baltic Birch, Basswood, or Maple for the best contrast and detail. Avoid woods with strong grain patterns like Oak or resinous woods like Pine.
- Calibrate with a Test Grid: Never engrave your final piece without first running a test grid on a scrap piece of the same material. This is the only way to find the perfect balance of power, speed, and resolution for your specific laser and wood.
- Finishing is Not Optional: Proper cleaning to remove soot and applying a protective finish like spray lacquer or shellac is essential to enhance contrast, protect the engraving from damage, and give it a professional, lasting appearance.
Table of Contents
- Choosing and Preparing Your Photo for Engraving
- Selecting the Best Wood for Photo Engraving
- Mastering Your Laser Engraver Settings
- The Engraving Process Step-by-Step
- Finishing and Protecting Your Engraved Wood Photo
- Conclusions
- Frequently Asked Questions
Discover the art of creating a stunning laser engraved photo on wood. This tutorial will walk you through the entire process, from preparing your image file to applying the finishing touches. Whether you’re making a personalized gift or a unique piece of art, we’ll provide the essential tips and techniques for a beautiful and lasting wood photo engraving.
Choosing and Preparing Your Photo for Engraving
The foundation of a breathtaking wood photo engraving is not the laser, nor the wood, but the image you begin with. This is the most critical stage in the entire process of how to laser engrave a photo. No amount of technical skill or advanced machinery can compensate for a poorly chosen or unprepared image. Conversely, taking the time to carefully select and edit your photograph is the first and most impactful step you can take toward creating a high-quality custom photo engraving that will truly capture your memory.
Interested in more Custom Photo? Check out our Custom Photo laser file designs: Click here!
What Makes a Photo Ideal for Engraving?
Not all photographs translate well to wood. The laser works in a monochromatic world, burning the wood to create shades ranging from a light toast to a deep char. To work effectively within this limitation, you must choose a photo with specific characteristics. Look for images with high contrast—a clear distinction between the light and dark areas. A photo with a wide range of mid-tones may look beautiful on a screen, but on wood, those subtle shades will blend together into a muddy, indistinct area. A portrait with a bright, sunlit face against a darker, shadowed background will engrave far more effectively than one taken on an overcast day where everything is a similar shade of gray. Equally important are good lighting and sharp focus. The laser reproduces exactly what it’s given; if your subject is blurry, the engraving will be blurry. Avoid photos with harsh, direct flash or deep shadows cutting across important features, as these will become solid black engraved areas, erasing all underlying detail. Finally, consider the background. A simple, uncluttered, or out-of-focus background ensures that your subject is the star of the piece. A busy background will compete for attention and can make the final engraving look chaotic.
The Step-by-Step Photo Preparation Process
Once you’ve selected a suitable photo, the digital preparation begins. This editing process is designed to optimize the image specifically for the laser’s interpretation, ensuring the best possible translation from pixels to wood grain. Using photo editing software like Photoshop, GIMP, or other free online tools, follow these essential steps:
- Crop and Isolate Your Subject: Before making any other adjustments, crop the photo to focus on the most important elements. This removes unnecessary background noise and improves the overall composition. For photos with particularly distracting backgrounds, consider using selection tools to completely remove the background, leaving only your main subject.
- Convert to Grayscale: Since the laser doesn’t see color, your first editing step is to remove it. Converting the image to grayscale (also known as desaturating) allows you to see the photo purely in terms of its tonal values—light, dark, and the shades in between. This is how the laser will interpret the file.
- Adjust Brightness and Contrast: This is where you truly prepare the image for engraving. You will likely need to increase the contrast significantly more than you would for a standard print. The goal is to push the light areas toward white and the dark areas toward black, creating clear separation. Use the “Levels” or “Curves” tools for precise control. You may need to slightly increase the brightness to ensure the lightest parts of your image are pure white, which will tell the laser not to fire in those areas, preserving the natural color of the wood.
- Apply Sharpening: A subtle application of a sharpening filter, like an “Unsharp Mask,” can help define edges and bring out fine details in hair, eyes, and fabric textures. Be careful not to over-sharpen, as this can create unnatural halos around objects that will be visible in the final engraving.
- Understand Dithering: The final step in the digital process is dithering. This technique converts your grayscale image into a pattern of black and white dots that simulates shades of gray. The density of these dots tells the laser where and how intensely to fire. Most laser control software (like LightBurn) has powerful, built-in dithering algorithms (e.g., Jarvis, Stucki, Floyd-Steinberg). It is generally best to export your high-contrast grayscale image and let the laser software perform the dithering, as this allows you to preview and select the algorithm that looks best for your specific image and wood type.
This meticulous preparation is not an optional tweak; it is the blueprint the laser will follow. Every moment spent selecting the right photo and carefully editing it is a direct investment in the quality of your final wooden keepsake.
Selecting the Best Wood for Photo Engraving
With your digital photo perfectly prepared, the next crucial decision is choosing your canvas. The type of material you select will profoundly impact the final appearance of your project. The color, grain pattern, and density of the wood all interact with the laser beam, influencing everything from the level of detail you can achieve to the overall contrast and warmth of the finished piece. When creating a laser engraved photo on wood, the goal is always clarity and contrast, which means your material choice is just as important as your photo editing. For photographs, the best woods are those with a light, uniform color and a minimal, consistent grain. This provides a clean, blank slate that allows the dark, engraved details of your photo to stand out without competing with the natural patterns of the wood itself.
Ideal Woods for Photo Engraving
While many woods can be engraved, only a select few are truly exceptional for reproducing photographs. These woods share common traits: low sap content for an even burn, a fine grain that doesn’t distract from the image, and a pale color for maximum contrast. Here are some of the best choices:
- Baltic Birch Plywood: Often considered a go-to material, especially for those new to the craft. High-quality Baltic Birch is light in color, has a very subtle grain, and is engineered to be free of knots and voids. It engraves with a consistent, rich brown tone, making it reliable and affordable for achieving a beautiful laser engraved photo on wood.
- Basswood: This is another top contender, particularly for intricate details. It is a very soft, light-colored wood with virtually no visible grain. The laser burns it easily and darkly, resulting in sharp, high-contrast images. Its smooth, uniform surface is ideal for capturing the subtle tones created by the dithering process.
- Maple: For a more premium feel, Maple is an excellent choice. This hardwood is light in color, dense, and has a fine, subtle grain. It produces a beautifully clean, permanent engraving that ranges from a light tan to a deep reddish-brown depending on your laser settings. The hardness of the wood helps to hold very fine details exceptionally well.
- Cherry: If you desire a warmer, richer final product, Cherry wood is a fantastic option. Its natural reddish hue provides a different aesthetic. The contrast will be less stark than on Maple or Basswood, but the result is an elegant, classic look where the image seems to be a natural part of the wood itself. The engraving on Cherry is typically a deep, dark brown.
Materials to Approach with Caution or Avoid
Just as some woods are ideal, others can actively work against you. Avoid woods with strong, prominent grain patterns like Oak or Ash. The dark lines in the grain will intersect with your photo, creating visual clutter and breaking up important details like faces. Softwoods like Pine are problematic due to their high resin and sap content. The laser will cause these resin pockets to burn hotter and darker, resulting in unattractive, blotchy spots that can ruin your engraving. Also, be wary of low-quality plywood from hardware stores, as it often contains voids, knots, and inconsistent glue layers that lead to an uneven and unpredictable result. Finally, while not a wood, it’s worth noting that slate is an excellent alternative material. When engraved, the laser removes the dark top layer to reveal a light gray underneath, creating a stunning, high-contrast photo that is both durable and unique.
Mastering Your Laser Engraver Settings
Having selected the perfect photo and the ideal wood, you are now at the control panel of the entire operation. The photo laser engraving settings you choose will directly translate your digital file into a physical object by telling the laser exactly how fast to move, how intensely to fire, and how to interpret the shades of your image. This is not a “one-size-fits-all” process; the optimal settings are a delicate balance that depends on your specific laser, the wattage of its tube, and the characteristics of the wood you chose in the previous step. Mastering this balance is the key to transforming a good engraving into an exceptional one.
The Core Parameters: Power, Speed, Resolution, and Dithering
Understanding how the primary settings interact is fundamental to learning how to laser engrave a photo. Think of them as four levers you must pull in harmony to achieve your desired result.
- Power: This setting controls the intensity of the laser beam, typically expressed as a percentage of the machine’s maximum output. Higher power results in a darker, deeper burn, while lower power creates a lighter mark. Too much power will obliterate fine details, creating excessive charring and a muddy, dark image. Too little, and the image will be faint and lack contrast.
- Speed: This dictates how quickly the laser head moves across the wood’s surface. Speed and power have an inverse relationship. A slower speed allows the laser beam to dwell on one spot for longer, resulting in a darker burn, similar to increasing power. A faster speed gives the wood less exposure to the beam, creating a lighter burn. Finding the right combination—for example, high speed with high power versus low speed with low power—is crucial for achieving a wide range of tones.
- Resolution (DPI): Measured in Dots Per Inch (or Lines Per Inch), this setting determines the density of the engraved lines. A higher DPI (e.g., 300-600) packs more lines into a smaller space, which is great for capturing fine detail. However, on wood, an excessively high DPI can cause the burn lines to overlap, concentrating too much heat and resulting in a darker, less detailed output. A resolution between 250 and 318 DPI is often a great starting point for wood.
- Dithering Algorithm: Since a laser can only do two things—fire or not fire—dithering is the software process that converts the many shades of gray in your photo into a pattern of black dots. The density of these dots tricks the eye into seeing continuous tones. Different algorithms create different patterns. Jarvis and Stucki are extremely popular for photos because they produce smooth, natural-looking tonal transitions. It’s always worth previewing your image with different dithering algorithms in your software, as one may look significantly better than another for your specific photo.
The Essential Step: Creating a Test Grid
Never engrave your final workpiece without first running a test. Every piece of wood is unique, and even two boards of the same species can engrave differently. The most efficient way to dial in your settings is to create a material test grid on a scrap piece of the exact same wood. Laser software like LightBurn has built-in tools to automate this. The grid creates a matrix of small squares, with each square engraved at a different combination of speed and power. By examining the finished grid, you can instantly identify the setting that produces the widest, smoothest range of tones, from a light tan to a rich dark brown, without heavy charring. This simple, five-minute test removes all guesswork and is the single most effective technique for guaranteeing a high-quality laser engraved photo on wood. For example, a hard wood like Maple will require significantly more power or a slower speed than a soft Basswood to achieve the same dark tone. Your test grid will reveal that perfect balance.
The Engraving Process Step-by-Step
With your digital masterpiece prepared and your machine settings dialed in from the test grid, you are ready for the most exciting part: bringing your image to life on wood. This practical walkthrough covers the hands-on process, transforming all your careful preparation into a tangible, custom photo engraving. Adhering to this structured procedure ensures not only a high-quality result but also a safe operating environment. Each step is essential in the practical application of how to laser engrave a photo.
The journey from a digital file to a finished piece begins at the laser bed. Follow these steps methodically for a smooth and successful engraving:
- Prepare Your Workspace and Material: Before placing your wood, ensure the machine’s honeycomb bed is clean and free of debris from previous jobs. Wipe the surface of your wood piece with a dry cloth to remove any dust, which can interfere with the laser. Place the wood in the desired engraving area. It is absolutely critical that the wood is perfectly flat. A warped or bowed piece will cause the laser to go in and out of focus, resulting in inconsistent and blurry patches. Use honeycomb hold-down pins or small, heavy weights on the corners (outside the engraving area) to secure the material flat against the bed.
- Position Your Design and Set the Focus: In your laser software, import your prepared photo and position it over the work area. Use the “Frame” function to have the laser trace the outer boundary of your image. This allows you to visually confirm that the engraving will be placed exactly where you want it on the wood. Once positioned, you must set the focus. The laser’s focus is the single most important variable for achieving sharp detail. An out-of-focus beam is wider and less powerful, turning crisp dots into fuzzy blobs. Use your machine’s specific focusing tool—whether it’s an auto-focus probe or a manual acrylic gauge—to set the correct distance between the laser nozzle and the top surface of the wood.
- Final Checks and Job Initiation: This is your last chance to review everything before you begin. Double-check that you have loaded the correct settings for power, speed, and resolution that you determined from your test grid. Confirm that your air assist is turned on; this is non-negotiable. Air assist blows a jet of air at the engraving point, extinguishing flames, clearing smoke and debris, and resulting in a much cleaner, less sooty engraving. Also, ensure your fume extraction system is running at full power. Once confirmed, close the laser’s safety lid. Move the laser head to the starting origin point you set in the software (usually the top-left corner of your design) and press start.
- Monitor the Process: Now, you watch the magic happen. The laser will begin moving back and forth, line by line, burning your image into the wood. Your most important job at this stage is to never, under any circumstances, leave the laser unattended while it is running. Wood is a combustible material. While small sparks at the point of contact are normal with proper air assist, you must watch for any sustained flare-ups. Keep a small CO2 fire extinguisher nearby specifically for this purpose. As the job progresses, you will see the full tonal range of your photo emerge. Once the engraving is complete, allow a minute for the exhaust fan to clear any remaining smoke from the enclosure before opening the lid to retrieve your piece.
Finishing and Protecting Your Engraved Wood Photo
The laser has finished its work, and you’ve just removed your piece from the machine. While the image is now permanently etched into the surface, the process is not yet complete. Straight off the laser bed, the wood is raw, covered in a fine layer of soot and resin residue, and vulnerable to moisture, dirt, and fading from UV light. The final finishing steps—cleaning and sealing—are what elevate your project from a simple engraving to a durable, professional-quality keepsake. This stage is crucial for enhancing contrast, protecting your work, and ensuring your laser engraved photo on wood remains beautiful for years to come.
Cleaning the Engraved Surface
Your first task is to meticulously clean the surface without smearing the dark residue into the lighter, unburned areas of the wood. This soot, if not removed properly, can create a muddy, hazy appearance that dulls the contrast you worked so hard to achieve. The key is to be gentle. Start with the mildest method: use a soft-bristled brush, like an old toothbrush, to gently whisk away the loose particles from the engraved crevices. Follow this with a blast of compressed air to remove any remaining dust. For more stubborn resin residue, particularly on woods like cherry, you may need a slightly more aggressive approach. Lightly dampen a clean, lint-free cloth or a microfiber towel with denatured alcohol or 99% isopropyl alcohol. Do not saturate the cloth; it should be just damp enough to lift the residue. Wipe the surface gently, moving with the grain of the wood. The alcohol will evaporate quickly, minimizing the risk of raising the wood grain. Avoid using water, as it can cause the wood fibers to swell and can leave stains.
Applying a Protective and Enhancing Finish
Once your piece is clean and completely dry, it’s time to apply a protective finish. A good finish serves two purposes: it protects the wood photo engraving from humidity, fingerprints, and environmental damage, and it dramatically enhances its appearance. The finish will deepen the color of the wood and darken the engraved areas, making the contrast “pop” and giving the piece a rich, completed look.
There are several excellent options for finishing your project:
- Mineral Oil: An easy-to-apply, non-toxic choice that gives the wood a natural, satin sheen. Simply wipe on a liberal coat, let it soak in for 15-20 minutes, and then buff off all the excess with a clean cloth. It’s great for bringing out the wood’s character but offers minimal long-term protection.
- Shellac: A classic wood finish that dries fast and seals the wood effectively. Using a spray can of clear, dewaxed shellac is an excellent way to seal the wood and prevent the dark engraved areas from bleeding into the grain during subsequent finish applications.
- Spray Lacquer or Polyurethane: For the most durable and professional result, a clear spray finish is the best choice. It provides a hard, protective film that resists moisture and UV damage. Choose a sheen that suits your preference (matte, satin, or gloss). To apply, work in a well-ventilated area. Hold the can about 10-12 inches from the surface and apply in light, sweeping motions. It is far better to apply 2-3 very thin coats than one thick, heavy coat, which can pool in the engraving and obscure details. Allow each coat to dry completely according to the manufacturer’s instructions before applying the next. This final layer is the armor that will protect your memory for a lifetime.
Conclusions
You now have the knowledge to create your own beautiful laser engraved photo on wood. By carefully preparing your image, selecting the right wood, and fine-tuning your laser settings, you can produce professional-quality results. Experiment with different photos and wood types to further develop your skills and create unique, personalized items that will be cherished for years to come.
Frequently Asked Questions
Q: What’s the best type of photo for wood engraving?
A: The ideal photo has high contrast with clear distinctions between light and dark areas, sharp focus, and a simple, uncluttered background. Avoid photos that are blurry, have harsh shadows across key features, or have a busy background that competes with the subject.
Q: What is the best wood for laser engraving a photo?
A: Light-colored woods with a fine, consistent grain are best. Top choices include Baltic Birch plywood, Basswood, Maple, and Cherry. These woods provide a clean canvas that allows the engraved details to stand out with high contrast.
Q: Do I need to use a test grid every time?
A: Yes, it is highly recommended. Even boards of the same wood species can vary in density and moisture content, which affects how they engrave. A quick test grid on a scrap piece of your final material removes all guesswork and is the single best way to guarantee optimal settings for power and speed.
Q: How do I clean my engraved photo without smudging it?
A: Start by gently brushing away loose debris with a soft brush. For stubborn residue, use a lint-free cloth lightly dampened with 99% isopropyl alcohol. Wipe gently with the grain. The alcohol cleans effectively and evaporates quickly, preventing smearing and minimizing the risk of raising the wood grain.

Subscribe to Our Newsletter
And enjoy FREE Download Files, SALE Alerts and Inspiring TIPS
Pricing Your Laser Engraving Work for Profitability
A Comprehensive Guide to Pricing Your Laser Engraving Services
A Comprehensive Guide on How to Price Laser Engraving Services
Charcuterie Board Engraving File – Wine & Grapes 3D Illusion…
$4.00Original price was: $4.00.$3.00Current price is: $3.00.(25% off)
Bee and Honey Jar Charcuterie Board Engraving File | PNG Download #007…
$4.00Original price was: $4.00.$3.20Current price is: $3.20.(20% off)
Valentine Love Captions: 6 Charcuterie Board Engraving Files…
$8.00Original price was: $8.00.$5.60Current price is: $5.60.(30% off)
American Eagle Flag Laser Engraving File for Charcuterie & Cutting…
$4.00Original price was: $4.00.$2.80Current price is: $2.80.(30% off)