

 Français
 Deutsch
 Español
 Italiano
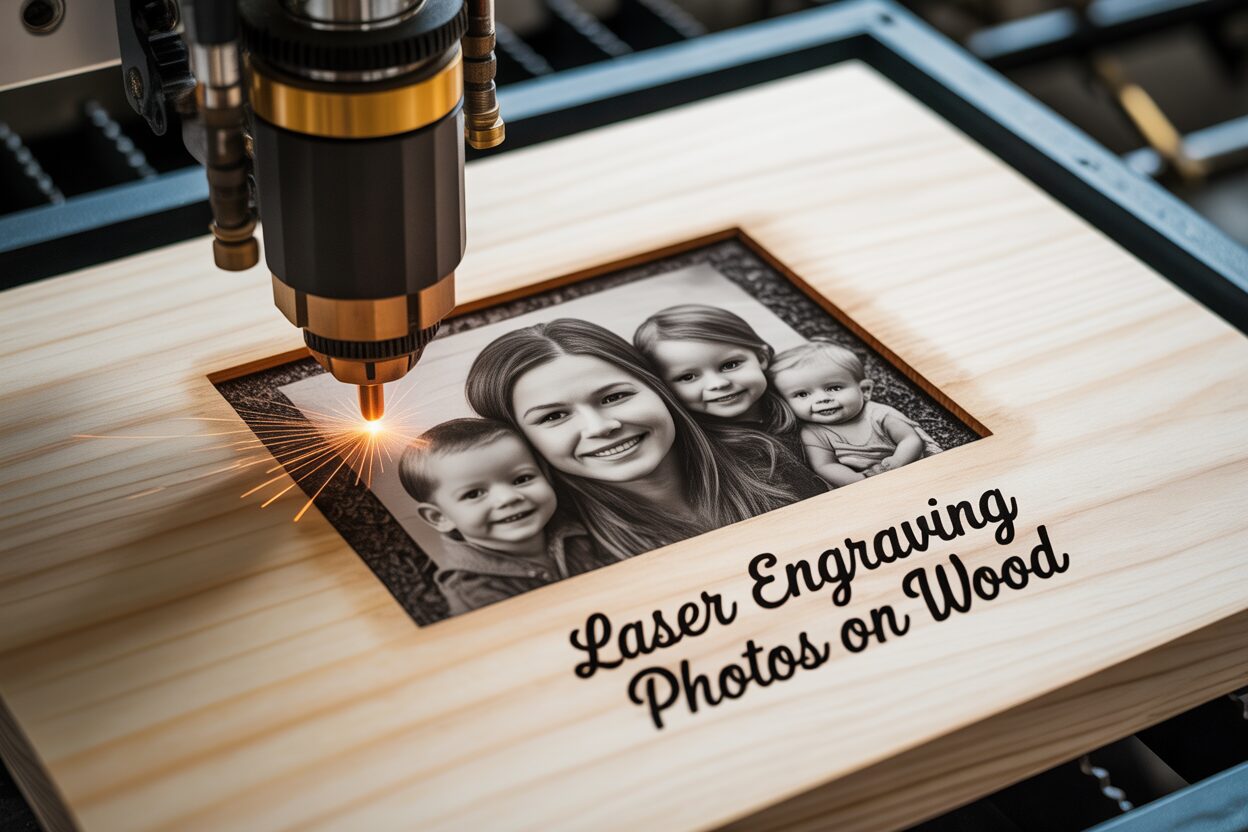
A Complete Guide to Laser Engraving Photos on Wood
Nov
Estimated reading time: 8 minutes
Key Takeaways
- Wood Selection is Crucial: The best results come from light-colored woods with a minimal, uniform grain and low resin content. Maple, Baltic Birch, and Basswood are top choices.
- Image Preparation is Mandatory: A beautiful engraving starts with a well-edited photo. You must convert your image to grayscale, adjust brightness and contrast significantly, and properly size it to match your wood blank.
- Test Grids Remove Guesswork: There are no universal “perfect” settings. The most effective way to dial in the ideal power, speed, and DPI for your specific wood and laser is to run a material test grid on a scrap piece first.
Table of Contents
- Selecting the Best Wood for Photo Engraving
- Preparing Your Photograph for Engraving
- Mastering Laser Settings for Perfect Results
- Conclusions
- Frequently Asked Questions
Laser engraving photos on wood is a beautiful way to create personalized gifts and decor. This guide offers a comprehensive walkthrough of the entire process, ensuring your projects are successful. We will cover everything from selecting the ideal wood and preparing your image file to dialing in the perfect laser settings for a high-quality, detailed finish.
Selecting the Best Wood for Photo Engraving
The foundation of a breathtaking laser-engraved photo is the wood itself. Think of the wood as your canvas; its color, grain, and composition will directly influence the clarity, contrast, and overall quality of the final piece. Choosing the wrong wood can turn a high-resolution photograph into a blurry, indistinct mess, while the right wood will make it pop with lifelike detail. The laser works by burning the surface of the wood, creating darker tones. Therefore, the properties of your chosen material—how it reacts to heat, its natural pattern, and its color—are as critical as your laser settings. To achieve stunning, high-fidelity results, you must select wood with a specific set of characteristics.
Key Characteristics of Photo-Friendly Wood
The ideal wood for photo engraving has three primary qualities: a light, uniform color, a minimal and consistent grain pattern, and a uniform density with low resin content. A light-colored surface, like pale maple or basswood, provides the perfect high-contrast backdrop. The laser creates shades ranging from light brown to near-black, and the lighter the original wood, the more dramatic and visible this tonal range becomes. A dark or reddish wood can work, but it reduces the overall dynamic range, potentially muting the finer details in the shadows. Secondly, a heavy, pronounced grain, like that found in oak or ash, will compete with your image. The laser burns the softer parts of the grain deeper and darker than the harder parts, creating a striped effect that disrupts the photograph’s details. A wood with a very fine, straight, or barely noticeable grain allows the engraved photo to be the center of attention. Finally, consistent density is crucial. Woods with high resin content, like pine, can cause flare-ups and produce dark, splotchy areas, ruining the delicate shading of a photograph. A smooth, dense, and resin-free surface ensures the laser can burn evenly across the entire image, producing predictable and clean results.
Recommended Woods for Photo Engraving
Based on the ideal characteristics, here are some of the best woods for bringing your photos to life:
-
Baltic Birch Plywood: Often considered a go-to for laser enthusiasts, Baltic Birch is prized for its bright, creamy color and exceptionally fine, consistent surface. Its multi-ply construction ensures it is stable and free of the voids and knots found in lower-grade plywood.
Pros: Excellent contrast, very affordable, readily available, and its uniform surface is perfect for capturing fine details. It is very forgiving for beginners.
Cons: As a plywood, it contains glue layers that can sometimes be exposed with very deep engravings, and the edges will show the layered construction.
-
Basswood: This is a very soft and light-colored hardwood with an almost invisible grain. It’s incredibly easy for the laser to work with, requiring less power to produce a dark, clean mark.
Pros: Superb for detailed work and smooth gradients. Its light color provides maximum contrast. It engraves quickly and cleanly.
Cons: Its softness makes it susceptible to dings and scratches, so it may require a protective finish. It doesn’t have the premium weight or feel of other hardwoods.
-
Cherry: Known for its beautiful, warm reddish-brown hue and smooth, fine grain, Cherry offers a rich, high-end finish. The wood darkens beautifully with age, enhancing the timeless quality of the engraved photo.
Pros: Creates a very deep, dark engraving that contrasts wonderfully with the wood’s natural warmth. The final product looks incredibly professional and valuable.
Cons: It’s a more expensive option. The inherent color of the wood means the contrast, while beautiful, is less stark than on Basswood or Maple.
-
Maple: A hard, dense wood with a light, creamy color and a very subtle grain. Maple is a premium choice that yields exceptionally sharp, crisp, and durable engravings.
Pros: Produces some of the highest-detail engravings possible. The hardness prevents bleeding or charring, resulting in clean lines and smooth tones. The light color provides excellent contrast.
Cons: Its density requires higher laser power or slower engraving speeds. It is one of the more expensive wood options available.
Woods to Avoid for Photo Engraving
Just as important as knowing what works is knowing what to avoid. Steer clear of woods with heavy, open grains like Red Oak or Ash. The drastic difference in density between their earlywood and latewood rings will result in a heavily striped engraving that completely overpowers your photo. Also, avoid woods with high resin or sap content, most notably Pine. The pockets of resin will cause the laser to produce dark, blotchy flare-ups, destroying any hope of achieving subtle grayscale shading. In general, avoid any piece of wood with knots, imperfections, or a highly figured grain, as these inconsistencies will disrupt the visual flow of your photograph and lead to an unpredictable and disappointing result.
Preparing Your Photograph for Engraving
A beautiful photograph rarely translates directly into a beautiful wood engraving. The laser doesn’t see colors or subtle nuances the way our eyes do; it only understands power, speed, and spacing. Therefore, preparing photos for laser engraving is a critical editing process that converts your rich, colorful image into a format the laser can interpret to burn a detailed, high-contrast result. By following a few key steps using software like Adobe Photoshop or the free alternative GIMP, you can dramatically improve the quality of your final piece and ensure your memory is captured with stunning clarity.
The digital preparation process is where you take control of the final look of your custom photo engraving wood project. Each step is designed to optimize the image data for the unique medium of wood, translating pixel brightness into laser power.
Interested in more Custom Photo? Check out our Custom Photo laser file designs: Click here!
-
1. Image Selection: Start with a Strong Foundation
Not all photos are created equal for engraving. The best candidates have strong contrast between the subject and the background, well-defined subjects, and are generally well-lit. A portrait with a clean, out-of-focus background will engrave far better than a busy photo of a person in a cluttered room. Look for images with a clear separation between light and shadow. Photos that are overly dark, hazy, or have very low contrast will result in a muddy, indistinct engraving with lost details.
-
2. Cropping and Resizing: Focus on What Matters
Before any other adjustments, frame your image properly. Crop out any distracting background elements to make your subject the undeniable focal point. Once you are happy with the composition, resize the image to the exact dimensions of your wooden blank. For instance, if you are engraving on a 5×7 inch piece of wood, set your image dimensions to 5×7 inches. It is also crucial to set the resolution, or DPI (Dots Per Inch). A setting of 300 DPI is a good standard, as it provides enough detail for the laser to produce a high-quality result without creating an unnecessarily large file.
-
3. Converting to Grayscale: See What the Laser Sees
Your laser engraver does not see color, only shades of gray. Converting your image to grayscale (black and white) is a crucial early step because it reveals the image’s true luminance values. Two different colors, like a bright red and a bright green, might appear identical to the laser if they have the same brightness. This conversion allows you to accurately preview how the tonal range will look and identify areas that may need adjustment before you even send the file to the laser.
-
4. Adjusting Brightness and Contrast: Sculpting with Light and Shadow
This is the most important artistic step. Wood has a much lower dynamic range than a computer screen. Therefore, you often need to exaggerate the contrast in your photo. Use the “Levels” or “Curves” adjustment tools in your software to make the bright areas brighter and the dark areas darker. Your goal is to have some areas of pure white (which the laser will not burn, leaving the natural wood color) and some areas of deep black (which the laser will burn darkest). Avoid having too many mid-tones, as this can lead to a flat-looking engraving. Don’t be afraid to slightly “over-expose” the highlights and deepen the shadows more than you would for a normal print.
-
5. Dithering: Translating Grays into Dots
A laser engraver can’t truly engrave in shades of gray; it essentially fires its beam in an on-or-off pattern. Dithering is the process that converts your grayscale image into a black-and-white pattern of dots that creates the illusion of tones. Different dithering algorithms, like Jarvis, Floyd-Steinberg, or Stucki, arrange these dots in different patterns to simulate shading. For photos, the Jarvis algorithm is often preferred as it produces a smooth, natural-looking result. This step is typically handled by your laser software (like LightBurn or RDWorks) and is the final translation that turns your edited grayscale photo into a precise set of instructions for the laser to follow.
Mastering Laser Settings for Perfect Results
Once your digital photograph is perfectly edited, the next step is to translate that image onto the wood’s surface. This is where you learn how to laser engrave photos by mastering your machine’s settings. It’s crucial to understand that there is no universal ‘perfect’ setting. The ideal combination depends entirely on the type of wood you’ve chosen, the wattage of your laser, and the specific look you want to achieve. Mastering this stage is less about finding a magic formula online and more about understanding the interplay between the three core variables: power, speed, and DPI. Getting these right is the key to transforming a digital file into a physical work of art.
The Core Trio: Power, Speed, and DPI
The quality of your laser engraving photos on wood hinges on the delicate balance of three primary settings. Think of them as the three legs of a stool—if one is off, the entire result can be compromised.
- Power: This setting controls the output intensity of the laser beam, measured as a percentage of your laser’s maximum wattage. Higher power results in a deeper, darker burn. For photo engraving, you need a range of power to create different shades. If the power is set too high, you will lose the delicate details in the darker areas of your photo, turning them into a charred, flat black. If the power is too low, your image will appear faint and washed out, lacking the contrast needed to make the subject stand out. The goal is to find a maximum power setting that produces a rich, dark brown, not a deep, ashy black.
- Speed: This determines how fast the laser head moves across the wood’s surface. Speed works in direct opposition to power; the slower the laser moves, the longer the beam is focused on any single point, resulting in a darker mark. Conversely, a faster speed gives the wood less exposure time, creating a lighter mark. The interplay between speed and power is fundamental. A low power setting at a very slow speed can produce the same darkness as a high power setting at a very fast speed. For photos, you typically want to find a moderately fast speed that allows for a good tonal range without causing excessive burning or “bleeding” of heat into the surrounding wood.
- DPI (Dots Per Inch): This setting, sometimes referred to as scan gap or interval, determines the resolution of your engraving. It controls how many lines, or dots, the laser will engrave per inch. A higher DPI (e.g., 300-600) places the engraved lines very close together, creating a high-resolution image with smooth tones and fine detail. However, this also means the laser passes over the wood more times, which increases the engraving time and can lead to a darker, sometimes over-burned result. A lower DPI (e.g., 150-250) will engrave faster and can be better for softer woods, but you may start to see the individual lines in the finished piece. Finding the right DPI is a trade-off between detail and time, and often a setting around 250-350 is a great starting point.
The Essential Step: Running a Material Test Grid
Before you ever risk engraving your final, prepared workpiece, you must run a test. The single most effective way to determine the ideal laser engraving settings for photos is by creating a material test grid on a scrap piece of the exact same wood. Most laser software has a built-in function to generate these grids, which are matrices of squares, each engraved with a unique combination of speed and power. For example, you can create a grid that tests power from 10% to 50% in 5% increments, against speeds from 100mm/s to 300mm/s in 20mm/s increments. Once the grid is engraved, you can visually inspect it to find the sweet spot. You’re looking for the square that shows the best range of shades—a light tan for the lowest power, and a deep, rich brown (not a pitted char) for the highest power. This single test removes all guesswork and provides you with the precise data needed to produce a stunning, detailed photo engraving every time.
Conclusions
You now have the knowledge to create stunning, personalized photo engravings on wood. By carefully selecting your materials, preparing your images, and fine-tuning your laser settings, you can produce professional-quality results. Experiment with different woods and photos to develop your unique style, and turn cherished memories into lasting art pieces that can be treasured for years to come.
Frequently Asked Questions
Q: What is the single best wood for a beginner to use for photo engraving?
A: Baltic Birch Plywood is an excellent choice for beginners. It’s affordable, has a light, uniform surface for great contrast, and is very forgiving, making it easier to achieve good results while you are still learning the process.
Q: Do I have to edit my photo before engraving it?
A: Yes, photo preparation is a critical step that should never be skipped. You must convert the image to grayscale, significantly adjust its brightness and contrast to suit the limited dynamic range of wood, and ensure it’s properly sized and dithered for the laser to interpret correctly. A raw, unedited photo will almost always produce a poor-quality engraving.
Q: How do I find the perfect laser settings for my wood?
A: The most reliable method is to run a material test grid on a scrap piece of the exact same wood you plan to use for your project. This creates a matrix of squares with different power and speed combinations, allowing you to visually identify the “sweet spot” that provides the best tonal range without any guesswork.

Subscribe to Our Newsletter
And enjoy FREE Download Files, SALE Alerts and Inspiring TIPS
A Comprehensive Guide on How to Price Laser Engraving Services
How to Price Your Laser Engraving and Cutting Services
The Ultimate Guide to Crafting a Laser Cut Box
Charcuterie Board Engraving File – Wine & Grapes 3D Illusion…
$4.00Original price was: $4.00.$3.00Current price is: $3.00.(25% off)
Bee and Honey Jar Charcuterie Board Engraving File | PNG Download #007…
$4.00Original price was: $4.00.$3.20Current price is: $3.20.(20% off)
Valentine Love Captions: 6 Charcuterie Board Engraving Files…
$8.00Original price was: $8.00.$5.60Current price is: $5.60.(30% off)
American Eagle Flag Laser Engraving File for Charcuterie & Cutting…
$4.00Original price was: $4.00.$2.80Current price is: $2.80.(30% off)