

 Français
 Deutsch
 Español
 Italiano
Unlocking the Potential of Laser Engraving
Jul
Estimated reading time: 14 minutes
Key Takeaways
- Understanding laser engraving involves mastering power, speed, and frequency settings, critical for different materials and desired effects.
- Raster and vector engraving are distinct techniques, with raster ideal for images and gradients, and vector for precise lines and cuts.
- Optimal engraving quality depends on material-specific calibration, precise focus, adequate air assist, and thorough material preparation.
- A wide array of materials like wood, acrylic, leather, glass, and metal can be laser engraved, each requiring specific techniques and offering unique applications.
- Operating laser engravers requires strict adherence to safety protocols (eye protection, ventilation, fire prevention) and consistent machine maintenance for longevity and performance.
Table of Contents
- Understanding Laser Engraving Techniques
- Exploring Laser Engraving Materials and Their Applications
- Essential Considerations for Your Laser Engraving Machine
- Inspiring Laser Engraving Projects and Creative Ideas
- Maintaining Safety and Quality in Laser Engraving
- Conclusions
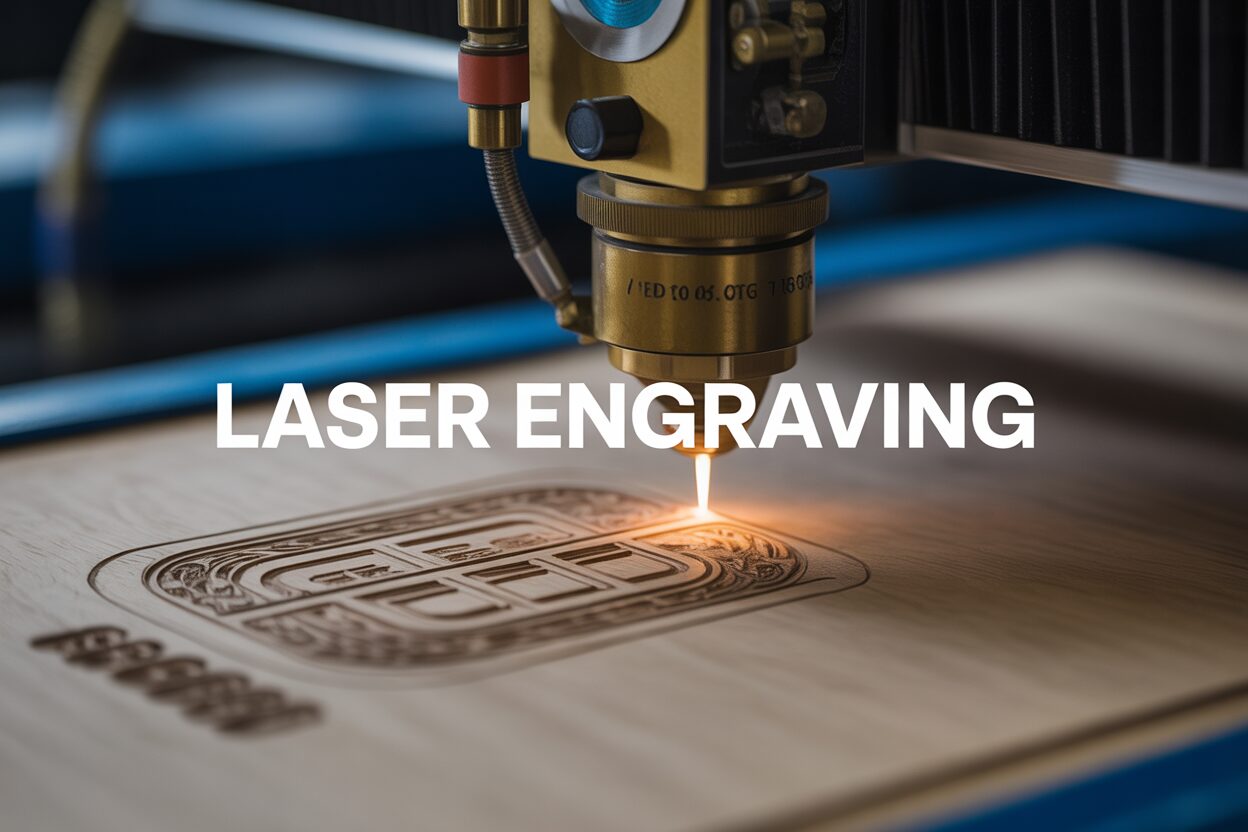
Laser engraving has revolutionized the way we personalize and create. This guide explores the fascinating world of laser engraving, covering essential techniques, compatible materials, and inspiring project ideas. Discover how this versatile technology can transform ordinary items into extraordinary works of art and unlock new creative possibilities.
Understanding Laser Engraving Techniques
Laser engraving fundamentally relies on the precise interaction of a concentrated laser beam with a material’s surface. The nuances of this interaction are governed by a critical set of parameters, often referred to as the “laser engraving settings.” These settings – power, speed, and frequency – are not independent variables; rather, they form a dynamic trifecta that dictates the depth, clarity, and overall aesthetic of the engraving. Understanding their interplay is paramount to achieving desired effects on diverse materials.
Power, measured in watts, directly correlates with the intensity of the laser beam. Higher power settings result in more material ablation, leading to deeper and darker engravings. This is particularly crucial for hard materials like metal or stone, where significant energy is required to alter the surface. Conversely, too much power on delicate materials like paper or thin plastics can cause burning, melting, or even cutting through the material completely. Finding the optimal power setting involves balancing the need for sufficient material removal with the risk of damaging the substrate.
Speed, on the other hand, dictates how quickly the laser head moves across the material. A slower speed allows the laser beam to dwell longer on a specific point, leading to deeper engraving and increased material removal for a given power setting. Conversely, a faster speed results in shallower engravings and greater efficiency, making it ideal for surface marking or light etching. The interplay between power and speed is particularly important: for instance, a high power setting combined with a slow speed will result in very deep engravings, while the same high power with a very fast speed might only produce a surface mark. The optimal speed is often a function of the desired depth and the material’s heat sensitivity.
Frequency, sometimes referred to as pulse-per-inch (PPI) or dots-per-inch (DPI) in some software, determines how many laser pulses are emitted in a given area. A higher frequency creates more overlap between successive laser pulses, leading to a denser and more consistent engraving. This is crucial for achieving smooth transitions and solid filled areas in raster engravings. For certain materials, especially those prone to charring or melting, adjusting the frequency can significantly impact the quality of the edge definition and the overall cleanliness of the engraved lines. A lower frequency can result in a “dotted” appearance, which can be desirable for certain artistic effects or for materials that require less heat input to prevent damage.
Raster vs. Vector Engraving: Understanding the Core Techniques
Laser engraving techniques fundamentally diverge into two primary methodologies: raster engraving and vector engraving. While both utilize the same laser technology, their operational principles and resulting aesthetic outcomes are distinct, making each suited for different applications in intricate design creation.
Raster engraving operates much like an inkjet printer. The laser head moves back and forth across the material, engraving line by line, much like how a printer lays down ink. The image or design is broken down into a series of pixels, and the laser fires or adjusts its power based on the intensity of each pixel. Darker areas in the image correspond to the laser firing with more power or frequency, creating deeper or more pronounced marks, while lighter areas receive less interaction, or no interaction at all. This technique is ideal for engraving photographs, highly detailed images with gradients, intricate patterns, or designs that require filling large areas. The process is inherently slower than vector engraving due to the repetitive back-and-forth movement across the entire engraving area. The quality of raster engraving is heavily influenced by the resolution (DPI) of the source image and the frequency settings of the laser. Higher DPI settings in the source image, combined with appropriate frequency settings on the laser, yield smoother gradients and more realistic photographic reproductions. For materials like wood, different power and speed settings during raster engraving can achieve varying shades of brown, essentially creating a grayscale image by controlling the amount of charring. On anodized aluminum, raster engraving selectively removes the anodic layer, revealing a brighter, underlying metal and creating a stark contrast.
Vector engraving, conversely, traces the outline of a design, similar to how a pen plotter draws a line. The laser follows paths defined by lines and curves in the design file, essentially “cutting” into the surface rather than ablating a wide area. This method is exceptionally fast and precise, making it perfect for creating clean, crisp lines, intricate geometric patterns, text outlines, or cutting thin materials. Because the laser precisely follows the vector paths, the resulting edges are typically very sharp and defined. While primarily used for outlining, vector engraving can also be used to fill very thin areas by creating a series of closely spaced parallel lines. The depth of a vector engraving is controlled by the power and speed settings, allowing for anything from a shallow surface scratch to a deep groove. When engraving materials like acrylic or even thin metals, vector engraving produces clean, sharp lines that emphasize precision. For signage or detailed architectural models, vector engraving offers unparalleled clarity for text and intricate shapes. The efficiency of vector engraving often makes it the preferred method for high-volume production of items with defined outlines.
Optimizing Engraving Quality: Maximizing Detail and Consistency
Achieving consistently high-quality laser engravings is an iterative process that involves experimentation, keen observation, and a methodical approach to parameter adjustment. Beyond the fundamental understanding of power, speed, and frequency, several advanced strategies can be employed to drastically improve the detail, consistency, and visual appeal of your engraved pieces.
One critical aspect is the material-specific calibration. No two materials engrave identically; a setting that works perfectly on wood will likely char plastic, and a setting for soft leather will barely make a mark on glass. It is highly recommended to create a “material setting matrix” for each new material you work with. This involves engraving small test patterns (squares, lines, text) at varying combinations of power, speed, and frequency, and then carefully evaluating the results. Documenting these settings for future reference will save significant time and material in the long run. For example, when working with anodized aluminum, a higher power and moderate speed might be ideal for a bright, clean mark, whereas for glass, very low power and high speed, often combined with a wet paper towel on the surface, can produce a frosted effect without cracking. Understanding the thermal properties of each material—its melting point, vaporization point, and tendency to char—is key to predicting how it will react to the laser’s energy.
Focus is another often-underestimated parameter. The laser beam, at its point of best focus, is incredibly fine and concentrated, leading to the smallest possible spot size and thus the highest power density. An out-of-focus beam will spread its energy over a larger area, resulting in a wider, shallower, and less defined engraving. Always ensure your material is at the precise focal distance from the laser lens. Some machines have auto-focus capabilities, while others require manual adjustment using a provided jig or by precisely measuring the distance. Even a slight deviation from optimal focus can significantly degrade the sharpness of fine details, especially in raster engravings of photographs or intricate text.
Air assist is a vital component for many engraving applications, especially on materials prone to charring or producing significant debris. An air assist nozzle directs a stream of compressed air directly at the engraving point. This serves multiple purposes: it helps to extinguish flames (especially on wood or acrylic), blows away smoke and debris from the engraving area (preventing them from settling back onto the material or obscuring the laser beam), and cools the material, reducing heat-affected zones and preventing melting or warping. On materials like acrylic, proper air assist prevents “flares” and produces a cleaner, clearer engraved line. For wood, it reduces charring and discoloration, resulting in a lighter, more natural engraving.
Finally, material preparation plays a subtle but significant role. Ensuring the material surface is clean, free of dust, oils, or residues is crucial. Any contaminants can absorb laser energy differently, leading to inconsistent or flawed engravings. For some materials, like certain plastics or coated metals, a protective film might need to be removed before engraving, or conversely, deliberately left on to protect areas that are not being engraved. Understanding the interaction of the laser with specific coatings or finishes on a material is as important as understanding its interaction with the base substrate. By diligently attending to these details—precise settings, optimal focus, effective air assist, and meticulous material preparation—you can unlock the full potential of your laser engraver and consistently produce high-quality, professional-grade results.
Exploring Laser Engraving Materials and Their Applications
The true versatility of laser engraving machines is revealed not just in their technical capabilities, but in the astounding array of materials they can transform. Each material offers a unique canvas, responding differently to the laser’s energy, and thus requiring specific techniques and yielding distinct aesthetic results. Understanding these material properties is paramount to successful engraving, enabling creators to select the ideal medium for their vision. The importance of material selection cannot be overstated, as it directly impacts the achievable detail, contrast, durability, and overall suitability of a project. Choosing the wrong material can lead to poor quality, material damage, or even hazardous fumes.
Wood stands as one of the most popular and forgiving laser engraving materials, beloved for its natural aesthetic and pleasant burnt aroma during the process. Its organic composition allows for varying levels of depth and charring, producing beautiful shades from light brown to deep black depending on the wood type and laser settings. Hardwoods like oak, maple, and cherry tend to produce crisper, less fuzzy engravings than softer woods like pine or balsa, which can be prone to more charring and less definition. The grain of the wood itself can add an artistic element, influencing how the engraving appears. For wood, raster engraving is predominantly used for images, photographs, and detailed graphics, utilizing varied power settings to create grayscale effects through charring. Vector engraving is excellent for crisp outlines, text, or cutting out shapes. When engraving wood, adequate ventilation and air assist are crucial to prevent excessive charring and remove smoke. Proper power and speed settings are essential to avoid scorching or burning through the material.
Creative Projects for Wood:
- Personalized cutting boards with etched recipes or family names.
- Wooden signs for homes, businesses, or events, featuring intricate designs.
- Custom photo engravings on wood planks for unique gifts or decor.
- Intricate ornamental elements for furniture or decorative boxes.
- Personalized wooden coasters with unique motifs.
Acrylic, a versatile plastic available in various colors and transparencies, offers distinctly different engraving results depending on its type. Cast acrylic typically engraves with a beautiful, frosted white finish, providing excellent contrast, especially on clear or colored sheets. Extruded acrylic, on the other hand, tends to engrave clear, more like a melt or slight indentation, and often discolors at the edges if not precisely tuned. For clear acrylic, the frosted effect of raster engraving is highly prized, creating a three-dimensional appearance when viewed from certain angles. Vector engraving is frequently used on acrylic for cutting intricate shapes with smooth, polished edges (especially on cast acrylic, which polishes beautifully with the laser’s heat, unlike extruded which can leave a rougher edge). Air assist is vital to prevent flaming and to ensure a clean, clear engraving without excessive melting or “hazing.” Lower power and higher speed settings are often preferred to achieve a clean mark without causing excessive melting or deformation.
Creative Projects for Acrylic:
- Custom LED edge-lit signs, where engraved lines illuminate from the base.
- Architectural models and intricate display pieces.
- Personalized jewelry or keychains with intricate designs.
- Acrylic awards and trophies with frosted text and logos.
- Bespoke decorative panels for interior design.
Leather, with its rich texture and natural variations, provides a unique canvas for laser engraving. The laser darkens the engraved areas, creating a debossed or branded effect that varies in intensity based on the leather type and settings. Genuine leather typically engraves with a clear, dark contrast, while faux leather or synthetic leather can produce different results, sometimes melting or leaving a less defined mark, and may also emit unpleasant fumes. Higher power and lower speed with precise focus are often used to achieve deep, rich engravings on genuine leather, creating a permanent, tactile impression. Good ventilation is essential due to the pungent smell and potential fumes released during the process.
Creative Projects for Leather:
- Custom leather wallets, belts, or watch straps with personalized monograms or patterns.
- Engraved journal covers or planner inserts.
- Leather patches for clothing or bags, featuring intricate logos.
- Personalized leather key fobs and baggage tags.
- Artistic engravings on leather sheets for wall decor.
Glass offers a challenging yet rewarding medium for laser engraving, producing a beautiful frosted or etched appearance. Unlike other materials where the laser removes material, on glass, the laser causes micro-fractures on the surface, resulting in a frosted effect. This requires very precise settings to avoid cracking the glass entirely. Lower power settings combined with higher speeds and a slightly out-of-focus beam are often recommended to create a smoother, more even etch. Using a thin layer of wet paper towel over the glass can also help dissipate heat and reduce cracking, leading to a more consistent etch. Raster engraving is the primary technique for glass, ideal for logos, text, and intricate designs.
Creative Projects for Glass:
- Personalized wine glasses, beer mugs, or decanters for special occasions.
- Engraved mirrors for custom decor or signage.
- Custom glass awards and corporate gifts.
- Architectural glass panels with frosted designs.
- Decorative glass bottles or jars.
Metal engraving, while often requiring more powerful lasers (fiber lasers being superior for direct metal marking), can also be achieved on coated metals with CO2 lasers. Pure, uncoated metals like stainless steel, brass, or aluminum typically do not absorb the infrared wavelength of a CO2 laser sufficiently for direct engraving or deep etching.
However, anodized aluminum is an excellent candidate for CO2 laser engraving, where the laser removes the colored anodized layer to reveal the shiny, underlying aluminum. This creates a high-contrast mark perfect for serial numbers, logos, and intricate designs.
For uncoated metals, a laser marking spray or paste (e.g., Cermark, Thermark) can be applied to the surface. The laser then bonds this substance to the metal, creating a permanent, high-contrast black mark. This technique allows CO2 lasers to mark a wide range of metals, including stainless steel, titanium, brass, and copper, making it highly versatile for industrial and artistic applications.
Raster engraving is used for detailed images and markings, while vector engraving is suitable for outlines or thin lines. Precision in focus and high power are often required when using marking compounds.
Creative Projects for Metal:
- Custom identification tags, barcodes, or serial numbers on industrial parts (using marking spray).
- Personalized dog tags or jewelry (on anodized aluminum or with marking spray).
- Engraved metal business cards with unique textures and designs.
- Customized tools or equipment with permanently marked logos.
- Decorative metal art panels or plaques (on anodized aluminum or with marking spray).
Essential Considerations for Your Laser Engraving Machine
Operating a laser engraving machine effectively and safely requires a thorough understanding of its core components, diligent maintenance practices, proactive troubleshooting skills, and an unwavering commitment to safety protocols. This chapter will delve into these critical aspects, empowering users to maximize their machine’s potential while ensuring a secure working environment.
Key Components of a Laser Machine
At the heart of every laser engraver lies its laser source, which dictates its capabilities and the types of materials it can process. The most common type for engraving is the CO2 laser, primarily used for organic materials like wood, acrylic, leather, glass, and some coated metals. CO2 lasers typically operate in the infrared spectrum, invisible to the human eye, and range in power from 30W to 150W or more for typical desktop and production machines. Higher wattage generally translates to faster engraving speeds and the ability to cut thicker materials. Another significant type is the Fiber Laser, which generates a laser beam through optical fibers doped with rare-earth elements. Fiber lasers produce a much smaller focal spot and a different wavelength, making them exceptionally effective for direct marking and engraving on a wider range of metals, plastics, and ceramics. They are generally more expensive but offer unparalleled precision and speed for specific applications, often resulting in permanent, high-contrast marks on metals without the need for marking compounds.
Beyond the laser source, the beam’s journey through the machine is facilitated by a series of precisely aligned optics, primarily mirrors and lenses. Mirrors guide the laser beam from the source to the engraving head. Keeping these mirrors meticulously clean is crucial, as any dust or residue can absorb laser energy, reducing beam power and potentially causing damage. The focusing lens, located in the engraving head, is arguably the most critical optical component. Its purpose is to concentrate the laser beam to an extremely fine point, creating the high power density required for engraving and cutting. Lenses come in various focal lengths (e.g., 1.5″, 2.0″, 4.0″), each offering different characteristics. A shorter focal length lens provides a finer beam spot, ideal for intricate details and thin materials, while a longer focal length lens offers a larger beam spot with a longer depth of field, beneficial for engraving on uneven surfaces or cutting thicker materials. Proper lens selection and maintenance (regular cleaning with lens-specific solutions and wipes) are paramount for achieving sharp, consistent results.
The ventilation system is an often-overlooked yet critical component directly impacting both engraving quality and operator safety. As the laser interacts with materials, it produces smoke, fumes, and particulate matter, many of which can be hazardous to inhale and corrosive to the machine’s internal components. A robust ventilation system typically consists of an exhaust fan (or blower) and ducting that extracts these byproducts from the engraving area and vents them outdoors or through a specialized filtration unit. Proper sizing of the exhaust fan relative to the machine’s enclosure volume and the type of materials being processed is essential. For materials like certain plastics or treated woods, a dedicated air filtration system with activated carbon filters and HEPA filters may be necessary to remove harmful VOCs and microscopic particulates that cannot be safely vented outdoors, ensuring clean air recirculation in the workspace.
Maintenance Tips and Troubleshooting Common Issues
Regular maintenance is not just about extending the lifespan of your laser machine; it’s about ensuring consistent, high-quality output and preventing costly downtime. The most fundamental maintenance task is the routine cleaning of optical components: mirrors and lenses. Even invisible dust can cause the laser beam to scatter, reducing power and leading to poor engraving quality. Use only lens-grade cleaning solution and lint-free wipes, handling optics by their edges to avoid fingerprints. The exhaust system should also be regularly checked for blockages and buildup. Accumulated residue in ducts can significantly reduce airflow, leading to poor smoke extraction and potential fire hazards. Clean the honeycomb or slatted bed frequently, as charred debris can reflect the laser and cause unwanted marks on the underside of your material. For machines with water-cooled laser tubes, regularly check the water level and quality in the chiller unit. Distilled water is usually recommended to prevent mineral buildup, and antifreeze or anti-algae additives may be necessary depending on the environment. Calibrate belt tension on the X and Y axes periodically to ensure accurate movement and prevent skip-stepping or distorted engravings. Lubricate linear rails and bearings as per the manufacturer’s recommendations to ensure smooth head movement.
Troubleshooting common issues often boils down to a systematic approach. If your engraving quality suddenly degrades (e.g., weak lines, fuzzy edges, inconsistent depth), first check the laser power setting in your software and the machine’s actual power output. Next, verify the focusing lens is clean and correctly focused on the material surface. A misaligned or dirty lens is a frequent culprit. If lines are wavy or distorted, check for loose belts, debris on the rails, or issues with the stepper motors. If the laser is firing but not marking, ensure the laser tube is functioning (look for the illuminated glow in CO2 tubes) and that the beam path from the tube through all mirrors to the lens is clear and aligned. Any smoke or condensation within the laser tube itself indicates a serious problem requiring professional servicing. Always consult your machine’s specific user manual for detailed troubleshooting steps pertinent to your model. Many issues can be resolved quickly with a structured diagnostic approach and adherence to a regular maintenance schedule.
Laser Engraving Safety Protocols
Laser engraving safety is paramount and must never be compromised. The high power densities of laser beams, along with the production of hazardous fumes and potential for fire, demand strict adherence to safety protocols.
Key safety precautions include:
- Eye Protection: Always wear certified laser safety glasses specifically rated for the wavelength of your laser (e.g., CO2 laser 10600nm). Standard safety glasses or sunglasses offer no protection against direct or reflected laser beams, which can cause permanent blindness.
- Ventilation: Operate the machine only with a fully functional and appropriate ventilation system. Ensure fumes are extracted outdoors or through a properly maintained air filtration unit. Never operate in an enclosed, unventilated space. Be aware that certain materials (e.g., PVC/vinyl, some synthetic leathers) should NEVER be laser engraved as they produce highly toxic and corrosive gases (e.g., chlorine gas). Research material safety data sheets (MSDS) before processing unknown materials.
- Fire Safety: Keep a fire extinguisher (ABC rated) readily accessible near the machine. Never leave the laser engraver unattended while it is operating, especially when cutting or engraving materials prone to flaming (e.g., wood, acrylic). Be aware of the fire suppression methods for different materials (e.g., water spray for wood, sand for electronics fires).
- Material Awareness: Understand which materials are safe to engrave and which are not. Avoid materials containing chlorine, bromide, or other halogenated compounds. Use only laser-safe materials. Store flammable materials away from the laser’s operating area.
- Machine Enclosure: Ensure all safety interlocks on the machine doors and covers are functioning correctly. These interlocks prevent the laser from firing if a door is open, significantly reducing the risk of accidental beam exposure.
- Electrical Safety: Ensure the machine is properly grounded and that all electrical connections are secure and in good condition. Avoid overloading electrical circuits.
- Work Area Cleanliness: Keep the work area clean and free of clutter. Remove flammable items that are not being processed.
- Training: Only allow trained and authorized personnel to operate the laser engraver. Ensure everyone understands the risks and safety procedures.
By consistently prioritizing these safety measures, users can mitigate risks and enjoy the full creative and productive potential of their laser engraving machines in a secure environment.
Inspiring Laser Engraving Projects and Creative Ideas
The true magic of owning a laser engraving machine lies in its ability to transform raw materials into personalized, functional, and aesthetically pleasing objects. From heartfelt gifts to bespoke home decor and practical everyday items, the creative possibilities are virtually limitless. This chapter aims to inspire, providing a range of project ideas suitable for various skill levels, and encouraging readers to delve deeper into exploration of different laser engraving materials and laser engraving techniques to manifest their unique creative visions. The journey from idea to finished product is a rewarding one, and with a laser engraver, precision and personalization are always within reach.
Personalized Gifts: Adding a Unique Touch
Personalized gifts resonate deeply, conveying thoughtfulness and unique effort. A laser engraver elevates standard gifts into cherished keepsakes. For beginners, simple projects that utilize a single material and basic raster or vector engraving are excellent starting points. Examples include engraving names or dates onto wooden coasters or cutting boards. These projects teach fundamental material handling and software setup without overwhelming complexity. As skills progress, consider incorporating multiple techniques or materials. For instance, a beautifully engraved leather journal combines the tactile pleasure of leather with the visual appeal of a crisp, dark engraving. Photographic engravings on wood or slate offer a truly unique and lasting way to capture memories. These projects leverage the laser’s ability to create grayscale effects through varied charring or depth.
When creating personalized gifts, attention to detail in design refinement is crucial for a professional look. For text-based designs, consider font selection carefully; readable and aesthetically pleasing fonts enhance the overall appeal. For photographic engravings, ensuring the source image is of high resolution and properly prepared (e.g., converted to grayscale, adjusted for contrast) will yield significantly better results. Experiment with different power and speed settings on scrap material before engraving the final piece to fine-tune the depth and darkness, ensuring the personalization stands out without overwhelming the base material. The beauty of these projects lies in the ability to mass-produce or create one-of-a-kind items with equal ease.
Project Ideas for Personalized Gifts:
- Wooden Photo Engravings: Raster engrave cherished photographs onto birch plywood, basswood, or even slate for a rustic, unique display. Apply a clear coat afterwards to protect the engraving and enhance contrast.
- Engraved Leather Wallets/Keychains: Vector engrave monograms, intricate patterns, or meaningful dates onto leather. Use a medium power and speed to create a deep, dark brand without cutting through.
- Customized Glassware: Raster engrave names, logos, or witty sayings onto wine glasses, beer mugs, or decanters for weddings, anniversaries, or birthdays. Remember to use the ‘wet paper towel’ technique for cleaner results.
- Personalized Cutting Boards: Engrave family recipes, custom designs, or family names onto bamboo or hardwood cutting boards. Apply food-safe mineral oil after engraving to highlight the contrast.
- Engraved Metal Accessories: Utilizing marking spray (for CO2 lasers) or a fiber laser, create personalized metal dog tags, jewelry pendants, or business card holders with crisp, permanent marks.
Home Decor Items: Elevating Your Living Space
Laser engraving offers an accessible pathway to creating unique home decor that reflects individual style. From wall art to functional organizers, the machine can help transform ordinary materials into extraordinary statement pieces. Consider multi-material approaches for added visual interest. For instance, combining engraved wood with acrylic accents can create lamps or shadow boxes with dynamic lighting effects. Vector cutting allows for intricate fretwork designs in wood or acrylic, perfect for decorative screens or intricate wall hangings. Raster engraving on large mirrors or glass panels can create stunning frosted art that catches and plays with light.
Achieving professional-looking results in home decor projects often involves a holistic approach to design and post-processing. For complex designs, use vector-based software (like Adobe Illustrator or Inkscape) to ensure clean lines and scalable graphics. After engraving, consider sanding wood to remove smoke residue, painting engraved areas for color contrast, or applying sealants and finishes to protect the material and enhance its appearance. For acrylic, flame polishing edges after vector cutting can give a glass-like finish, significantly elevating the perceived quality. Experiment with different types of wood like cedar for its distinctive smell when engraved, or dark acrylic for stark contrast with frosted engravings.
Project Ideas for Home Decor:
- Custom Wall Art/Mandala Panels: Intricately vector cut and/or raster engrave detailed designs on wood veneer or MDF panels. Layering different materials can add depth.
- Engraved Mirror or Glass Art: Transform plain mirrors into frosted masterpieces with large-scale raster engraved patterns, quotes, or scenic images.
- Personalized Photo Frames: Engrave names, dates, or decorative motifs directly onto wooden or acrylic photo frames, or create custom frames from scratch.
- Decorative Lamps/Lanterns: Design and cut intricate panels from wood or acrylic that can be assembled into unique lamps, with engraved details casting beautiful shadows when lit.
- Custom Coasters and Trivets: Engrave complex patterns or personalized monograms onto wood, cork, slate, or even marble tiles for stylish and functional tabletop protection.
Functional Products: Crafting Utility with Style
Beyond aesthetics, laser engraving excels at creating functional products that are both practical and visually appealing. Think of custom organizers, precise templates, or unique signage. The ability to cut and engrave in a single pass makes creating prototypes or small-batch production runs incredibly efficient. For functional items, precision is often paramount. Ensure your designs have accurate dimensions, especially if parts need to fit together or if the item serves a specific organizational purpose.
When aiming for professional-looking functional items, consistency in engraving depth and clarity is key. This often means running multiple passes at lower power for deeper engravings, or meticulously cleaning the material before engraving to ensure uniform results. For items meant for outdoor use or heavy handling, consider materials known for durability like anodized aluminum or certain hardwoods, and apply appropriate protective finishes after engraving. Experiment with inlay techniques, where laser-cut pieces of one material are precisely fitted into engraved pockets of another, adding an exquisite level of detail to functional items like presentation boxes or custom game boards.
Project Ideas for Functional Products:
- Custom Electronic Enclosures: Precisely cut and engrave acrylic, wood, or even thin aluminum sheets to create custom enclosures for Raspberry Pi projects, IoT devices, or circuit boards, complete with port cutouts and indicator labels.
- Organizational Trays/Dividers: Design and cut custom inserts for drawers or boxes from thin plywood or acrylic to perfectly organize tools, jewelry, or craft supplies.
- Bespoke Jigs and Templates: Create highly accurate cutting or marking templates for woodworking, sewing, or crafting projects from rigid acrylic or MDF.
- Durable Signage: Engrave and /or cut outdoor-grade acrylic or two-tone plastic sheets for durable and professional-looking business signs, directional markers, or nameplates.
- Custom Game Boards/Pieces: Engrave intricate designs onto wooden blocks for board games like chess, checkers, or even custom dice, providing a unique tactile experience. Create custom game boards on wood or acrylic with integrated storage.
The journey with your laser engraving machine is one of continuous learning and boundless creativity. Don’t be afraid to experiment with new materials, push the boundaries of different techniques, and continually refine your design process. Every successful project, and even every failed experiment, provides valuable insights that contribute to your growing mastery of this incredibly versatile tool. The most profound creative visions are often realized through persistent exploration and the courage to try new things.
Maintaining Safety and Quality in Laser Engraving
The exhilarating process of creating intricate designs with a laser engraver comes with significant responsibilities. While the previous chapters touched upon fundamental safety considerations, this section aims to unequivocally reiterate and expand upon the crucial importance of laser engraving safety, emphasizing that robust safety protocols are not merely regulatory burdens but indispensable elements for achieving consistent high-quality results and ensuring a secure operational environment for every laser engraving project. Neglecting safety not only jeopardizes personnel but can also lead to machine damage, poor output, and even catastrophic failures. A meticulous approach to safety and maintenance is the bedrock upon which reliable and exceptional laser engraving stands.
Crucial Safety Guidelines: Protecting Personnel and Property
The laser beam itself, invisible to the naked eye for CO2 lasers, poses the most significant and immediate danger. Eye protection is non-negotiable. Anyone in the vicinity of an operating laser engraver must wear certified laser safety glasses specifically designed for the wavelength of the laser being used (e.g., CO2 laser 10600nm). Standard safety glasses or sunglasses offer no protection against direct or reflected laser beams, which can cause permanent blindness. Direct or even reflected laser light can cause irreversible eye damage, including retinal burns leading to blind spots or complete vision loss. Always verify the safety glasses’ Optical Density (OD) rating and wavelength protection. Furthermore, ensure the machine’s safety interlocks on access doors and panels are fully functional. These interlocks are designed to immediately shut off the laser beam if a door is opened during operation, preventing accidental exposure.
Ventilation is equally critical due to the byproducts generated during the engraving process. Laser engraving vaporizes material, producing smoke, fumes, and microscopic particulate matter, many of which can be hazardous when inhaled. Depending on the material, these fumes can range from unpleasant odors to highly toxic gases or carcinogens. A dedicated, robust exhaust system that vents directly outdoors is the preferred solution. If outdoor venting is not feasible, a high-quality air filtration system specifically designed for laser exhaust, incorporating HEPA filters for particulates and activated carbon filters for volatile organic compounds (VOCs), is essential. Regular inspection and replacement of filters are mandatory to maintain filtration efficiency. Crucially, certain materials, such as PVC (polyvinyl chloride) and vinyl, must NEVER be laser engraved. When heated, PVC releases chlorine gas, which is highly corrosive, toxic (damaging to human lungs), and can severely damage the laser machine’s optics and electronics. Always verify material composition before engraving and consult Material Safety Data Sheets (MSDS) when in doubt about unknown materials.
Fire prevention is a constant consideration, particularly when engraving flammable materials like wood, paper, or acrylic. While the laser’s primary action is vaporization, localized combustion can occur. Never leave the laser engraver unattended while it is operating, especially when cutting or engraving materials prone to flaming (e.g., wood, acrylic). A small ember can quickly escalate into a full-blown fire. Always have an appropriate fire extinguisher (ABC rated for general combustibles, liquids, and electrical fires) readily accessible and ensure operators are trained in its use. Keep the workspace clear of clutter and store flammable materials away from the machine. Regularly clean the engraving bed (honeycomb or slats) as accumulated debris can catch fire or reflect the laser incorrectly. For materials prone to flaming, ensure the air assist system is functioning optimally to suppress flames and blow away ignitable debris. A common best practice is to always operate with the machine’s lid closed; besides blocking laser radiation, it acts as a fire containment barrier in case of a small flare-up.
Finally, proper disposal of waste materials and byproducts is part of a comprehensive safety strategy. Engraved material scraps, especially those from plastics, can release residual VOCs. Collect and dispose of waste according to local regulations. If using an air filtration system, the spent filters will contain concentrated hazardous particulates and should be handled with appropriate personal protective equipment (gloves, respirators) and disposed of as hazardous waste, depending on the materials processed.
Maintaining Longevity and Optimal Performance
Consistent safety measures inherently contribute to the longevity and optimal performance of your laser engraving machine. A clean machine is a happy machine, and a safe operator is a meticulous one. The cornerstone of machine longevity is regular and thorough cleaning. The most critical components to maintain are the optical elements—mirrors and lenses. Dust, smoke residue, and fingerprints can absorb or scatter the laser beam, reducing power efficiency, causing poor engraving quality, and potentially damaging the optics themselves. Use only specialized lint-free wipes and lens-grade cleaning solutions. Never touch optical surfaces with bare hands. Follow the manufacturer’s guidelines for frequency of cleaning, but typically after every 8-10 hours of operation or whenever engraving quality degrades, optics should be inspected. Ensuring the ventilation system is clear and efficient not only protects operators but also prevents corrosive smoke and particulates from damaging internal electronics, guide rails, and the laser tube itself.
Beyond optics and ventilation, routine mechanical maintenance is vital. Regularly inspect and clean the motion system: linear rails, bearings, belts, and stepper motors. Accumulated debris on guide rails can lead to jerky movements, ghosting in engravings, or even lead to total motor failure. Lubricate moving parts according to the manufacturer’s recommendations to ensure smooth, precise motion and prevent premature wear. Check and adjust belt tension periodically as loose belts can cause inaccurate positioning and distorted engravings. For machines with water-cooled laser tubes, monitor the chiller unit. Ensure the water level is adequate, the temperature is stable (typically around 18-22°C for CO2 lasers), and that only distilled water (and potentially specific coolants or anti-algae solutions) is used. Contaminated or overheated cooling water significantly reduces the lifespan and power output of the laser tube.
Consistent safety measures directly translate to higher quality output. A machine that is properly maintained, with clean optics and a clear beam path, will deliver its rated power efficiently and consistently, resulting in sharp, precise engravings. A well-ventilated environment prevents smoke from settling back onto the material, ensuring cleaner and more vibrant results. Adhering to safety protocols, such as never forcing material that doesn’t fit or leaving the machine unattended, prevents operational errors that can ruin jobs, damage the machine, or necessitate costly repairs. In essence, treating your laser engraver with respect, understanding its needs for cleanliness and proper operation, and prioritizing safety above all else, guarantees not only a long and productive life for your machine but also consistently professional-grade results across all your laser engraving projects, fostering a safe and creative workspace for years to come.
Conclusions
Laser engraving offers immense creative potential for both hobbyists and professionals. By understanding the diverse techniques, suitable materials, and essential safety practices, you can confidently embark on exciting projects. Continuously explore new ideas and expand your skills to truly master the art of laser engraving.
Frequently Asked Questions
Q: What are the three key parameters in laser engraving, and how do they affect the outcome?
A: The three key parameters are power, speed, and frequency. Power (watts) controls the intensity, affecting depth and darkness. Speed dictates how long the laser dwells, influencing depth and efficiency. Frequency determines pulse density, impacting engraving consistency and edge definition. Understanding their interplay is crucial for desired effects on different materials.
Q: What is the main difference between raster and vector engraving?
A: Raster engraving is like an inkjet printer, engraving line by line based on pixels, ideal for photographs and detailed images with gradients. Vector engraving traces outlines and lines, similar to a pen plotter, making it fast and precise for crisp lines, text, and cutting materials.
Q: What materials can I engrave with a laser, and are there any I should avoid?
A: Common materials include wood, acrylic, leather, glass, and certain metals (like anodized aluminum or using marking sprays). You should NEVER engrave materials containing chlorine, such as PVC or vinyl, as they release highly toxic and corrosive gases that are harmful to humans and the machine.
Q: What are the most crucial safety precautions for laser engraving?
A: Paramount safety precautions include wearing certified laser safety glasses (rated for your laser’s wavelength), ensuring robust ventilation to remove hazardous fumes, practicing fire safety (never leaving the machine unattended, having a fire extinguisher), and understanding which materials are safe to engrave.
Q: How can I ensure high-quality engravings and maintain my machine?
A: High quality is achieved through material-specific calibration, precise focus, and proper air assist. Machine longevity and performance are maintained by regularly cleaning optical components (mirrors and lenses), checking the exhaust system for blockages, lubricating moving parts, and monitoring the chiller unit for water-cooled lasers.

Subscribe to Our Newsletter
And enjoy FREE Download Files, SALE Alerts and Inspiring TIPS
How to Make a Stunning Laser Cut Box: A Step-by-Step Guide
A Beginner’s Guide to Making a Laser Cut Box
A Beginner’s Guide to Crafting a Custom Laser Cut Box
Charcuterie Board Engraving File – Wine & Grapes 3D Illusion…
$4.00Original price was: $4.00.$3.00Current price is: $3.00.(25% off)
Bee and Honey Jar Charcuterie Board Engraving File | PNG Download #007…
$4.00Original price was: $4.00.$3.20Current price is: $3.20.(20% off)
Valentine Love Captions: 6 Charcuterie Board Engraving Files…
$8.00Original price was: $8.00.$5.60Current price is: $5.60.(30% off)
American Eagle Flag Laser Engraving File for Charcuterie & Cutting…
$4.00Original price was: $4.00.$2.80Current price is: $2.80.(30% off)