

 Français
 Deutsch
 Español
 Italiano
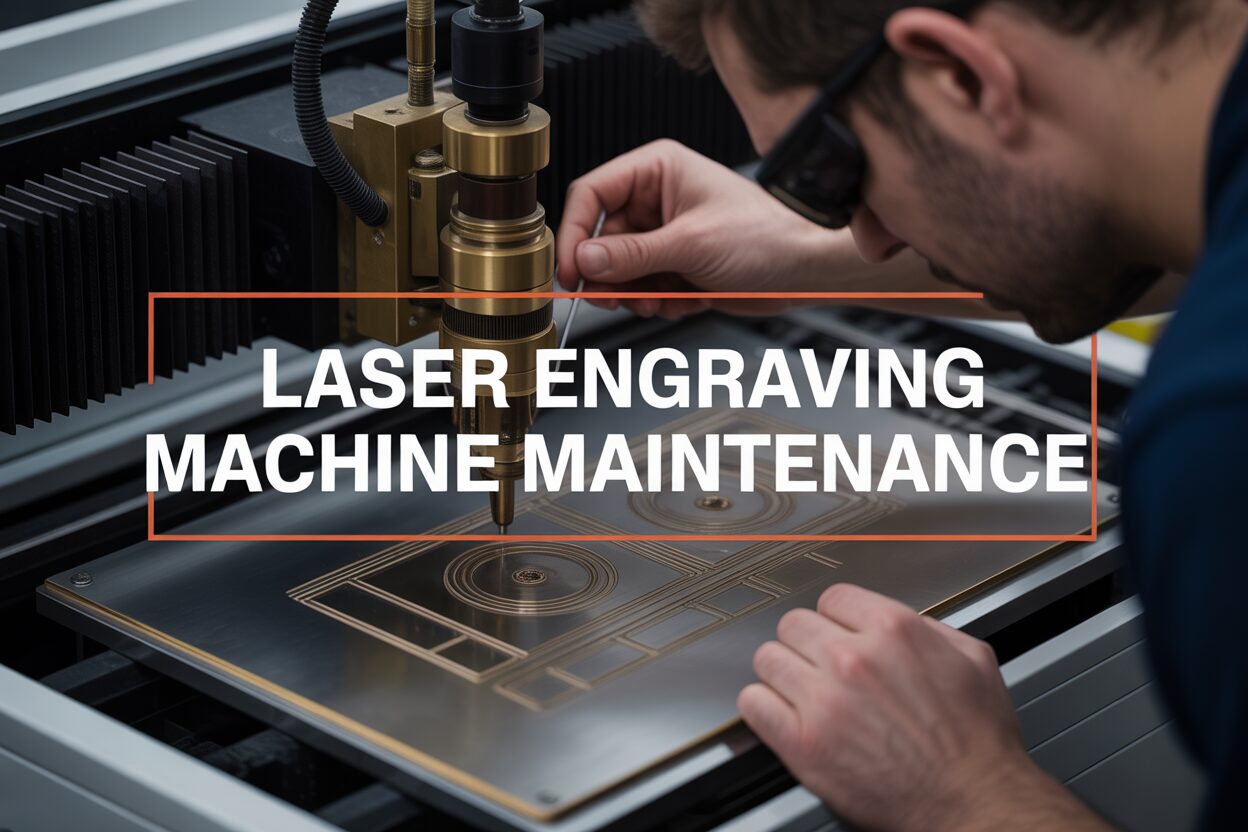
Optimizing Performance: Essential Laser Engraving Machine Maintenance for Longevity
Jul
Estimated reading time: 11 minutes
Key Takeaways
- Regular maintenance is crucial for longevity and performance: It actively prevents common issues, significantly reduces repair costs, and ensures consistent quality in your engraved products.
- Systematic cleaning is vital: Implementing daily, weekly, and monthly routines for optics, motion systems, and exhaust components is necessary for optimal machine function and efficiency.
- Laser tubes and optics require special attention: Proper cleaning, adequate cooling, and timely replacement/alignment are critical for maintaining beam quality, maximizing power delivery, and extending component lifespan.
- Advanced calibration and troubleshooting prevent major issues: Techniques like precise beam alignment, focal length adjustment, and systematic problem diagnosis are key to consistent precision and optimal output.
- Environmental control and material selection extend machine life: Managing factors like dust, temperature, humidity, and choosing appropriate materials are important preventative measures that safeguard your investment.
Table of Contents
- Understanding the Importance of Regular Maintenance
- Routine Cleaning and Inspection Procedures
- Key Component Maintenance: Laser Tube and Optics
- Advanced Maintenance and Troubleshooting for Performance
- Preventative Measures and Best Practices for Longevity
- Conclusions
Regular maintenance of your laser engraving machine is crucial for ensuring its longevity, consistent performance, and the quality of your engraved products. This article delves into the essential maintenance practices, from routine cleaning to critical component checks, offering valuable insights to keep your machine running smoothly and efficiently.
Understanding the Importance of Regular Maintenance
Maintaining a laser engraving machine isn’t merely an optional chore; it’s a fundamental pillar of sustained operational excellence and long-term profitability. While the initial investment in a laser engraver is significant, neglecting its upkeep can quickly erode that value, leading to diminished performance, frequent breakdowns, and ultimately, a significant impact on your bottom line. Proactive care, exemplified by consistent laser engraver cleaning and routine inspections, is the cornerstone of preventing common issues before they escalate into costly repairs or production bottlenecks.
The immediate benefits of a well-maintained machine are tangible. For instance, a clean lens ensures precise laser focus, directly translating to sharp, consistent engraving quality. Conversely, a dusty or smudged lens diffuses the laser beam, resulting in fuzzy engravings, uneven cuts, and wasted material. Similarly, keeping rails lubricated and free of debris prevents erratic movement and improves engraving accuracy, reducing the need for costly reworks. These seemingly minor considerations collectively contribute to an uninterrupted workflow, which is crucial in a production environment where deadlines and quality standards are paramount. Ignoring these simple maintenance tasks can lead to a cascade of problems, from inconvenient downtime to irreparable damage to critical components like the laser tube itself, an expense that can rival the cost of a new machine.
Prevention of Common Issues
The proactive approach to laser engraver maintenance acts as a formidable barrier against a host of common operational issues. Take, for example, the build-up of residue from engraving various materials. Over time, this residue can accumulate on mirrors, lenses, and even inside the laser tube’s housing. This accumulation directly impedes the laser beam’s path, reducing its power and efficiency. Regular cleaning of these optical components, as well as the work area, ensures the laser operates at its peak performance. Furthermore, debris in the ventilation system or on the exhaust fan can restrict airflow, leading to overheating of crucial components and potential irreparable damage. Consistent cleaning of these areas ensures proper heat dissipation, extending the lifespan of sensitive electronics and the laser tube. Similarly, ensuring proper alignment of the laser optics and tightness of belts and pulleys through routine checks prevents ghosting, skipped lines, or inaccurate engravings, all of which incur material waste and loss of production time.
Reduced Repair Costs and Consistent Quality
Beyond preventing minor annoyances, regular maintenance significantly reduces the likelihood of major component failures, thereby slashing potential repair costs. A well-lubricated motion system, for instance, prevents premature wear on bearings and leadscrews, components that are costly to replace and often require specialized technician intervention. Similarly, routinely checking and replacing worn-out consumable parts, like air filters or sacrificial beds, prevents more extensive damage to the machine’s internal mechanisms. The consistent quality of engraved products is perhaps the most direct and impactful benefit for profitability. When a machine consistently produces high-quality results, fewer rejects occur, material waste is minimized, and customer satisfaction remains high. This translates into repeat business, positive word-of-mouth, and a strong brand reputation. Conversely, a machine plagued by inconsistent performance leads to frustrated customers, wasted resources, and ultimately, a decline in revenue. The long-term benefits of consistent quality are directly tied to increased profitability and operational efficiency, making maintenance not an expense, but an invaluable investment. Integrating a comprehensive maintenance schedule into your operational routine – encompassing daily, weekly, and monthly checks – ensures that your laser engraving machine remains a reliable asset, consistently delivering high-quality results and contributing positively to your business’s bottom line.
Routine Cleaning and Inspection Procedures
Establishing a consistent routine for cleaning and inspection is paramount for the optimal performance and longevity of your laser engraving machine. This proactive approach minimizes downtime, reduces repair costs, and ensures consistent quality in your engraved products. The cleaning regimen typically involves attention to the machine’s critical optical components, as well as the immediate work area and the overall mechanical systems.
Daily Cleaning Measures
Immediately following each day’s operation, or even after extended runs, focus on the immediate work environment and easily accessible areas. The most critical daily task is the cleaning of the machine’s interior work area. Engraving and cutting processes generate significant amounts of dust, debris, and fumes, which can settle on the machine’s internal components. Use a soft-bristled brush or a shop vacuum with a narrow crevice attachment to remove loose particles from the honeycomb bed, the bottom of the machine chassis, and around the exhaust grate. A thorough daily cleaning prevents the accumulation of material that can interfere with optical pathways or hinder the movement of gantry components. Additionally, wipe down the exterior surfaces of the machine with a damp, lint-free cloth to remove dust and fingerprints, maintaining a clean and professional appearance. For machines with a pass-through, ensure the openings are clear of obstructions and debris.
Weekly Cleaning and Inspection
Weekly tasks delve deeper into the machine’s core components, focusing on the optics and motion system. This significantly impacts engraving quality and machine lifespan.
Lenses and Mirrors:
These are the most sensitive components and require meticulous care. Always handle them by their edges, wearing clean, lint-free gloves to avoid contamination from skin oils. Use specialized lens cleaning solutions and lint-free optical wipes. Never spray solution directly onto the lens or mirror; instead, apply it to the wipe. Gently wipe the surface in one direction, without applying pressure, to remove dust and residue. For stubborn spots, a second gentle wipe may be necessary. Ensure you clean all three mirrors and the focusing lens. Refer to your machine’s manual for the exact location of each optical component, as designs vary. Dirty optics drastically reduce laser power and engraving quality.
Belts and Pulleys:
Inspect the tension and condition of the timing belts for both the X and Y axes. They should be taut but not overly tight, with no visible fraying, cracking, or missing teeth. Adjust tension according to manufacturer specifications if necessary. Also, check the pulleys for any signs of wear, accumulation of debris, or misalignment. Loose or worn belts can lead to inaccurate engravings, ghosting, and skipped steps.
Rails and Bearings:
Clean the linear rails and guide rods with a lint-free cloth to remove any dust or debris. After cleaning, apply a thin, even layer of a manufacturer-recommended lubricant specifically designed for linear motion systems. This ensures smooth movement and prevents premature wear on the bearings. Move the gantry through its full range of motion a few times to evenly distribute the lubricant.
Exhaust Fan and Ducting:
Depending on your usage, the exhaust fan and ducting can accumulate significant amounts of residue. Disconnect the exhaust hose and visually inspect for buildup. If accessible, gently brush off accumulated debris from the fan blades and inside the ducting to maintain optimal airflow. Restricted airflow leads to poor fume extraction and potential overheating of the laser tube and electronics.
Monthly Deep Cleaning and Inspection
Monthly maintenance is more comprehensive and often involves checking components that are not ordinarily accessed daily or weekly.
Air Assist Nozzle and Cone:
Disassemble the air assist nozzle and clean any residue or melted material that might be obstructing the airflow. A clear air assist is crucial for preventing flare-ups, reducing charring, and ensuring clean cuts.
Water Chiller/Cooling System:
For liquid-cooled laser tubes, check the water level in the chiller. Top off with distilled water if necessary. Inspect the coolant for any discoloration or signs of algae growth. If the water appears murky, it might be time for a coolant flush and refill, following the chiller manufacturer’s guidelines. Ensure the fan on the chiller is free of dust.
Electrical Connections:
With the machine powered off and unplugged, visually inspect readily accessible electrical connections for any loose wires or signs of corrosion. This is a general safety check and should only be performed if you are comfortable and knowledgeable about electrical systems. If any issues are found, consult a qualified technician.
Grille/Honeycomb Bed:
If not done weekly, a more thorough cleaning of the honeycomb bed is essential monthly. Soaking can sometimes help remove stubborn residue. Ensure it’s completely dry before placing it back in the machine.
By diligently adhering to these routine cleaning and inspection procedures, you empower your laser engraving machine to perform consistently at its peak, reducing the likelihood of costly repairs and extending its operational lifespan considerably.
Key Component Maintenance: Laser Tube and Optics
At the heart of every laser engraving machine lies the laser tube and its intricate optical system, the very components responsible for generating and directing the powerful laser beam. Their proper maintenance is not just crucial for performance but directly impacts the output quality and the overall lifespan of the machine. Neglecting these critical elements can lead to significant power loss, inconsistent engraving results, and ultimately, premature component failure.
Laser Tube Maintenance and Replacement
The laser tube is arguably the most expensive consumable component in a laser engraving machine, particularly in CO2 laser systems. While maintenance of the tube itself is primarily focused on ensuring proper cooling and avoiding physical damage, recognizing when an old tube needs replacement is vital.
Signs of a failing CO2 laser tube often include:
- Reduced Power Output: Noticeable decrease in cutting/engraving efficiency even at high power settings, requiring multiple passes for tasks previously done in one.
- Inconsistent Beam: Engravings appear patchy, uneven, or exhibit variations in depth across the material.
- Discoloration of the Beam: The laser beam, if visible through a testing method (e.g., acrylic block test), might appear purple or pink instead of the usual visible red (for alignment lasers) or a clear, strong burn.
- Difficulty Firing: The tube struggles to fire, or takes longer to initiate the laser beam.
- Physical Damage: Cracks in the glass, especially near the electrodes or output coupler, are clear indicators of failure.
When replacement is necessary, extreme caution is advised. Laser tubes contain high voltage and can shatter if mishandled. Always ensure the machine is powered off and unplugged. Disconnect the cooling hoses and electrical connections carefully, following the manufacturer’s specific instructions. When handling the new tube, avoid touching the optical ends and support it evenly to prevent stress fractures. Installation typically involves reconnecting the cooling system and electrical leads, followed by aligning the laser beam to ensure it travels correctly through the optical path. Proper alignment after tube replacement is critical for optimal beam quality and power delivery to the material. This often requires fine-tuning of the mirror positions to ensure the beam is centered through each mirror and the focusing lens.
Optical System Maintenance: The Foundation of Beam Quality
The optical system, comprising mirrors and lenses, is responsible for guiding and focusing the laser beam onto the material. Their cleanliness directly translates to the machine’s performance. Contaminants like dust, debris, and smoke residue can absorb or scatter the laser light, leading to power loss, localized overheating of the optics, and degraded beam quality.
Proper cleaning of optics (as detailed in the preceding chapter) is not just about dirt removal; it directly contributes to consistent laser machine calibration and optimal beam quality. A clean lens ensures a tight, precise focal point, leading to sharp lines and efficient material removal. Clean mirrors reflect the maximum possible laser power, preventing energy loss and maintaining the beam’s integrity as it travels from the tube to the work surface. Regular cleaning minimizes the need for drastic power adjustments, extending the life of the laser tube and ensuring predictable results from your chosen power and speed settings.
CO2 Laser vs. Fiber Laser Optics Maintenance
While both CO2 and fiber lasers rely on optical systems, their maintenance requirements differ due to their fundamental design and operating wavelengths.
- CO2 Laser Maintenance: CO2 lasers typically use fragile mirrors and a focusing lens made of zinc selenide (ZnSe) or gallium arsenide (GaAs), often with coatings. These optics are highly susceptible to damage from physical contact and contamination from smoke and debris generated during engraving. Hence, the rigorous cleaning procedures involving specialized solutions and lint-free wipes are paramount for CO2 systems. The open optical path from the laser tube to the focusing lens makes these components vulnerable to environmental contaminants.
- Fiber Laser Maintenance: Fiber lasers, on the other hand, deliver the laser light through an optical fiber. The main optical components that require user attention are typically the collimating lens and the focusing lens in the laser head. Due to their enclosed nature and the design of the fiber delivery system, the internal optics of a fiber laser are generally less exposed to the environment and therefore require less frequent general cleaning compared to CO2 laser mirrors. However, the focusing lens within the fiber laser head can still accumulate debris from material processing, and its cleanliness is crucial for maintaining beam spot size and power density. While the cleaning frequency for fiber laser optics might be lower, the precision required is equally high. Some fiber laser systems may also incorporate protective windows that act as a sacrificial layer, and these should be regularly inspected and replaced if scratched or damaged.
Regardless of the laser type, understanding the function and vulnerabilities of its specific optical system is key to implementing effective cleaning and maintenance protocols, safeguarding your investment, and ensuring peak performance for years to come.
Advanced Maintenance and Troubleshooting for Performance
Beyond routine cleaning and component care, advanced maintenance and troubleshooting involve a deeper understanding of your laser machine’s operational parameters. This includes precise calibration techniques and the ability to diagnose and rectify common performance issues, ensuring consistent precision and optimal output.
Advanced Calibration Techniques
Achieving precise engraving and cutting requires meticulous calibration, particularly concerning beam alignment, focal length, and the fine-tuning of power settings.
Beam Alignment:
This is arguably one of the most critical and often overlooked aspects of CO2 laser maintenance. Proper beam alignment ensures that the laser beam travels perfectly centered through all mirrors and the focusing lens, maximizing power delivery and beam quality at the work surface. Misalignment leads to power loss, uneven cuts, and degraded engraving quality. The process typically involves a series of “pulse tests” at different mirror locations, confirming the beam hits the center of each mirror aperture. This usually starts from the laser tube’s output, aligning the first mirror, then the second (often on the gantry), and finally ensuring the beam enters the focusing lens squarely. Each adjustment requires precise manipulation of the mirror adjustment screws. It is a methodical process that, when done correctly, significantly impacts machine performance.
Focal Length Calibration:
The focal length of your lens dictates the precise distance between the lens and the material where the laser beam converges to its smallest, most powerful point (the focal point). Incorrect focal length results in fuzzy engravings, inefficient cutting, and greater charring. Calibration involves determining the exact focal distance, often through a “ramp test” where a line is engraved on a sloped piece of material. The sharpest part of the line indicates the optimal focal distance. This distance should then be used as the reference point for setting your machine’s Z-axis height. Maintaining the precise focal distance is crucial for achieving crisp details and efficient material removal.
Power Settings Adjustment:
While not strictly a maintenance task, understanding how to fine-tune power settings is essential for consistent quality and plays a role in troubleshooting. Different materials and desired outcomes require specific power and speed combinations. Maintaining consistent performance across various jobs means understanding how factors like beam alignment and focal length impact the effective power delivered to the material. If you notice a sudden drop in effective power at previously successful settings, it often points to a maintenance issue with the optics or laser tube.
Troubleshooting Common Issues and Maintenance Links
Many recurring performance problems can be directly linked back to insufficient or improper maintenance. Recognizing these connections is the first step in effective troubleshooting.
- Uneven Engraving: This can manifest as areas of deeper or lighter engraving.
- CO2 Lasers: Often points to misaligned optics, a dirty focusing lens, or an unstable work bed. Check beam alignment, clean optics, and ensure the material lies flat. Worn or loose belts can also cause unevenness in the direction of the gantry movement.
- Fiber Lasers: Less common due to enclosed optics, but can stem from a contaminated protective window or a misaligned scanning head.
- Material Burning/Excessive Charring:
- Both CO2 and Fiber: Could indicate an incorrect focal length (beam not focused precisely on the surface), excessive power settings for the material, or insufficient air assist. Start by verifying focal length, reducing power, and ensuring air assist is fully functional and aimed correctly. Obstructed air assist nozzles are a common cause.
- Power Fluctuations or Weak Output:
- CO2 Lasers: Most commonly due to a failing laser tube, dirty optics (mirrors/lens), or a faulty power supply. Check for signs of tube degradation, meticulously clean all optical components, and if the problem persists, consult a technician for power supply diagnostics. Inadequate water cooling can also cause temporary power fluctuations as the tube overheats.
- Fiber Lasers: Less prone to power fluctuations but can be caused by contamination on the protective window or a failing laser module (less common and requires professional service). Check the protective window first.
Specific Troubleshooting Steps
To effectively troubleshoot, adopt a systematic approach, starting with the simplest and most common culprits.
For CO2 Laser Maintenance:
- Check Optics: Always begin with a thorough inspection and cleaning of all mirrors and the focusing lens. This solves a vast majority of power-related issues.
- Beam Alignment Test: Perform a full beam alignment test. Many power problems are subtle alignment shifts.
- Water Cooling System: Verify chiller temperature, water flow, and water quality. Ensure no air bubbles are trapped in the cooling lines.
- Motion System: Inspect belts for tension and wear, and lubricate rails. Ensure no debris obstructs gantry movement.
- Air Assist: Confirm strong, unobstructed airflow from the nozzle.
For Fiber Laser Maintenance:
- Protective Window: Inspect and clean the protective window in the scanning head. If scratched or heavily contaminated, replace it.
- Lens Contamination: While less exposed, the focusing lens within the head can still accumulate particulate. If accessible and you are trained, inspect and clean carefully.
- Cooling System: Monitor cooling fan operation and ensure vents are clear to prevent overheating of the laser module.
- Software/Settings: Verify consistent software settings and that material parameters haven’t been inadvertently altered.
By mastering these advanced maintenance techniques and troubleshooting methodologies, you can significantly extend the operational life of your laser engraving machine, prevent costly repairs, and consistently achieve superior engraving and cutting results. This proactive approach transforms challenges into opportunities for deeper understanding and greater control over your production process.
Preventative Measures and Best Practices for Longevity
Extending the serviceable life of your laser engraving machine beyond its expected lifespan is not a matter of luck but the direct result of adhering to a comprehensive regimen of preventative measures and best practices. These go beyond mere cleaning and encompass environmental controls, material considerations, and a commitment to a structured maintenance schedule, ensuring consistent peak performance and maximizing your return on investment.
Environmental Control
The operating environment plays a crucial role in the health of your laser engraving machine. Dust, temperature fluctuations, and humidity are silent enemies that can severely degrade performance and component longevity.
Dust Control:
A laser machine shop is inherently dusty due to various materials being cut and engraved. While internal filtration helps, minimizing airborne dust is paramount. Use industrial air purification systems or dust collectors if processing materials that generate significant particulate matter. Keep the machine covers closed when not in operation. Regularly clean the surrounding area to prevent dust from being drawn into the machine’s sensitive components, especially the optics and motion system.
Temperature and Humidity Regulation:
Laser tubes, especially CO2, perform optimally within specific temperature ranges (typically 18-25°C or 65-78°F). Extreme temperatures can reduce power output, shorten tube life, and cause electronic components to fail prematurely. Similarly, high humidity can lead to condensation on optical components, causing irreparable damage if a laser fires through it, and can also accelerate corrosion on electrical connections. Installing a dedicated HVAC system or using dehumidifiers and air conditioners to maintain stable environmental conditions within the recommended range is a significant preventative measure. For machines with water chillers, ensuring the chiller itself is operating in a stable environment commensurate with its specifications is also critical.
Proper Ventilation
Adequate ventilation is non-negotiable for operator safety and machine longevity. The engraving process generates fumes, smoke, and particulate matter that, if not properly extracted, will settle on and damage optical components, contaminate the motion system, and pose health risks.
Robust Exhaust System:
Invest in a powerful exhaust fan and maintain clean, unobstructed ducting. The exhaust system should effectively pull all contaminants away from the engraving area and out of the workspace.
Regular Cleaning of Exhaust Components:
As discussed previously, regularly cleaning the exhaust fan blades and ducting prevents the buildup of sticky residues that can reduce airflow and put strain on the fan motor, leading to premature failure.
Airflow Optimization:
Ensure there are no leaks in the exhaust system and that the make-up air for the room is sufficient to prevent negative pressure, which can hinder efficient fume extraction.
Using High-Quality Materials
The type and quality of materials processed directly impact machine wear and tear.
Material Selection:
Some materials, like certain plastics, release corrosive fumes that can damage internal components over time. Others, like MDF, generate fine, abrasive dust. Being aware of the byproducts of your chosen materials helps you anticipate maintenance needs.
Clean Materials:
Always use clean, debris-free materials. Dirty or previously processed materials can introduce foreign contaminants into your machine, leading to unnecessary wear on optics and mechanical systems. Pre-cleaning materials can mitigate this risk.
Avoid Hazardous Materials:
Never engrave materials that are known to produce toxic or corrosive byproducts harmful to health or machine components (e.g., PVC due to chlorine gas).
Structured Maintenance Schedule
The ultimate preventative measure is the unwavering commitment to a structured maintenance schedule. This binds together all the essential care practices into a reliable routine.
Consistent CO2 Laser Maintenance:
For CO2 systems, this means stringent daily cleaning of the work area, weekly detailed cleaning of all mirrors and lenses with appropriate solutions and wipes, monthly checks of the water chiller’s water quality and level, and regular inspection/lubrication of the motion system. Frequent beam alignment checks, especially after any gantry collision or significant movement, are critical. Timely laser tube replacement based on power degradation rather than catastrophic failure ensures continuous production without unplanned downtime.
Consistent Fiber Laser Maintenance:
While generally requiring less frequent optical cleaning due to enclosed systems, fiber lasers still benefit from regular external cleaning, inspection of the protective window, and ensuring the cooling systems (often air-cooled) are free of dust and operating efficiently. Their robust nature does not negate the need for planned preventative checks.
The Role of Calibration and Timely Replacement:
Consistent laser machine calibration, including focal length and beam alignment, ensures that the machine always operates at its peak efficiency, minimizing energy waste and maximizing cutting/engraving precision. Equally important is the timely replacement of wear-and-tear components, particularly the laser tube. Proactive replacement before complete failure reduces the risk of emergency breakdowns and allows for planned downtime, minimizing disruption to your operations.
By integrating these preventative measures and best practices into your operational workflow, you transform your laser engraving machine from a delicate instrument into a robust and reliable workhorse. This dedication to maintenance ensures not only superior performance and consistent product quality but also a significantly extended lifespan, safeguarding your investment and contributing directly to your business’s long-term profitability and operational efficiency.
Conclusions
By implementing these essential laser engraving machine maintenance practices, you can significantly extend the lifespan of your equipment, ensure consistent engraving quality, and avoid costly downtime. Regular care and attention to detail are key to maximizing your investment and maintaining peak performance in all your laser engraving projects.
FAQ
Q: How often should I clean my laser engraving machine’s optics?
A: Lenses and mirrors should be meticulously cleaned weekly using specialized solutions and lint-free optical wipes. Daily attention should also be given to cleaning the immediate work area to prevent accumulation of debris.
Q: What are the signs that my CO2 laser tube is failing?
Interested in more Signs? Check out our Signs laser file designs: Click here!
A: Key signs include reduced power output (requiring multiple passes for tasks previously done in one), inconsistent beam (patchy or uneven engravings), discoloration of the beam (appearing purple or pink), difficulty firing, and visible physical damage like cracks in the glass.
Q: Why is proper ventilation so important for a laser engraver?
A: Proper ventilation is crucial for two main reasons: operator safety and machine longevity. It effectively extracts harmful fumes, smoke, and particulate matter that, if not removed, would settle on and damage sensitive optical components and the machine’s motion system, while also protecting the operator’s health.

Subscribe to Our Newsletter
And enjoy FREE Download Files, SALE Alerts and Inspiring TIPS
Pricing Your Laser Engraving Work for Profitability
A Comprehensive Guide to Pricing Your Laser Engraving Services
A Comprehensive Guide on How to Price Laser Engraving Services
Charcuterie Board Engraving File – Wine & Grapes 3D Illusion…
$4.00Original price was: $4.00.$3.00Current price is: $3.00.(25% off)
Bee and Honey Jar Charcuterie Board Engraving File | PNG Download #007…
$4.00Original price was: $4.00.$3.20Current price is: $3.20.(20% off)
Valentine Love Captions: 6 Charcuterie Board Engraving Files…
$8.00Original price was: $8.00.$5.60Current price is: $5.60.(30% off)
American Eagle Flag Laser Engraving File for Charcuterie & Cutting…
$4.00Original price was: $4.00.$2.80Current price is: $2.80.(30% off)