

 Français
 Deutsch
 Español
 Italiano
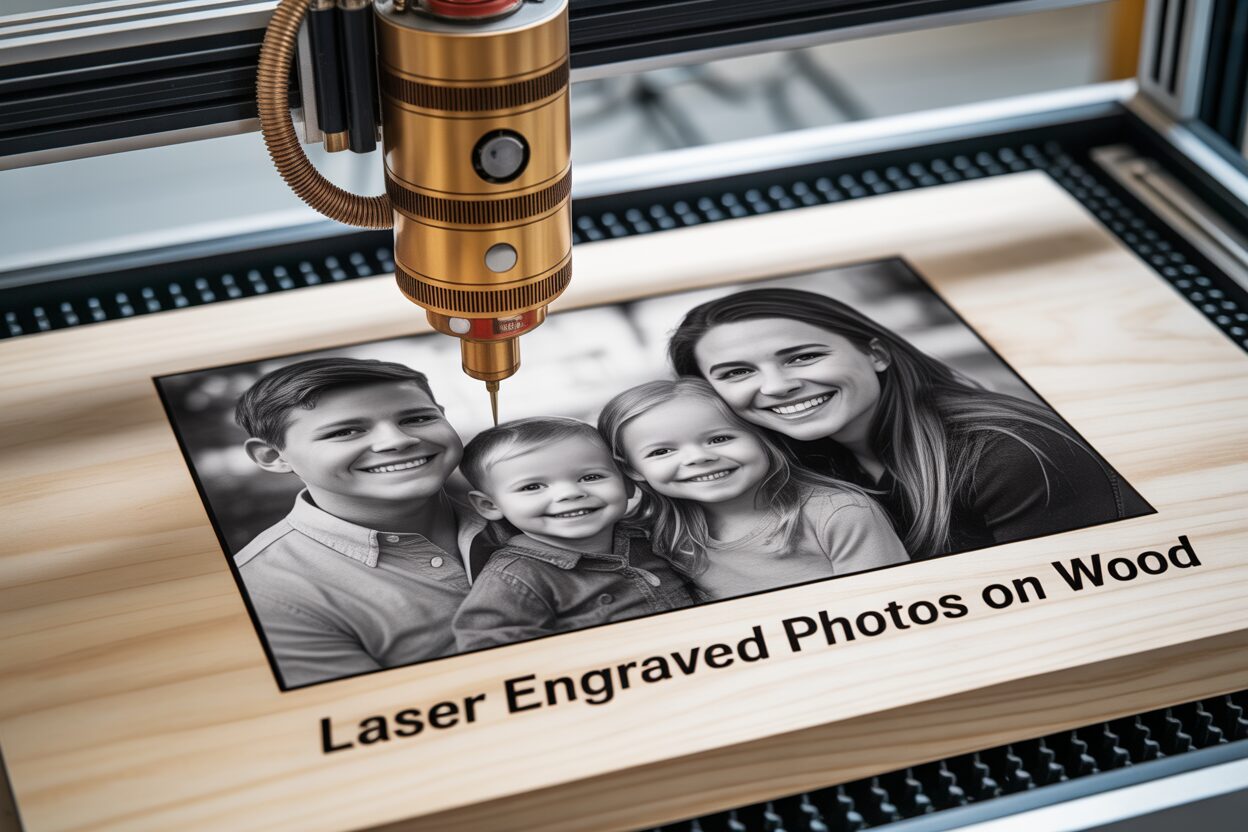
Mastering the Art of Laser Engraving Photos on Wood
Oct
Estimated reading time: 7 minutes
Key Takeaways
- Wood Selection is Crucial: The best results come from woods with a light, uniform color, a smooth grain, and low resin content. Baltic Birch Plywood and Maple are top choices for high-contrast, detailed engravings.
- Photo Preparation is Essential: Never send an unedited photo to the laser. Always start with a high-resolution image (300 DPI), convert it to grayscale, significantly increase its contrast, and apply a subtle sharpening filter.
- Master the Settings Triangle: The final quality depends on balancing Power, Speed, and DPI (Dots Per Inch). There is no universal setting; you must always run a test on a scrap piece of your chosen material to dial in the perfect parameters.
Table of Contents
- Selecting the Best Wood for Photo Engraving
- How to Prepare Your Photo for Laser Engraving
- Understanding Dithering: Translating Grays into Dots
- Essential Software and Laser Settings for Engraving
- Conclusions
- Frequently Asked Questions
Transform your favorite photographs into stunning works of art with photo engraving on wood. This detailed guide walks you through every step of the process, ensuring you can create beautiful, high-quality engraved wood photos. We’ll explore the best woods, photo preparation techniques, and the software you need to achieve professional results and create personalized masterpieces.
Selecting the Best Wood for Photo Engraving
The foundation of a stunning laser engraved photo is the wood itself. Far from being a passive canvas, your choice of material actively influences the final outcome, dictating the level of detail, contrast, and overall aesthetic of your piece. The laser doesn’t just draw on the wood; it burns into it, reacting with the wood’s unique properties. This interaction means that selecting the right wood is as crucial as perfecting your laser settings. The ideal wood for photo engraving possesses a specific set of characteristics: a light, uniform color for maximum contrast; a smooth, consistent grain that won’t interfere with the image’s details; and a low resin or sap content to ensure a clean, even burn without blotchy, unpredictable dark spots.
When searching for the perfect material, several options consistently stand out. Understanding how each one reacts to the laser will empower you to choose the best wood for laser engraving photos based on the specific look you want to achieve.
- Baltic Birch Plywood
Appearance: Valued for its very light, creamy color and exceptionally uniform surface. As an engineered wood, it lacks the prominent grain patterns found in solid hardwoods, providing a consistent canvas.
Laser Interaction: It engraves with remarkable consistency, producing a rich, dark brown to near-black burn that contrasts beautifully with its pale surface. The key is to source high-quality, void-free Baltic Birch, as internal glue pockets in lower-grade plywood can cause uneven engraving.
Final Result: Baltic Birch yields sharp, high-contrast photo engravings. Its predictable nature and affordability make it a fantastic choice for both beginners and professionals seeking reliable, striking results. - Basswood
Appearance: An exceptionally light-colored wood, often appearing almost white. It has a very fine, straight grain that is so subtle it’s nearly invisible, contributing to its smooth, uniform texture.
Laser Interaction: As a very soft wood, Basswood requires minimal laser power to achieve a beautiful, even burn. It produces a consistent, medium-brown tone without the harsh darkness of other woods, resulting in softer gradients. Its low sap content prevents blotching and ensures a clean engraving.
Final Result: Perfect for portraits and images that benefit from subtle shading and smooth tonal transitions. The final look is often compared to a classic sepia photograph, offering a gentle and refined aesthetic. Its only drawback is its softness, making it more susceptible to damage. - Cherry
Appearance: Renowned for its elegant, warm reddish-brown color and a fine, straight grain. Cherry wood has the unique quality of darkening gracefully over time, enriching the appearance of the engraved piece.
Laser Interaction: Cherry engraves with exceptional precision, capturing fine details beautifully. It produces a deep, rich, and dark burn that creates a subtle, lower-contrast effect compared to lighter woods. The result is less about stark black-and-white and more about sophisticated, tonal depth.
Final Result: This wood produces luxurious, heirloom-quality keepsakes. The engraved photo feels integrated into the wood, creating a warm, elegant piece where the natural beauty of the Cherry complements the image. - Maple
Appearance: A dense hardwood known for its light, creamy color and a durable surface with a very fine, subtle grain.
Laser Interaction: Its high density requires a bit more laser power, but it rewards the effort with incredibly crisp, clean, and dark lines. Maple is resistant to scorching, which means the laser burn is contained, preventing the “bleeding” that can soften details on other woods.
Final Result: Maple is a top-tier choice for high-definition photo engraving. The sharp contrast between its light surface and the dark, precise burn allows intricate details to shine, making it ideal for complex images. It is consistently ranked among the best materials for achieving professional, photo-realistic quality.
How to Prepare Your Photo for Laser Engraving
A masterpiece engraving begins long before the laser fires up; it starts with a meticulously prepared digital image. You cannot simply take a photo from your phone and send it to the laser expecting a perfect result. The fundamental difference between a digital display and a piece of wood is that a laser is a binary tool—it can either burn (on) or not burn (off). It cannot natively create the countless shades of gray you see on a screen. The entire process to prepare photo for laser engraving is about translating the continuous tones of your photograph into a format the laser can understand and beautifully replicate. The first and most critical rule is to always start with the highest resolution image possible. A blurry, low-resolution source file will inevitably lead to a muddy, indistinct engraving. Aim for an image that is at least 300 DPI (dots per inch) at the final size you intend to engrave.
With your high-quality image selected, it’s time to open your preferred editing software, such as the free GIMP or industry-standard Adobe Photoshop, and follow these essential steps:
- Convert to Grayscale: Your laser doesn’t see color, so the first step is to remove it. Converting your image to grayscale (often found under Image > Mode > Grayscale) allows you to see the image in terms of light and shadow, which is exactly how the laser will interpret it. This prevents misleading color values from influencing your edits.
- Adjust Brightness and Contrast: This is arguably the most crucial step. Photos that look great on a backlit screen often appear flat and washed out when engraved on wood. You need to exaggerate the tonal range. Use the “Levels” or “Curves” adjustment tools to make the light areas lighter and the dark areas darker. Don’t be afraid to push the brightest highlights (like the glint in an eye or sun on a cheek) to pure white, as this will translate to unburnt wood, creating a vital point of contrast. Deepen the shadows to ensure they receive a solid burn.
- Sharpen the Image: A subtle sharpening can significantly enhance the final result by defining edges. Use a tool like the “Unsharp Mask” filter. Apply it sparingly; the goal is to add crispness to details like hair, eyes, and textures, not to create harsh, unnatural outlines. Over-sharpening will result in a noisy, artifact-filled engraving.
Understanding Dithering: Translating Grays into Dots
After optimizing your image’s tones, you must address the laser’s binary nature. This is where dithering comes in. Dithering is a process that converts your grayscale image into a black-and-white pattern of dots. By varying the spacing and density of these tiny dots, the dithering algorithm creates the illusion of different shades of gray. Think of the photos in a classic newspaper—up close, you see individual dots, but from a distance, they merge into a coherent image with depth and shading. Most laser control software, like LightBurn, has built-in dithering options. You will typically upload your edited grayscale image and then select a dithering algorithm. Common choices include Jarvis, which is excellent for photos as it produces a smooth, natural-looking pattern, and Stucki or Floyd-Steinberg, which can produce slightly sharper but more structured results. The editing you did previously is vital because it provides the dithering algorithm with a clean, high-contrast image to work from, ensuring the final dot pattern accurately represents the details of your cherished memory.
Essential Software and Laser Settings for Engraving
With your digitally optimized image ready, the next step is to translate it into physical instructions your machine can execute. This is the job of your laser photo engraving software. This software acts as the crucial intermediary, taking your prepared image file (like a BMP, JPG, or PNG) and converting it into a complex set of commands, often called G-code, that dictates the laser head’s every move, power output, and speed. For most users, LightBurn is the gold standard. It’s a powerful, versatile program compatible with a wide range of lasers, offering extensive control over every parameter. For those starting with diode lasers, LaserGRBL is a popular free alternative that, while less feature-rich, is highly capable for photo engraving. Many consumer-grade machines also come with their own proprietary software (like the Glowforge UI or xTool’s Creative Space), which are designed for ease of use but may offer less granular control than dedicated programs like LightBurn. Regardless of the software you use, your success will hinge on mastering three core settings: Power, Speed, and DPI.
These three settings form a delicate triangle of variables; changing one will directly impact the others and the final result. Understanding their interplay is the key to moving from mediocre burns to stunning, high-detail laser engraved photos on wood.
- Power: This setting, usually expressed as a percentage (0-100%), controls the intensity of the laser beam. Higher power results in a darker, deeper burn. For photos, you rarely use 100% power, as this can lead to excessive charring, deep gouges, and a loss of subtle detail, turning shadows into black voids. The goal is to set a maximum power that produces a rich dark tone without over-burning the wood.
- Speed: This determines how quickly the laser head moves across the wood’s surface, typically measured in millimeters per minute (mm/min) or millimeters per second (mm/s). Speed works in opposition to power. A slower speed allows the laser to dwell on each spot for longer, resulting in a darker mark. A faster speed gives the laser less time to burn, producing a lighter mark. For detailed photos, a moderately fast speed is often preferred to prevent heat from bleeding into surrounding areas and blurring fine details.
- DPI (Dots Per Inch): Also known as Line Interval or LPI (Lines Per Inch), this setting controls the resolution of your engraving. It dictates how many lines the laser will engrave within one inch. A higher DPI (e.g., 300-600) places the lines very close together, creating a smoother, more photo-realistic appearance with seamless tonal transitions. However, high DPI also increases engraving time and puts more heat into the material, which can risk over-burning on sensitive woods. A lower DPI (e.g., 150-250) is faster but may result in visible horizontal “scan lines” in the final piece.
Finding the perfect balance for a specific wood is a process of refinement. As a starting point for a 10W diode laser on Maple or Baltic Birch, you might begin with settings like: Speed 3000 mm/min, Max Power 25%, and a DPI of 318. However, this is only a guess. The single most important rule in laser engraving is to always run a test on a scrap piece of the exact same material before engraving your final workpiece. Use a test grid or a small, detailed section of your photo to dial in your settings. If the test appears too dark and muddy, increase the speed or lower the power. If it’s too faint, decrease the speed. Mastering this calibration process is what elevates your work from a simple burn to a true work of art.
Conclusions
You now have the knowledge to create stunning laser engraved photos on wood. By selecting the right materials, carefully preparing your images, and fine-tuning your software settings, you can produce incredible, personalized pieces. Don’t be afraid to experiment with different woods and photos to perfect your technique. Start creating unique gifts and decor that will be cherished for years.
Frequently Asked Questions
Q: What is the single best wood for a beginner?
A: For beginners, Baltic Birch Plywood is an excellent choice. Its light color provides high contrast, its uniform surface ensures consistent results, and it is relatively affordable, making it perfect for practicing and perfecting your technique.
Q: Why can’t I just use a color photo for engraving?
A: A laser engraver does not see color; it only understands “burn” or “don’t burn.” Converting to grayscale is the first step in translating the image’s light and shadow information into a format the laser can work with. Without this step, the laser software may misinterpret colors, leading to unpredictable and poor-quality results.
Q: What is dithering and why is it important?
A: Dithering is a digital process that converts a grayscale image into a pattern of black and white dots. By varying the size and spacing of these dots, it creates the illusion of shades of gray. This is crucial for photo engraving because it’s the technique used to replicate the tonal range of your photo with a laser that can only operate in an on/off state.
Q: My engraved photos look muddy and dark. What am I doing wrong?
A: This is a common issue often caused by incorrect settings. Your laser power might be too high, your speed too slow, or both. This over-burns the wood, causing details in the darker areas to merge together. Try increasing your speed or lowering your maximum power. Always run a test on a scrap piece of wood to find the settings that produce a clean, detailed burn.

Subscribe to Our Newsletter
And enjoy FREE Download Files, SALE Alerts and Inspiring TIPS
Pricing Your Laser Engraving Work for Profitability
A Comprehensive Guide to Pricing Your Laser Engraving Services
A Comprehensive Guide on How to Price Laser Engraving Services
Charcuterie Board Engraving File – Wine & Grapes 3D Illusion…
$4.00Original price was: $4.00.$3.00Current price is: $3.00.(25% off)
Bee and Honey Jar Charcuterie Board Engraving File | PNG Download #007…
$4.00Original price was: $4.00.$3.20Current price is: $3.20.(20% off)
Valentine Love Captions: 6 Charcuterie Board Engraving Files…
$8.00Original price was: $8.00.$5.60Current price is: $5.60.(30% off)
American Eagle Flag Laser Engraving File for Charcuterie & Cutting…
$4.00Original price was: $4.00.$2.80Current price is: $2.80.(30% off)