

 Français
 Deutsch
 Español
 Italiano
Mastering Slate Coaster Engraving with Your Laser Machine
Jun
Estimated Reading Time
9 minutes
Key Takeaways
- Proper selection and preparation of slate coasters, focusing on surface evenness and thickness consistency, are fundamental for successful and consistent laser engraving results.
- Designing for slate requires understanding its subtractive nature, emphasizing high contrast, sufficient resolution (300 DPI), and robust file formats (vector for crispness), often simplifying intricate details.
- Optimal laser settings (power, speed, DPI) are crucial and unique to each slate batch and laser machine; thorough material testing grids are essential to prevent issues like chipping, faintness, or melting.
- Post-engraving cleaning and finishing, particularly with mineral oil or stone sealants, significantly enhance visual contrast and protect the slate, adding to the product’s longevity and appeal.
- For bulk or custom orders, employing jigs, sorting by thickness, and documenting successful settings are vital strategies for maintaining efficiency, consistency, and high-quality production.
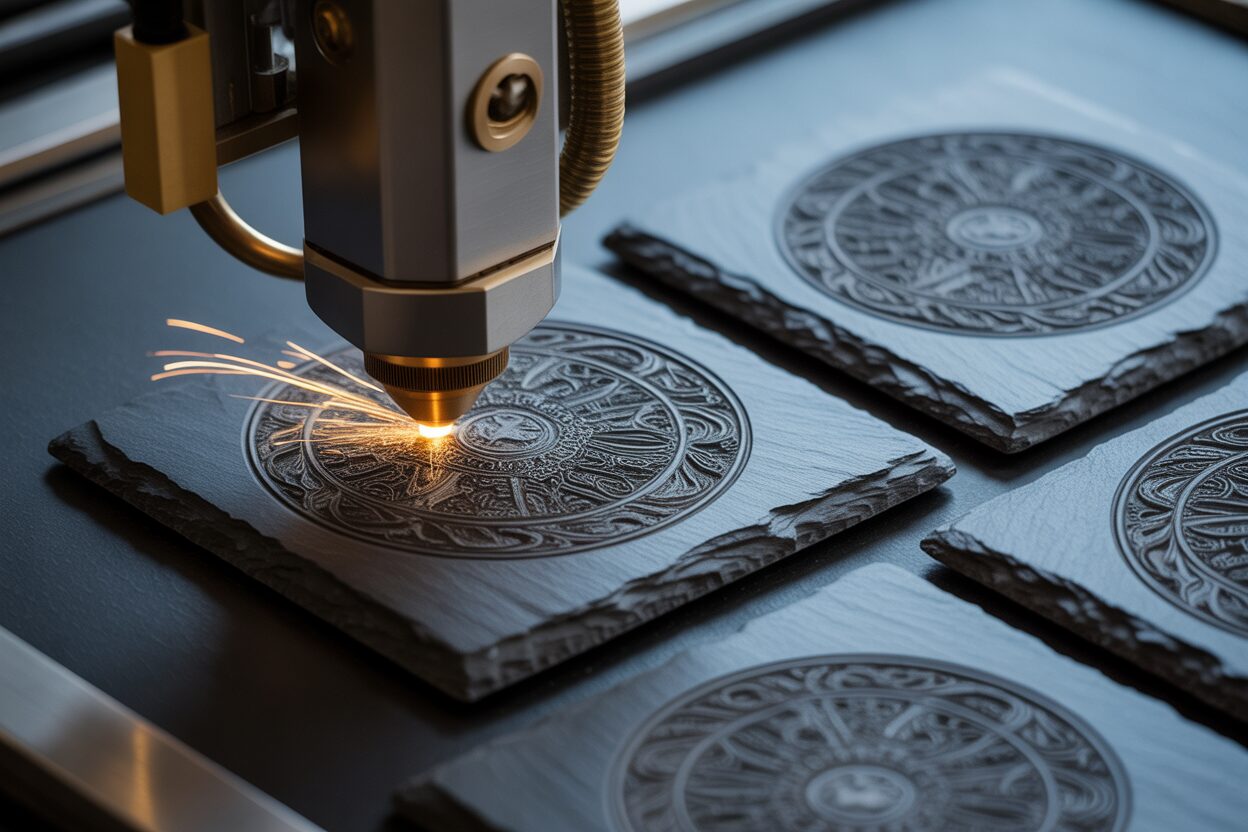
Explore the art of slate coaster engraving using your laser machine. This article delves into selecting the right slate coasters, preparing your designs, understanding optimal laser engraved slate coasters settings, and applying finishing techniques. Perfect for hobbyists looking to sell custom coasters or businesses expanding their slate coasters bulk offerings with unique, personalized products.
Choosing and Preparing Slate for Engraving
The foundation of any beautifully engraved slate coaster lies in the quality of the raw material. Selecting the right slate coasters is not merely about aesthetics; it directly impacts the engraving process and the final outcome. Variations in slate can lead to inconsistencies, frustrations, and wasted materials.
Key Selection Criteria for Slate Coasters
When sourcing your slate coasters, pay close attention to three primary factors: slate type (or rather, its characteristics useful for engraving), thickness, and, most critically, surface evenness. Most commercially available coasters are made from natural slate, a fine-grained metamorphic rock. While you generally don’t need to delve into geological specifics, look for slate that is relatively uniform in color and texture for consistent engraving results. Some slate has prominent mineral inclusions like pyrite (fool’s gold); while small flecks can add character, large inclusions can disrupt the laser beam, chip out during engraving, or cause uneven coloration in the engraved area. Examine the edges as well; cleanly cut or naturally chipped edges are common, but ensure they aren’t overly crumbly, which might indicate a lower quality or more fragile slate.
Thickness typically ranges from 4mm to 7mm (approximately 3/16 to 1/4 inch). Thicker coasters often feel more substantial and premium, but the most important aspect regarding thickness is consistency across a batch, especially when dealing with slate coasters bulk orders. Significant variations in thickness will require frequent refocusing of your laser, slowing down production. If possible, measure a sample of coasters from a potential supplier to gauge their consistency.
Surface evenness is arguably the most crucial factor for successful slate coaster engraving. Laser engravers have a very precise focal point. If the slate surface is uneven, warped, or has significant peaks and valleys (common with “natural cleft” slate), parts of your design will be out of focus. This results in blurry lines, inconsistent engraving depth, or areas where the laser doesn’t mark the slate at all. While a perfectly flat surface is ideal (often found in “honed” slate, which is smoother), natural cleft slate can still be used if the variations are minimal. Test this by placing a ruler or straight edge across the coaster’s surface; significant gaps indicate potential problems. For beginners, starting with honed or relatively flat slate coasters can reduce initial challenges.
Cleaning and Preparing Slate for Engraving
Proper preparation is essential before any slate coaster engraving takes place. Even brand-new coasters can harbor dust from cutting, oils from handling, or other residues that can interfere with the laser. A clean surface ensures the laser interacts directly and evenly with the slate, producing a crisp, clear engraving.
Your first step should be a gentle wipe-down. Use a soft, dry, lint-free cloth or a soft brush to remove any loose dust or particles. For more thorough cleaning, especially if you notice fingerprints or a slight sheen, lightly dampen a clean cloth with isopropyl alcohol (IPA) – a 70% solution works well – and gently wipe the surface. IPA is preferred because it cleans effectively and evaporates quickly without leaving a residue. Alternatively, a very mild soap and water solution can be used, but ensure the coasters are thoroughly rinsed to remove all soap and, crucially, completely dry before engraving. Any moisture on the slate can turn into steam when hit by the laser, potentially affecting the engraving quality or even slightly fogging your laser lens over time if not properly ventilated. Avoid harsh chemical cleaners or abrasive scrubbing, as these can damage the slate’s surface or leave residues that react negatively with the laser.
Managing Bulk Orders and Ensuring Consistency
When undertaking slate coasters bulk orders, efficiency and maintaining consistent quality across all engraved slate coasters are paramount. Begin by inspecting your shipment upon arrival. Spot-check coasters from various parts of the batch for consistency in color, size, thickness, and especially surface evenness. If you detect significant variations, particularly in thickness, consider sorting the coasters into groups. For instance, group coasters that are 4-5mm thick separately from those that are 5-6mm thick. This allows you to adjust the laser’s Z-axis (focus height) for each sub-batch, ensuring the engraving quality remains consistent. While this adds an extra step, it’s far better than discovering half your batch is poorly engraved due to focus issues. Always order a few extra coasters than needed for the actual order. These spares are invaluable for performing test engraves. Different batches of slate, even from the same supplier, can sometimes react differently to the laser. Dialing in your settings (power, speed, frequency) on a spare from the current batch before processing the entire lot will save you time, material, and potential headaches, leading to a batch of uniformly stunning engraved slate coasters.
Designing for Slate Coaster Engraving
The artistry of slate coaster engraving begins long before the laser beam touches the stone; it starts with a design thoughtfully crafted or adapted for the unique properties of slate. Unlike printing on paper where colors are added, laser engraving on slate is a subtractive process, typically lightening the dark surface to create contrast. This fundamental characteristic dictates many of the design choices you’ll make to achieve crisp, detailed, and impactful laser engraved slate coasters.
For optimal results, resolution and file format are key technical considerations. A resolution of at least 300 DPI (dots per inch) is generally recommended for slate coaster engraving, ensuring sharp details. While higher resolutions like 600 DPI can be used, the improvement may be marginal on slate’s natural texture and will significantly increase engraving time. The most common file formats are vector (SVG, AI, DXF, CDR) and raster (PNG, JPG, TIFF, BMP). Vector files are ideal for text, logos, and line art as they are mathematically defined and can be scaled infinitely without loss of quality, resulting in exceptionally crisp edges. Raster files, or bitmaps, are pixel-based and are suitable for photographs or complex images with gradients. When using raster images, ensure they are high enough resolution at the intended print size to avoid pixelation. Most laser software can import both types, but for designs combining text and graphics, creating the design in a vector program and exporting it in a compatible vector format is often preferred. Always convert text to paths or curves before exporting to avoid font substitution issues if the file is opened on a different system or sent directly to the laser controller.
Maximizing Visual Impact on Slate
When designing for slate coaster engraving, the goal is to create strong visual contrast between the engraved (lighter) areas and the unengraved (darker) slate. This means bold designs often work best. Think in terms of positive and negative space; sometimes, engraving the background and leaving the subject in the natural dark slate can be very effective. Thin lines or very delicate details can be problematic. Lines thinner than 0.1mm to 0.2mm (depending on your laser’s spot size and slate quality) might not engrave cleanly or could disappear against the slate’s texture. Similarly, small, intricate details can become muddled or chip out, especially on more heavily textured slate. It’s often better to simplify complex designs, thickening lines and increasing the space between design elements. When working with grayscale images for photographic reproduction, understand that the laser translates shades of gray into varying densities of engraved dots or lines. Previewing how your software will dither the image (convert continuous tones into engravable patterns) is crucial. Common dithering algorithms like Floyd-Steinberg or Jarvis can produce good results, but test engraves are essential to fine-tune how these translate to the actual slate coaster. Avoid large solid areas of engraving if you want a completely uniform lightened area, as slight variations in the slate can sometimes show through; patterned fills or textured engravings can be more forgiving and visually interesting for large fills. Ensure your design stays within the usable area of the coaster, leaving a small margin from the edge, particularly if the edges are naturally chipped, to avoid engraving over uneven surfaces at the very periphery.
Crafting Unique Custom Coasters
Creating custom coasters with personalized text or imagery is a popular application for slate coaster engraving. For text-based designs, font selection is paramount. Choose fonts that are clear and legible even at smaller sizes. Sans-serif fonts (like Arial, Helvetica) or sturdy serif fonts (like Times New Roman, Georgia, if bold enough) generally engrave well. Avoid overly ornate script fonts with very thin strokes, as these can be difficult to read and may not engrave reliably unless scaled quite large. Always consider the overall size of the coaster, typically around 4×4 inches (10×10 cm), and ensure your text is large enough to be easily readable.
When preparing photographs or complex images for slate coasters, conversion to grayscale is the first step. You’ll then need to dither the image. Most laser software or graphics programs (like GIMP or Photoshop) offer dithering options. Experiment with different dithering methods (e.g., Stucki, Jarvis, Floyd-Steinberg) and DPI settings to see what produces the best tonal range and detail on your specific slate with your laser. High-contrast images with well-defined subjects tend to translate better to slate than images with subtle gradients or very dark subjects. Pre-processing the image to enhance contrast or sharpen details before dithering can significantly improve the final engraved slate coaster. For all custom designs, especially those from customers, create a digital mockup showing the design placement on the coaster shape (square, round) for approval. This, combined with a test engrave on a spare coaster using the exact material batch, ensures the final product meets expectations and that your engraved slate coasters are consistently high quality.
Optimal Laser Settings and Engraving Techniques
Achieving crisp, high-contrast slate coaster engraving hinges on meticulously dialing in your laser settings. While specific values will vary based on your laser machine’s wattage, tube type (CO2 being most common for slate), lens, and the exact nature of the slate, understanding the interplay between power, speed, and resolution (DPI/PPI) is crucial. As a general starting point for a 40-60W CO2 laser, you might begin testing with low power (e.g., 10% to 25%), moderate to high speed (e.g., 200mm/s to 500mm/s), and a DPI around 250-300. Slate engraves by ablating the surface material, creating a lighter mark. The aim is a bright white or light gray mark without causing excessive heat buildup that can lead to melting or overly fragile engraved areas.
Always perform a material test grid on a spare coaster from the current batch before committing to a full run. This involves engraving a series of small squares or shapes with varying power and speed combinations. This test will visually show you the sweet spot for achieving the desired contrast and clarity. For DPI/PPI (dots per inch/pixels per inch), 250-300 DPI is often sufficient for clean vector lines and text on laser engraved slate coasters. For photographic engravings, you might experiment with higher DPI settings in conjunction with appropriate dithering, but be mindful that higher DPI increases engraving time and can concentrate more heat, potentially increasing the risk of chipping.
Adapting Settings and Troubleshooting Common Issues
The optimal settings for slate coaster engraving are not static. They will need adjustment based on the slate’s individual characteristics. Darker, denser slate might require slightly more power or a slower speed to achieve a bright engrave. Conversely, lighter colored or more friable slate may benefit from lower power and faster speeds to prevent blowout or excessive chipping. If you desire a deeper, more tactile engrave, you’ll lean towards higher power or slower speed, being careful not to over-engrave.
Common issues encountered during laser engraved slate coasters production often include:
- Uneven Engraving: This is frequently a focus problem. Ensure your slate piece is perfectly flat and at the correct focal distance across its entire surface. Warped coasters or an unlevel laser bed are common culprits. Use a jig to ensure consistent height. Variations within the slate material itself can also cause minor inconsistencies.
- Chipping or Flaking: This usually indicates too much energy is being delivered. Try reducing laser power, increasing speed, or lowering the DPI. Very fine details or sharp internal corners in a design are also more prone to chipping. Moderate air assist is generally recommended; too strong a jet can sometimes worsen chipping on delicate areas, while too little allows debris to interfere.
- Faint or Washed-Out Engraving: This suggests insufficient energy. Increase power, decrease speed, or check that your focus is spot-on. Dirty optics (lens and mirrors) can also significantly reduce the laser’s effective power, so maintain a regular cleaning schedule.
- Melted or Glassy Appearance: The slate surface has become too hot. Reduce power, increase speed, or potentially lower DPI to reduce heat concentration.
Efficiency and Consistency for Bulk and Custom Orders
When producing slate coasters bulk quantities, efficiency and consistency are key. Once your settings are dialed in from your test grid, creating a jig is highly recommended. A jig allows you to place multiple slate coasters onto the laser bed in precisely the same position every time, drastically reducing setup time between runs and ensuring consistent design placement. For very large orders, if you notice variation in coaster thickness within your bulk supply (as discussed in the previous chapter), pre-sorting them into batches of similar thickness can save time by allowing you to adjust focus once for each sub-batch rather than for individual coasters.
For custom coasters, particularly those involving personalized names or unique graphics, maintaining quality control requires careful attention. Always use the settings proven effective for that specific type or batch of slate. Before starting a new custom job, especially with intricate art or new fonts, engrave a quick test on a spare coaster. This confirms that the design details translate well and that the settings remain optimal. Documenting your successful settings (machine, power, speed, DPI, material type, even supplier batch number if possible) creates a valuable reference library that will speed up future orders of engraved slate coasters and ensure the professional results your clients expect. Regular cleaning of your laser’s optics, especially during long production runs, is critical for maintaining consistent engraving quality from the first coaster to the last.
Finishing and Protecting Your Engraved Slate Coasters
Once your laser has worked its magic and the slate coaster engraving is complete, a few crucial steps remain to transform your raw engravings into polished, professional products. These finishing touches not only enhance the visual appeal of your laser engraved slate coasters but also protect them, ensuring longevity and customer satisfaction.
The first order of business after the engraving process is thorough cleaning. The laser ablation process generates fine slate dust and residue that will cling to the coaster’s surface, obscuring the engraving’s true crispness and potentially feeling gritty to the touch. Begin by GENTLY brushing off loose debris with a very soft brush or using a low-pressure air compressor to blow it away. Be careful not to use an overly stiff brush or extremely high air pressure, which could potentially chip delicate engraved areas, especially if your design has very fine details. For a more thorough clean, wipe the engraved slate coasters with a clean, damp, lint-free cloth. Plain water is often sufficient. If there’s stubborn residue, you can use a cloth lightly dampened with isopropyl alcohol (IPA), which evaporates quickly without leaving streaks. Alternatively, a very mild solution of dish soap and water can be used; however, if you opt for this, ensure you rinse the coasters thoroughly with clean water to remove all soap residue and then allow them to dry completely. Never use abrasive cleaners or scouring pads, as these will scratch the slate.
Enhancing Contrast and Providing Protection
With the coasters clean, you can consider applying a finish. This step is highly recommended as it dramatically enhances the contrast of the engraving – making the light engraved areas pop against a richer, darker background – and offers a degree of protection.
- Food-Safe Mineral Oil: This is a very popular and effective choice for slate coasters. Applying a thin coat of food-safe mineral oil significantly darkens the unengraved slate, thereby increasing the visual contrast with the lighter engraved portions. It also gives the slate a subtle, attractive sheen and provides some resistance to water spots and stains. To apply, pour a small amount of oil onto a clean cloth and rub it evenly over the entire surface of the coaster, including the edges. Let it soak in for 10-20 minutes, then buff off any excess oil thoroughly with a fresh, clean, lint-free cloth. The coasters should not feel greasy. This finish is easy to reapply if needed over time.
- Stone Sealants: For more robust protection against moisture and staining, various stone sealants are available. These can be spray-on or wipe-on and come in different finishes, such as matte, satin, or gloss. A matte or satin finish is often preferred for slate as it maintains a more natural look while still providing protection. Ensure the sealant is food-safe if there’s a concern about direct contact, though for coasters, this is less critical than for items like cutting boards. Always test any sealant on a scrap piece of slate first to see how it alters the appearance and ensure you’re happy with the result. Apply according to the manufacturer’s instructions, typically in thin, even coats, allowing for proper drying time between coats if multiple are required. Good ventilation is essential when working with spray sealants.
- No Finish: Some creators prefer the completely natural, raw look of the engraved slate. While this is aesthetically valid, be aware that unfinished coasters will be more susceptible to staining and water marks.
Packaging Your Masterpieces
The final step is packaging your custom coasters or slate coasters bulk orders. Thoughtful packaging not only protects the coasters during transit or until use but also adds to the perceived value and professionalism of your product. Before packaging, ensure each coaster has protective feet (cork or foam dots) on the underside to prevent scratching furniture; this is a small detail that customers greatly appreciate. For individual sets, consider tying them with twine or a ribbon and placing them in a small gift box or a clear cellophane bag. Including a small care card with instructions (e.g., “Wipe clean with a damp cloth,” “Not dishwasher safe,” “Re-oil occasionally if oiled”) is a nice touch. For slate coasters bulk orders, ensure coasters are interleaved with thin foam sheets, paper, or bubble wrap to prevent chipping and scratching during shipping. Pack them snugly in sturdy boxes to prevent movement. The weight of slate adds up quickly, so robust packaging is essential to ensure your beautifully engraved slate coasters arrive at their destination in perfect condition.
Conclusions
Slate coaster engraving offers a fantastic opportunity to create personalized and marketable products. By mastering material selection, design preparation, and laser settings for slate coasters, you can produce high-quality engraved slate coasters. Whether for custom coasters as gifts or for slate coasters bulk sale, these tips will help you achieve professional and appealing results, enhancing your craft and business potential.
FAQ
Q: What type of slate is best for laser engraving?
A: Natural slate that is relatively uniform in color, texture, and especially surface evenness is ideal. Honed slate offers a flatter surface, while natural cleft slate can be used if variations are minimal. Avoid slate with large mineral inclusions or crumbly edges.
Q: What file formats and resolution are recommended for slate coaster designs?
A: For crisp text and line art, vector formats (SVG, AI, DXF) are best. For photos or complex images, raster formats (PNG, JPG, TIFF) at a minimum of 300 DPI are recommended. Always convert text to paths/curves in vector files.
Q: How do I prevent chipping or uneven engraving on slate coasters?
A: Chipping often indicates too much laser energy; try reducing power, increasing speed, or lowering the DPI. Uneven engraving is usually a focus problem; ensure the slate is perfectly flat and at the correct focal distance, or use a jig for consistent placement.
Q: What’s the best way to clean slate coasters after engraving?
A: Gently brush off loose dust first. Then, wipe with a clean, damp, lint-free cloth. For stubborn residue, use isopropyl alcohol (IPA) or a very mild soap and water solution, ensuring thorough rinsing and complete drying before any further processing.
Q: How can I enhance the contrast and protect engraved slate coasters?
A: Food-safe mineral oil is highly recommended to significantly darken the unengraved slate, making the light engraving pop, and offering water resistance. Alternatively, various stone sealants can provide more robust protection. Always test any finish on a scrap piece first to ensure desired results.

Subscribe to Our Newsletter
And enjoy FREE Download Files, SALE Alerts and Inspiring TIPS
A Comprehensive Guide to Pricing Your Laser Engraving Services
A Comprehensive Guide on How to Price Laser Engraving Services
How to Price Your Laser Engraving and Cutting Services
Charcuterie Board Engraving File – Wine & Grapes 3D Illusion…
$4.00Original price was: $4.00.$3.00Current price is: $3.00.(25% off)
Bee and Honey Jar Charcuterie Board Engraving File | PNG Download #007…
$4.00Original price was: $4.00.$3.20Current price is: $3.20.(20% off)
Valentine Love Captions: 6 Charcuterie Board Engraving Files…
$8.00Original price was: $8.00.$5.60Current price is: $5.60.(30% off)
American Eagle Flag Laser Engraving File for Charcuterie & Cutting…
$4.00Original price was: $4.00.$2.80Current price is: $2.80.(30% off)