

 Français
 Deutsch
 Español
 Italiano
Mastering Laser Cutting for Wood Projects
Jul
Estimated reading time: 12 minutes
Key Takeaways
- Laser cutting wood offers unparalleled precision and efficiency for intricate designs, transforming raw wood into artistic and functional pieces.
- The choice between Diode and CO2 lasers depends on project needs: Diode for hobbyists and thin materials, CO2 for power, speed, and thicker/harder woods.
- Optimal laser cutter settings (power, speed, focus, air assist) are crucial for clean cuts and engravings, requiring calibration for different wood types.
- Effective laser cut wood designs require vector software, consideration of kerf, and material-specific optimization.
- Proper material selection (plywood, hardwoods, softwoods) and finishing techniques (sanding, gluing, protective coats) enhance durability and aesthetic appeal.
Table of Contents
- Understanding Laser Technology for Wood
- Diode Laser Wood vs. CO2 Laser Wood: A Comparative Analysis
- Suitability for Specific Wood Types and Project Needs
- Essential Laser Cutter Wood Settings for Optimal Results
- Mastering Power and Speed for Precision
- Focus and Air Assist: The Finer Details
- Optimizing for Various Wood Densities and Finishes
- Creative Applications and Design Considerations for Wood
- Developing Effective Laser Cut Wood Designs
- Material Selection for Specific Projects
- Assembly and Finishing Techniques
- Conclusions
- FAQ Section
Laser cutting wood has revolutionized woodworking, offering unparalleled precision and efficiency for intricate designs. This guide explores various laser types, essential settings, and creative approaches to transform raw wood into stunning artistic and functional pieces, incorporating the nuances of both cutting and engraving.
Understanding Laser Technology for Wood
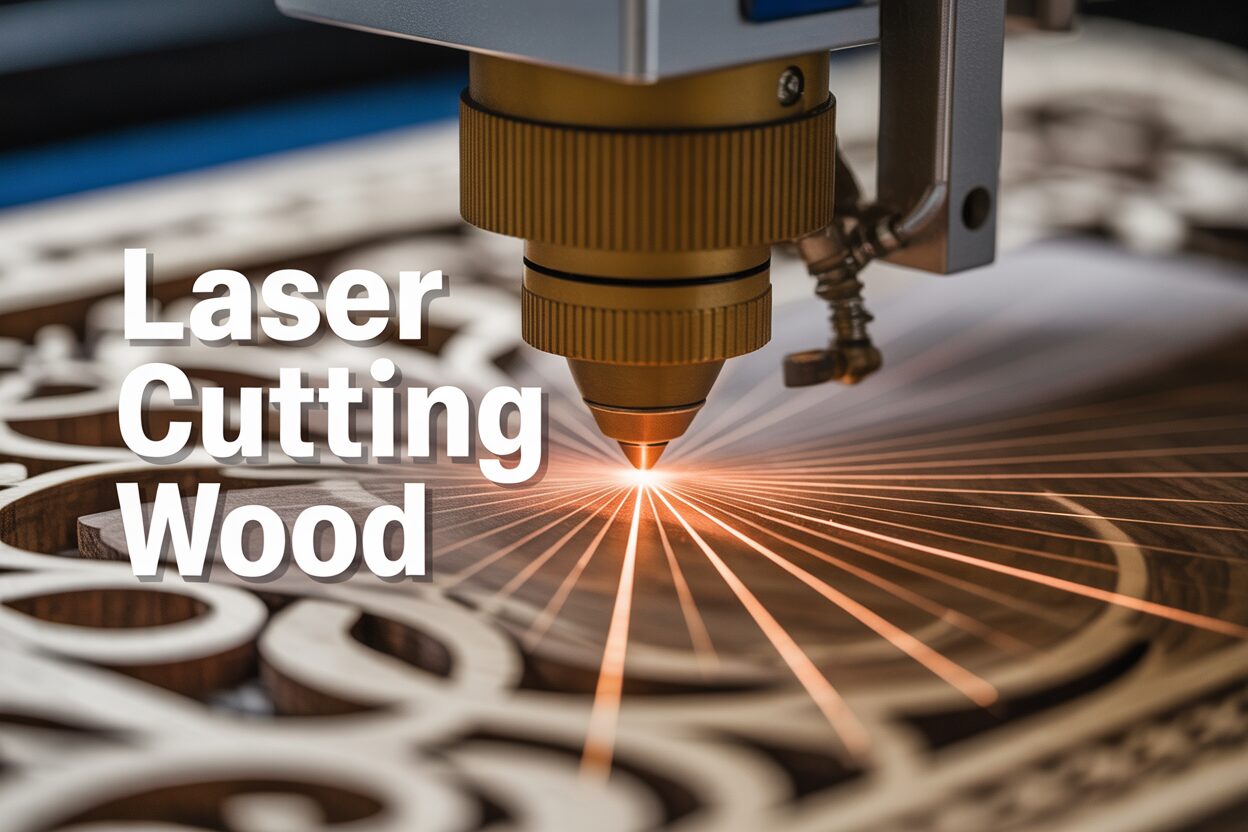
Delving into the core of how laser cutters transform raw wood into intricate designs requires a foundational understanding of the physics at play. Laser cutting relies on a highly focused beam of coherent light to vaporize or ablate material. When this intense energy interacts with wood, the rapid increase in temperature causes the wood fibers to instantaneously turn into gas, creating a clean cut or precise engraving. The process is remarkably controlled, allowing for unparalleled accuracy that hand tools simply cannot match. Unlike traditional cutting methods that involve mechanical force, laser cutting is a non-contact process, which minimizes material stress and prevents splintering or deformation, especially with delicate wood types. The kerf, or the width of the cut, is incredibly fine, often less than a hair’s breadth, enabling the creation of intricate patterns and tight tolerances for interlocking parts. The heat-affected zone (HAZ) is typically very small, leading to minimal discoloration or charring around the cut line, although this can vary significantly depending on the laser type, power settings, and wood species. Furthermore, the ability to control beam intensity, speed, and focal point provides immense versatility, allowing users to switch seamlessly between cutting through thick stock and delicately engraving detailed images onto the surface.
Diode Laser Wood vs. CO2 Laser Wood: A Comparative Analysis
When selecting a laser cutter for wood projects, the choice often boils down to two primary technologies: Diode Laser Wood and CO2 Laser Wood. While both employ the fundamental principles of laser cutting, their distinct characteristics make them suitable for different applications and project needs. Understanding these differences is crucial for maximizing efficiency and achieving desired outcomes.
Diode Lasers for Wood Projects
Diode lasers are solid-state lasers that typically emit light in the visible blue or infrared spectrum, with common wavelengths around 450nm (blue) or 808nm/980nm (infrared). For wood applications, the blue diode lasers are particularly effective. Their shorter wavelength leads to a higher absorption rate by organic materials like wood, making them efficient for both cutting and engraving. Diode lasers are generally more compact, energy-efficient, and significantly more affordable than their CO2 counterparts, making them an attractive entry point for hobbyists and small workshops. They are well-suited for engraving intricate details, shading, and photographic images onto various wood types, including softer woods like balsa, pine, and poplar, as well as some hardwoods up to a certain thickness. For cutting, they excel with thinner materials, typically up to 3-6mm depending on the laser’s power and wood density. Their ability to engrave with very fine resolution also makes them ideal for personalized gifts, decorative items, and detailed signage. However, their power output is generally lower than CO2 lasers, which means slower cutting speeds and limitations on the thickness of material they can process effectively. They also typically struggle with very dark woods or woods with high moisture content, as these can absorb the laser energy less efficiently.
CO2 Lasers for Wood Projects
CO2 lasers, on the other hand, operate in the infrared spectrum at a wavelength of 10.6 micrometers. This wavelength is highly absorbed by organic materials and is the go-to choice for serious wood cutting and engraving applications. CO2 lasers are significantly more powerful, ranging from 30W for hobbyist models to hundreds of watts for industrial machines. This higher power translates directly into faster cutting speeds and the ability to cut much thicker wood, often exceeding 1/2 inch or even 1 inch with multiple passes. They are exceptionally versatile, capable of effortlessly cutting through a vast array of wood types, from softwoods to challenging hardwoods like oak, maple, and walnut, and even plywoods and MDF. For engraving, CO2 lasers produce excellent results, creating deep, consistent markings and various shades by adjusting power and speed. They are the preferred choice for production environments, demanding intricate cutting of larger pieces, or working with thicker stock for furniture components, architectural models, and various woodworking jigs. The main drawbacks are their higher cost, larger footprint, and the need for more robust cooling systems, typically water-cooled, to maintain optimal performance. They also tend to have a larger beam spot size compared to diode lasers, which can sometimes limit the absolute finest detail in engraving, though this is often negligible for most applications.
Suitability for Specific Wood Types and Project Needs
The choice between diode laser wood and CO2 laser wood largely hinges on the specific wood types you’ll be working with and the demands of your projects. For casual engraving on thinner, softer woods like birch plywood, balsa, or pine, and for learning the fundamentals of laser operation, a diode laser offers an economical and effective entry point. It’s excellent for crafting small decorative items, personalized tags, or intricate stencils. However, if your ambition includes cutting through thicker hardwoods like oak for joinery, creating complex wooden gears, or running a small production line for custom wooden signs or artistic panels, the speed, power, and versatility of a CO2 laser become indispensable. CO2 lasers also handle a wider range of engineered wood products, such as MDF and various plywood composites, with greater efficiency and cleaner cuts. The distinct benefits of each technology allow woodworkers to choose a laser cutter that precisely aligns with their creative vision and practical requirements, ensuring optimal results and a rewarding experience in this precision-driven craft.
Essential Laser Cutter Wood Settings for Optimal Results
Achieving pristine cuts and detailed engravings on wood with your laser cutter is less about brute force and more about intelligent calibration. The fundamental principle is to find the perfect synergy between power, speed, focus, and air assist. These Laser Cutter Wood Settings are interdependent; changing one often necessitates adjustments to the others to maintain desired outcomes. Understanding their individual roles and how they interact is paramount to transforming raw material into a masterpiece. The inherent variability of wood – its density, grain direction, moisture content, and finish – means that a universal “perfect setting” simply doesn’t exist. Instead, a methodical approach involving test cuts and iterative adjustments is essential for each new project or wood type. Proper calibration not only ensures aesthetic quality but also maximizes machine efficiency and prolongs the life of consumable components like lenses and mirrors by preventing unnecessary heat buildup or power output.
Mastering Power and Speed for Precision
Power dictates the intensity of the laser beam, directly correlating to how much material is vaporized per unit of time. For cutting, higher power generally means faster cutting speeds or the ability to cut thicker materials. However, excessive power can lead to unwanted charring, wider kerf, and a significant heat-affected zone (HAZ), potentially discoloring the surrounding wood. For engraving, power controls the depth and darkness of the mark. Too much power can burn through thin materials or create an overly deep, brittle engraving, while too little power results in a faint or inconsistent mark.
Speed refers to how quickly the laser head moves across the material. For cutting, slower speeds allow the laser more time to ablate the material, enabling deeper cuts or complete penetration. Faster speeds are used for shallower cuts or for engraving, where less material removal is desired. When engraving, speed also influences the density of the etched lines, affecting the perceived darkness and detail. A high speed combined with high power can still result in a through-cut, while a low speed with low power might only create a superficial etch. The key is to find the “sweet spot” where enough energy is imparted to the wood for efficient material removal without causing detrimental effects. This balance is particularly critical for preventing charring, which often occurs when the laser dwells too long in one spot, overheating the wood fibers. A good starting point for preventing charring is to increase speed while gradually increasing power until the desired cut depth or engraving darkness is achieved. For challenging woods, multiple passes at lower power settings can often yield cleaner results than a single, high-power pass, as it allows heat to dissipate between passes.
Focus and Air Assist: The Finer Details
Focus is perhaps the most critical yet often overlooked setting for achieving optimal results. The laser beam, as it exits the lens, converges to a pinpoint at its focal point. This is where the energy density is highest and where the most efficient cutting and engraving occur. An improperly focused beam will result in a wider, less intense spot, leading to inefficient material removal, rougher edges, and increased charring. For cutting, the focal point is typically set at or slightly below the surface of the material, allowing the beam to penetrate efficiently. For engraving, the focal point is usually set precisely on the surface to ensure sharp detail. Achieving perfect focus involves accurately measuring the distance from the laser lens to the material surface, often using a calibration tool like a focus gauge or by manually adjusting until the smallest, most intense dot is observed during a low-power test fire.
Air Assist involves directing a stream of compressed air directly at the laser’s point of interaction with the material. This serves several vital functions. Firstly, it blows away smoke, debris, and vaporized wood particles from the cutting path, preventing them from scattering and redepositing on the material’s surface (which causes discoloration or “smoke staining”) or on the laser lens (which reduces efficiency and can damage the lens over time). Secondly, and equally important for cut quality, it cools the cutting area, dramatically reducing the likelihood of charring and burning along the cut edges. The air assist effectively extinguishes embers and dissipates excess heat, leading to cleaner, sharper edges. For engraving, air assist is also beneficial for maintaining a clean surface and preventing smoke from obscuring detail. The intensity of the air assist can typically be adjusted, with higher pressure generally preferred for cutting to maximize particulate removal and cooling, and slightly lower pressure for delicate engraving to avoid scattering fine detritus onto the engraved area.
Optimizing for Various Wood Densities and Finishes
The inherent properties of wood greatly influence how it interacts with the laser. Softer woods like balsa or pine require less power and higher speeds to prevent excessive burning, while dense hardwoods such as oak or maple demand more power and slower speeds for complete cuts. Plywoods, with their alternating grain directions and adhesive layers, present a unique challenge, often requiring slightly more power and careful air assist to manage adhesive residue. Coated or finished woods also react differently; the coating might burn or melt before the wood itself, necessitating adjustments. Experimentation with test swatches of each new material is highly recommended to dial in the perfect Laser Cutter Wood Settings. This iterative process of running small test patterns, adjusting parameters, and evaluating the results is the most reliable path to achieving consistently clean cuts, precise engravings, and overall optimal outcomes for any wood project.
Creative Applications and Design Considerations for Wood
The laser cutter transcends its role as a mere cutting tool; it becomes a catalyst for unleashing unprecedented creativity in woodworking. From transforming flat sheets of material into intricate 3D sculptures to personalizing everyday objects with exquisite detail, the possibilities are virtually limitless. The precision of laser technology opens doors to designs previously unattainable by traditional means, allowing for incredibly fine lines, complex geometric patterns, and perfect interlocking joints. Whether you’re crafting decorative art, such as ornate wall hangings, intricate mandalas, or multi-layered relief sculptures, or developing highly functional items like custom storage boxes, jigs, or charcuterie boards with embedded designs, the laser elevates the aesthetic and functional value of your creations. The ability to both cut and engrave on the same machine further expands the creative palette, enabling the creation of pieces that combine structural integrity with stunning surface embellishments, making each project a testament to the versatility of laser-cut wood. This seamless integration of processes streamlines the workflow, moving from design concept to finished product with remarkable efficiency.
Developing Effective Laser Cut Wood Designs
Before launching into physical production, thoughtful design is paramount. Effective Laser Cut Wood Designs begin with a clear understanding of the laser’s capabilities and limitations, as well as the inherent properties of wood. Design software plays a crucial role in translating your ideas into laser-ready files. Vector-based programs such as Adobe Illustrator, CorelDRAW, Inkscape (free), or specialized CAD software like AutoCAD or Fusion 360 are ideal for creating cut lines, while raster-based programs like Adobe Photoshop can be used for preparing images for Wood Engraving. When designing for cutting, ensure all lines are vector paths. Pay close attention to corner radii; lasers cut with a round beam, so perfectly sharp interior corners are not possible. Consider the kerf (the width of the laser cut) in your designs, especially for interlocking parts, where precise tolerances are critical for a snug fit without excessive sanding or glue. For engraving, differentiate between vector engraving (etching lines) and raster engraving (filling areas), as these require different settings and produce distinct visual effects. Experiment with varying shades and depths in Wood Engraving by manipulating laser power and speed, as discussed in the previous chapter, to add dimensionality and texture to your designs. Design for material optimization by nesting multiple parts efficiently within your stock, minimizing waste. Always save your designs in a format compatible with your laser cutter’s software, commonly .SVG, .DXF, .AI, or .PDF.
Material Selection for Specific Projects
The choice of wood significantly impacts the final look and feel of your laser-cut project.
- Plywoods (like Baltic Birch or Poplar plywood) are popular due to their stability, relatively low cost, and consistent thickness, making them excellent for intricate cuts and structural components, though glues can sometimes cause more charring.
- Solid Hardwoods (e.g., maple, cherry, walnut) offer superior aesthetic appeal with their rich grain patterns. They engrave beautifully, leading to high-contrast marks, but can be more challenging to cut cleanly, potentially requiring more power and air assist.
- Softer Woods (e.g., balsa, basswood, pine) are easy to cut and engrave quickly, making them suitable for prototyping, delicate models, or quick decorative pieces, but they are more prone to charring if settings aren’t dialed in precisely.
Consider the natural color and grain of the wood when planning your Wood Engraving. Lighter woods often provide higher contrast for raster engravings, while darker woods can yield subtle, elegant results. For functional items like charcuterie boards, choose food-safe woods and finishes, and ensure your design accounts for practical elements like handles or juice grooves. For decorative art, consider combining different wood types or incorporating inlays created by cutting contrasting wood pieces.
Assembly and Finishing Techniques
Once your pieces are cut and engraved, proper assembly and finishing enhance both durability and aesthetic appeal. For assembled items like boxes, finger joints or tab-and-slot designs are common for their strength and ease of alignment. Wood glues (e.g., Titebond, wood PVA glues) are typically used for strong bonds. For charring prevention, careful Laser Cutter Wood Settings (as previously discussed, especially air assist) are key. However, if charring does occur, light sanding with fine-grit sandpaper (220-400 grit) can effectively remove surface char and smoke stains. For intricate designs where sanding is difficult, wiping with denatured alcohol or a damp cloth can sometimes help lift surface residue, but always test on a scrap piece first. Finishing your laser-cut wood pieces protects them and brings out their natural beauty. Options include clear coats (lacquer, polyurethane, shellac) for a durable protective layer, oils (Tung oil, Danish oil) for a natural, hand-rubbed look, or stains to alter the wood’s color. For engraved areas, applying a thin coat of finish can deepen the color contrast of the engraving. Always ensure adequate ventilation during finishing, especially when using solvent-based products. By thoughtfully combining design, material selection, and post-processing, you can elevate your laser-cut wood projects from simple cuts to stunning pieces of functional art.
Conclusions
Mastering laser cutting for wood opens up a world of creative possibilities, from intricate designs to functional art. By understanding the different laser types, optimizing settings, and exploring diverse design applications, you can elevate your woodworking projects and achieve professional-quality results with precision and efficiency.
FAQ Section
Q: What are the main differences between Diode and CO2 lasers for wood?
A: Diode lasers are more compact, energy-efficient, and affordable, ideal for hobbyists and engraving on thinner, softer woods (up to 3-6mm). CO2 lasers are significantly more powerful, faster, and capable of cutting much thicker (1/2 inch to 1 inch) and harder woods, suitable for production environments and diverse material types like plywood and MDF.
Q: Why are power, speed, focus, and air assist important laser settings?
A: These settings are interdependent and crucial for optimal results. Power dictates intensity and depth, speed controls material removal rate, focus ensures the beam’s highest energy density for efficiency and detail, and air assist prevents charring, smoke staining, and keeps the lens clean.
Q: How do different wood types affect laser cutting and engraving?
A: Wood density, grain, and finish significantly impact laser interaction. Softer woods need less power/higher speed to prevent charring, while dense hardwoods require more power/slower speed for complete cuts. Plywoods, with their alternating grain directions and adhesive layers, present a unique challenge, often requiring slightly more power and careful air assist to manage adhesive residue. Experimentation with test swatches is vital for each new material.

Subscribe to Our Newsletter
And enjoy FREE Download Files, SALE Alerts and Inspiring TIPS
Pricing Your Laser Engraving Work for Profitability
A Comprehensive Guide to Pricing Your Laser Engraving Services
A Comprehensive Guide on How to Price Laser Engraving Services
Charcuterie Board Engraving File – Wine & Grapes 3D Illusion…
$4.00Original price was: $4.00.$3.00Current price is: $3.00.(25% off)
Bee and Honey Jar Charcuterie Board Engraving File | PNG Download #007…
$4.00Original price was: $4.00.$3.20Current price is: $3.20.(20% off)
Valentine Love Captions: 6 Charcuterie Board Engraving Files…
$8.00Original price was: $8.00.$5.60Current price is: $5.60.(30% off)
American Eagle Flag Laser Engraving File for Charcuterie & Cutting…
$4.00Original price was: $4.00.$2.80Current price is: $2.80.(30% off)