

 Français
 Deutsch
 Español
 Italiano
Mastering Laser Cut Acrylic
Jul
Estimated reading time: 19 minutes
Key Takeaways
- Laser cutting acrylic offers unparalleled precision, clean edges (often flame-polished), and versatility for intricate designs.
- Optimal results depend on understanding and balancing key parameters like power, speed, frequency, and crucial air assist, especially for different acrylic types (cast vs. extruded).
- The technology opens vast creative possibilities, from detailed signage and jewelry to complex 3D layered designs and functional prototypes.
- Advanced techniques like edge-lighting, thermoforming, and combining specialized acrylics expand creative frontiers.
- Rigorous maintenance of optics, belts, and ventilation, along with strict adherence to safety protocols (eye protection, fume extraction, fire prevention), are non-negotiable for safe and effective operation.
This article delves into the exciting world of laser cutting acrylic, exploring the techniques, settings, and creative possibilities this versatile material offers. Discover how precision laser technology transforms acrylic sheets into intricate designs, opening doors for both artistic expression and functional applications. Learn to harness the power of light for stunning results.
Understanding Laser Cut Acrylic Technology
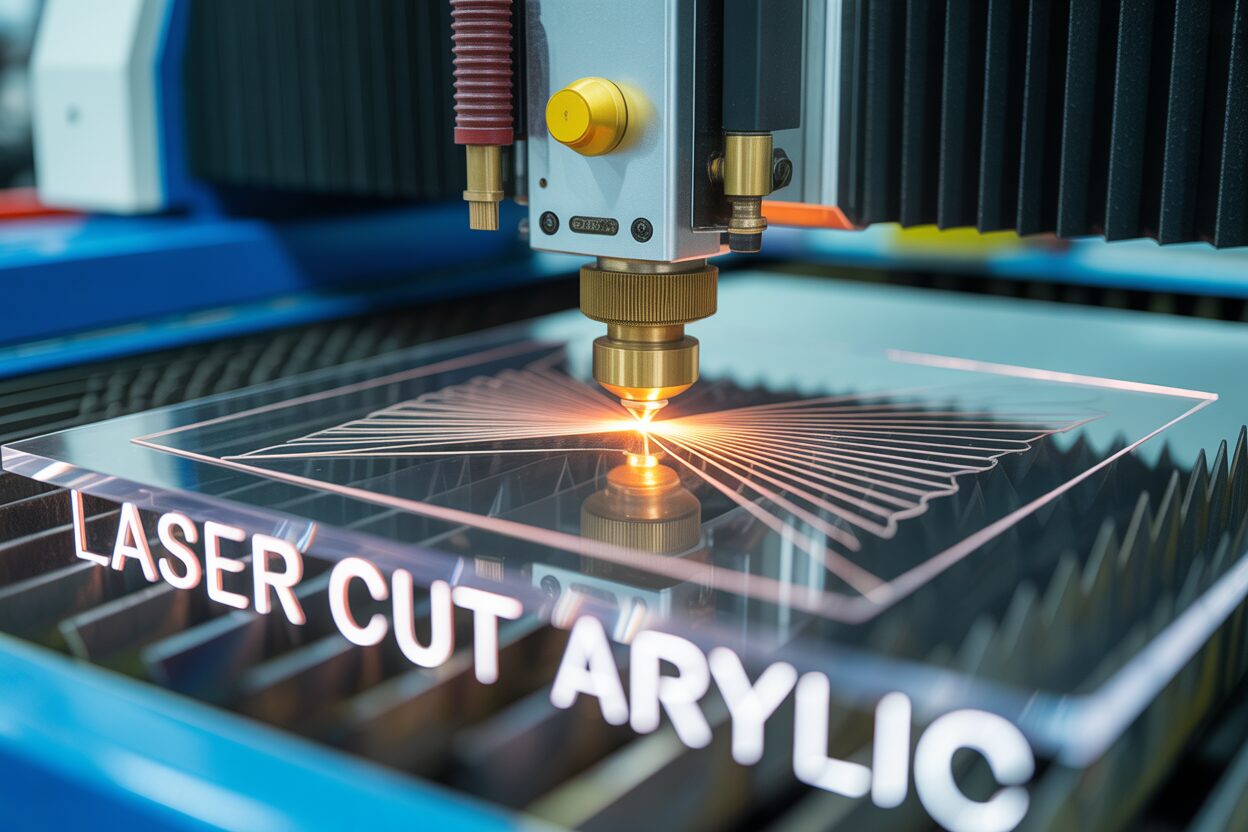
At its core, laser cutting acrylic is a sophisticated application of concentrated light energy to precisely sever material. An acrylic cutting machine employs a high-powered laser, typically a CO2 laser, to generate an intense beam of infrared light. This beam is then directed and focused onto the surface of the acrylic sheet. The fundamental principle at play is the localized heating and vaporization of the acrylic. As the highly concentrated laser beam strikes the material, the temperature in that tiny spot rapidly increases, causing the acrylic to instantly transform from a solid to a gas, creating a clean kerf (the width of the cut). This process is known as sublimation. Unlike traditional methods that physically tear or abrade the material, laser cutting offers a non-contact process, which significantly reduces the risk of material deformation or stress. The interaction is meticulously controlled, allowing for incredibly intricate designs and sharp corners that would be challenging, if not impossible, to achieve with conventional tools.
Operational Mechanics of an Acrylic Cutting Machine
The operation of an acrylic cutting machine involves several interconnected components working in harmony. The CO2 laser tube, often filled with a mixture of carbon dioxide, nitrogen, and helium, is excited by an electrical discharge to produce the laser beam. This raw beam is then guided through a series of mirrors, precisely reflecting it along the optical path to the laser head. Within the laser head, a crucial component is the focusing lens. This lens converges the broad laser beam into an incredibly fine, powerful point directly at the surface of the acrylic. The smaller the focal spot, the thinner and more precise the cut. The laser head itself is typically mounted on a gantry system, which moves with extreme precision across the cutting bed, guided by computer numerical control (CNC) programming. This enables the machine to follow complex geometries uploaded from design software.
The Advantages of Laser Technology for Acrylic
The adoption of laser technology for cutting acrylic has revolutionized acrylic fabrication, offering a multitude of advantages over traditional methods like routing, sawing, or manual cutting. Foremost among these benefits is unparalleled precision and edge quality. The localized and controlled nature of laser cutting results in edges that are often flame-polished and clear, eliminating the need for extensive post-processing such as sanding or buffing, which are invariably required with routed or sawn edges. This not only saves significant time and labor but also ensures a superior aesthetic finish. Speed is another significant advantage. Laser cutters can move at high rates while maintaining cutting quality, drastically reducing production times, especially for complex designs or large batches.
Furthermore, the versatility of laser cutting allows for the creation of incredibly intricate details, small holes, and sharp internal corners that are impractical or impossible with mechanical tools. The non-contact nature of the process means less material waste due to chatter or burring, and delicate patterns can be cut without breaking the material. The digital workflow, from design software directly to the laser cutter, ensures repeatability and consistency, making it ideal for mass production where identical parts are required. This level of accuracy and detail opens up vast possibilities for artistic designs, signage, prototyping, and intricate component manufacturing.
Key Concepts for Optimal Cutting Performance
Achieving optimal cutting performance in acrylic fabrication hinges on a nuanced understanding and proper calibration of key laser parameters: laser power, focal length, and air assist.
Laser Power: This setting directly controls the intensity of the laser beam. For acrylic, which undergoes sublimation, sufficient power is crucial to ensure complete vaporization of the material. Too little power results in incomplete cuts or melted, rough edges, while excessive power can lead to excessive heat affected zones (HAZs), charring, or wider kerfs. The ideal power setting is a balance between clean cutting and minimizing material degradation, often determined by the material thickness and desired edge quality. Thicker acrylic generally requires higher power.
Focal Length: This refers to the distance from the focusing lens to the point where the laser beam is at its smallest and most intense (the focal point). For cutting, the focal point is typically set slightly below or directly on the surface of the acrylic. An incorrect focal length will result in a wider, less intense beam at the cutting surface, leading to imprecise cuts, melting, or incomplete penetration. Different lens configurations offer varying focal lengths, influencing the kerf width and cut depth. A shorter focal length yields a tighter beam and a finer cut, ideal for intricate details, while a longer focal length provides a more forgiving depth of field, suitable for thicker materials.
Air Assist: This often-underestimated parameter involves directing a stream of compressed air or an inert gas, such as nitrogen, coaxially with the laser beam at the point of cutting. For acrylic, air assist plays a critical role in two primary ways. Firstly, it helps to cool the material immediately around the cut area, preventing localized melting and ensuring a cleaner, smoother edge, free from burring or sticky residue. Secondly, and perhaps more importantly for acrylic, the air assist blows away the vaporized material, preventing it from redepositing on the cut edges or the lens. This keeps the optical path clear, preserves the integrity of the cut, and significantly reduces the risk of undesirable charring or frosting on the cut line, resulting in that desirable flame-polished look directly from the machine. Proper air assist pressure is vital; too little can leave residue, while too much can cause turbulence and affect cut quality.
Optimizing Acrylic Laser Cutter Settings for Flawless Results
Achieving truly flawless laser cut acrylic goes beyond merely understanding the technology; it necessitates a deep dive into the nuanced art of adjusting acrylic laser cutter settings. No single set of parameters will work universally, as optimal results are highly dependent on the thickness and, crucially, the type of acrylic being processed. The two primary types, cast and extruded, behave differently under the laser, demanding distinct considerations. Cast acrylic, produced by pouring liquid monomer between two glass plates, tends to cut with cleaner, almost flame-polished edges directly from the machine and is less prone to melting. Extruded acrylic, manufactured by forcing molten plastic through a die, is generally more cost-effective but has a lower melting point, making it more susceptible to melting and burring during laser cutting. Understanding these inherent material properties is the first step in tuning your machine for success.
Key Parameters for Acrylic Cutting
To precisely control the laser’s interaction with the acrylic, several interconnected parameters must be meticulously adjusted:
Power: As discussed in the previous chapter, power refers to the laser’s output intensity. For cutting acrylic, the goal is to provide just enough power to vaporize the material without overheating the surrounding areas. Thicker acrylic inevitably requires more power. However, simply increasing power isn’t always the answer; excessive power can lead to wider kerf, increased frosting, or even deformation.
Speed: This parameter dictates how fast the laser head moves across the material. Power and speed work in conjunction. For a given power level, reducing the speed increases the energy delivered per unit area, resulting in a deeper or hotter cut. Conversely, increasing speed reduces the energy density. Finding the right balance between power and speed is crucial for achieving a clean, complete cut without scorching or melting. Faster speeds with adequate power generally yield cleaner edges by reducing the heat-affected zone (HAZ).
Frequency (PPI – Pulses Per Inch): Particularly relevant for CO2 lasers, frequency controls how many laser pulses are delivered per inch of travel. For cutting acrylic, a relatively low frequency (often in the range of 500-1000 Hz for cutting, or even higher for engraving) is typically preferred. A lower frequency allows more time for the material to vaporize and the molten plastic to be expelled by the air assist, contributing to smoother edges with less melting. Higher frequencies, while good for engraving detail, can introduce more heat, leading to frosting or rougher edges when cutting. Some machines refer to this as “Pulse Mode” for cutting, where a continuous wave laser effectively pulses at a set frequency.
Air Assist: Already highlighted for its importance, air assist is non-negotiable for quality laser cut acrylic. It serves a dual purpose: cooling the immediate cutting zone to prevent melting and expelling vaporized material and combustion byproducts from the kerf. Without adequate air assist, molten plastic will readily re-deposit onto the cut edges, leading to rough, frosted, or sticky surfaces. The pressure and flow rate of the air assist need to be optimized for different thicknesses; thicker acrylic benefits from a more robust air stream.
Troubleshooting Common Issues and Achieving Polished Edges
Despite careful initial setup, issues can arise. Here’s how to troubleshoot common problems and work towards those coveted smooth, polished edges:
Melting/Sticky Edges: This is a clear indicator of too much heat.
- Reduce power.
- Increase speed.
- Ensure air assist is strong and properly aimed.
- For extruded acrylic, slightly lower frequency might help, as well as considering multiple passes at lower power.
Frosting/Cloudy Edges: Often caused by uneven cooling or excessive interaction with expelled vapors.
- Increase air assist pressure and ensure it is directly in the kerf.
- Try a slightly lower frequency setting, allowing more time for material to clear.
- Ensure the material is clean and free of surface contaminants.
- Consider a slightly faster speed to reduce the HAZ.
Incomplete Cuts: The laser isn’t fully penetrating the material.
- Increase power.
- Decrease speed.
- Verify focal length is precisely set. A slightly out-of-focus beam will significantly reduce cutting efficiency.
- Check if your lens or mirrors are dirty, reducing laser power transmission.
- Ensure the gantry is square and the material is flat on the bed.
Achieving Smooth, Polished Edges: This is the holy grail for laser cut acrylic.
- Use cast acrylic whenever possible, as it naturally yields better edges.
- Precisely dial in your power and speed for your specific thickness. The “sweet spot” will produce a clean, clear cut without melting or frosting.
- Maintain powerful and well-positioned air assist. This is arguably the most critical factor for edge quality.
- Keep your optics (lenses and mirrors) immaculately clean. Contaminants absorb laser energy, reducing cutting efficiency and potentially leading to uneven cuts.
- For some applications, particularly with thicker extruded acrylic, “chain cutting” (a technique where cuts slightly overlap to create a cleaner edge that resembles routing) or multiple passes at lower power but adequate air assist can improve results.
The process of optimizing acrylic laser cutter settings is inherently iterative. It begins with understanding the material, making educated guesses for initial settings based on guidelines or manufacturer recommendations, and then performing test cuts. Observe the results critically: examine the edges, check for completeness of cuts, and note any smoke residue. Adjust one parameter at a time and re-test. Keeping a log of settings that work for specific material thicknesses and types will save countless hours in the future, building a valuable library of optimized cutting profiles for flawless laser cut acrylic.
Creative Possibilities with Laser Cut Acrylic
The precision and versatility afforded by laser cutting technology unlock an astounding array of creative possibilities for acrylic fabrication. Far beyond simple flat shapes, laser cut acrylic empowers designers, artists, and manufacturers to bring intricate and innovative acrylic design ideas to life. The material’s inherent properties—lightweight, durable, often transparent or translucent, and available in a spectrum of vibrant colors—combine synergistically with laser technology to create products and art installations that are both functional and visually striking.
One of the most immediate and impactful applications of laser cut acrylic is in signage and displays. From elegant corporate logos and directional signs to eye-catching retail displays and lightboxes, acrylic’s ability to be precisely cut and polished, coupled with the optional incorporation of LED lighting, makes it a superior choice for illuminated and dimensional signage. The ability to cut intricate text and graphics with sharp, clean lines surpasses traditional routing methods, offering a premium aesthetic. In the realm of jewelry and fashion accessories, laser cut acrylic has revolutionized custom designs, allowing for lightweight earrings, pendants, brooches, and even decorative elements for clothing. The speed and repeatability of the laser cutter make small-batch production and personalized items highly feasible. Artistic installations also greatly benefit, enabling artists to create complex sculptural forms, layered lightdiffusing panels, or delicate abstract compositions where precision is paramount.
Beyond aesthetic applications, laser cut acrylic is increasingly vital in product prototyping and functional components. Its dimensional stability and ease of fabrication allow for rapid iterative design processes. Engineers and product developers can quickly cut out functional prototypes for enclosures, jigs, fixtures, and machine guards, accelerating the development cycle. The ability to create exact replicas from digital designs ensures consistency from prototype to final production. Furthermore, in educational settings, laser cut acrylic is invaluable for creating engaging teaching aids, robotics components, and models, fostering hands-on learning and STEM (Science, Technology, Engineering, and Mathematics) education. The transparent nature of acrylic also makes it excellent for creating protective barriers, sneeze guards, and laboratory equipment where visibility is key.
Design Considerations for Laser Cutting
To fully harness the potential of laser cut acrylic, certain design considerations must be integrated into the conceptualization phase:
Kerf Compensation: As the laser beam vaporizes material, it creates a kerf—a small amount of material that is removed by the laser (typically 0.1mm – 0.5mm depending on the material, power, and focus). For highly precise parts, especially when creating interlocking components, this kerf needs to be accounted for in the design file. For internal cuts, the design should be slightly larger, and for external cuts, slightly smaller, to achieve the exact desired dimension. Software often has features to automatically apply kerf compensation.
Tab and Slot Joints: For assembling multi-part acrylic designs without adhesives (or to simply aid alignment for gluing), tab and slot joints are a common and effective technique enabled by laser cutting. Designing interlocking tabs and corresponding slots requires precise measurement, and once again, kerf compensation may be necessary to achieve a snug fit. This method is particularly useful for creating enclosures, boxes, and structural forms.
Minimum Feature Size: While lasers offer incredible detail, there are limits to how small features can be cut without compromising structural integrity or causing excessive heat buildup. Thin, fragile elements, or holes smaller than the material thickness, may be prone to breakage or melting during the cutting process. Understanding these limitations is key to designing robust parts.
Bending and Forming: Acrylic can be heated and bent after cutting. Designers might incorporate cut lines that act as hinge points or design parts that can be thermoformed into complex 3D shapes after the flat pattern is laser cut.
Acrylic Engraving: The Complementary Process
Beyond cutting, acrylic engraving stands as a powerful complementary process, allowing for the addition of intricate surface details without fully penetrating the material. Unlike cutting, where the laser vaporizes through the material, engraving uses lower power settings and higher speeds to etch or abrade the surface. The laser, in essence, creates micro-fractures or shallow indentations, which typically result in a frosted, white appearance on clear acrylic. This contrast makes engraving perfect for:
- Personalization: Adding names, dates, or custom messages to products.
- Branding: Etching logos onto merchandise or signage.
- Detailed Graphics: Creating subtle patterns, illustrations, or informational text that can’t be cut.
- Tactile Elements: Adding texture or raised/recessed areas for a sensory experience.
Different engraving techniques, such as raster engraving (like printing an image line by line) and vector engraving (following lines as paths), allow for varying levels of detail and depth. By combining precise laser cutting with an intricate acrylic engraving, designers can achieve unparalleled richness and complexity in their acrylic projects, truly unlocking the full potential of laser fabrication.
Advanced Techniques for Laser Cutting Acrylic
Having mastered the fundamentals and optimized your acrylic laser cutter settings, the next frontier involves exploring advanced techniques that unlock truly extraordinary results. These methods extend beyond basic cutting and engraving to encompass special effects, complex assemblies, and the sophisticated use of varied acrylic types, significantly expanding the creative landscape for cutting acrylic sheets.
Special Effects with Laser Cut Acrylic
Edge-Lit Acrylic: One of the most captivating applications leverages acrylic’s light-guiding properties. By engraving or cutting specific patterns onto the surface or within the body of a clear acrylic sheet, and then illuminating one or more of its edges with LEDs, the light becomes trapped within the sheet and exits only where the laser has interacted with the material. This creates stunning, glowing designs that appear to float in mid-air. For optimal edge-lighting, it’s crucial to use high-quality cast acrylic with perfectly clear, polished edges from the laser cut. Any frosting or melting on the edge will impede light transmission. Engraving settings should be optimized to create a sufficient surface disturbance for light to refract outwards without being too deep or creating excessive heat.
Layering for 3D Designs: While laser cutting is inherently a 2D process, layering multiple precisely cut acrylic sheets allows for the creation of intricate 3D forms, topographical maps, detailed architectural models, or multi-dimensional artistic pieces. Each layer contributes to the overall depth, and by varying the color and transparency of the acrylic sheets, stunning visual effects can be achieved. This technique often employs carefully designed alignment holes or tab-and-slot joints between layers to ensure perfect registration during assembly. The design software plays a crucial role here, where complex 3D models are often “sliced” into 2D layers for laser cutting.
Incorporating Diverse Color Acrylics: Beyond clear and standard solid colors, acrylic is available in an astonishing array of specialty finishes including fluorescents, pastels, translucent, opaque, glitter-infused, and even “stained glass” effect sheets. Combining these different colors and opacities in a single design can yield vibrant, dynamic projects. However, it’s important to note that different color pigments and additives can slightly alter a specific acrylic sheet’s thermal properties, potentially requiring minor adjustments to power and speed settings compared to standard clear or solid color acrylics of the same thickness. Always conduct small test cuts when introducing a new material.
Post-Processing Techniques for Enhanced Results
While laser cutting yields excellent edges, post-processing can further elevate the quality and complexity of your creations:
Polishing: Although laser-cut cast acrylic often has a “flame-polished” edge, some applications demand absolute optical clarity or a mirror-smooth finish. This can be achieved through additional polishing steps.
- Flame Polishing: Using an open flame (like a propane torch) to quickly melt and smooth the surface. This requires practice and careful control to avoid overheating or deforming the acrylic. It’s effective for thicker pieces.
- Buffing: Using a buffing wheel with a specialized polishing compound to mechanically remove small imperfections and achieve a high gloss.
- Vapor Polishing: A more advanced method using chemical vapors to dissolve and smooth the surface, typically used for intricate parts or internal surfaces.
Bending (Thermoforming): Laser cut acrylic can be heated along a specific line to enable precise bending. A strip heater applies localized heat, allowing the acrylic to become pliable enough to bend to a desired angle before cooling and solidifying. This technique is invaluable for creating enclosures, stands, and curved design elements from flat sheets.
Assembling Laser-Cut Acrylic Parts: Beyond tab-and-slot, various joining methods ensure robust and aesthetic assemblies.
- Adhesives: Solvent cements (e.g., Weld-On 4) chemically bond acrylic by dissolving the surfaces and fusing them together, creating virtually invisible, strong joints ideal for clear acrylic. Glue-on-glue applications (e.g., UV-cured adhesives) are also common. Proper clamping and ventilation are crucial.
- Fasteners: Screws, nuts, bolts, and standoffs are frequently used for mechanical assembly, especially when parts need to be disassembled, or for attaching acrylic to other materials. Laser-cut holes must be precise to accommodate the fasteners without stress cracking.
Working with Specialized Acrylics
Mirror Acrylic: This highly reflective acrylic, often with a metallic backing, requires specific handling. The laser should ideally cut with the mirrored side facing down to minimize reflections that could damage the laser lens and to achieve a cleaner cut on the visible side. Adjustments to power might be necessary as the mirrored layer can absorb or reflect laser energy differently. Be cautious of “burn-through” on the mirrored layer.
Frosted Acrylic: Designed to diffuse light, frosted acrylic can be laser cut effectively. The frosted surface often means that engraved areas might not show as much contrast as on clear acrylic, so adjustments to engraving power or speed may be needed to achieve the desired effect. The cutting parameters for frosted acrylic are generally similar to those for clear acrylic of the same thickness.
By embracing these advanced techniques and understanding the nuances of specialized acrylics, fabricators can move beyond basic cuts to create sophisticated, multi-dimensional, and visually stunning projects. The interplay of precision laser technology with these creative applications truly unlocks the full expressive potential of laser cut acrylic.
Maintenance and Safety for Your Acrylic Cutting Machine
Ensuring the longevity and consistent performance of your acrylic cutting machine, while paramount, pales in comparison to the absolute necessity of maintaining a rigorous safety protocol. Operating a laser cutter involves working with high-power lasers, electrical currents, and combustible materials, making both routine maintenance and unwavering safety adherence non-negotiable for anyone involved in laser cutting acrylic.
Essential Maintenance Practices
Regular maintenance is the cornerstone of reliable and precise laser cutting. Neglecting these routines can lead to degraded cut quality, machine downtime, and costly repairs.
Cleaning Optics: The laser’s optical path—including mirrors and the focusing lens—is the most critical component for maintaining beam integrity and power delivery. Even a small speck of dust or residue (especially from acrylic vapor) can absorb laser energy, leading to reduced cutting efficiency, beam distortion, or permanent damage to the optics.
- Frequency: Clean the lens daily or after every few hours of operation, and mirrors weekly or as needed, depending on usage and material.
- Method: Use only lens-grade cotton swabs or wipes specifically designed for optics, along with approved optical cleaning solutions (often isopropyl alcohol or distilled water). Handle optics by their edges to avoid fingerprints. Never use abrasive materials or cloths.
Checking Belts and Rails: The gantry system, responsible for precise movement of the laser head, relies on smooth rails and properly tensioned belts.
- Frequency: Inspect weekly.
- Method: Clean the linear rails and bearings with a lint-free cloth and appropriate lubricant as recommended by the manufacturer. Check drive belts for proper tension; they should be taut but not overly stretched, and free from frays or damage. Loose belts can cause inaccurate cuts and ghosting.
Ventilation and Fume Extraction System: When cutting acrylic sheets, the sublimation process generates significant amounts of highly corrosive and toxic fumes (gaseous hydrocarbons). A robust and well-maintained fume extraction system is vital for both air quality and machine longevity.
- Frequency: Inspect the exhaust fan and ducting monthly. Clean filters or replace them as per manufacturer guidelines. The condition of the cutting bed (honeycomb or slat) should also be checked and cleaned regularly to remove debris and maintain airflow.
Bed Cleaning: The cutting bed can accumulate melted debris and small cut-outs. A dirty bed can cause uneven cuts or allow laser reflection, potentially damaging the underside of the material.
- Frequency: Clean regularly, ideally after each major cutting session.
- Method: Remove debris, and if using a honeycomb bed, ensure the cells are not clogged.
Overall Machine Cleanliness: Keep the interior and exterior of the machine free from dust and debris. This includes the laser tube, power supply, and control electronics. Always follow the manufacturer’s specific maintenance schedule and guidelines.
Crucial Safety Precautions
Safety in a laser cutting environment cannot be overstressed. Failure to adhere to safety protocols can result in severe injury, fire, or property damage.
Eye Protection: This is paramount. Never look directly into the laser beam or its reflections. Always wear approved laser safety glasses (OD rating appropriate for your laser’s wavelength) when the laser is in operation, even if the machine has viewing windows, as these glasses provide an additional layer of protection. Ensure anyone in the vicinity also wears appropriate eye protection.
Fume Extraction: As mentioned, cutting acrylic produces hazardous fumes. Always operate the laser with the fume extraction system fully engaged. Ensure the exhaust vents outdoors or through a highly efficient filtration system (HEPA and activated carbon filters are often required). Inhaling these fumes can cause respiratory issues and other health problems.
Fire Hazards: Acrylic is a combustible material. While designed to vaporize, if cutting parameters are not optimized or if there’s insufficient air assist, localized combustion can occur.
- Never leave the machine unattended during operation. Always be present to monitor the cutting process.
- Have a fire extinguisher readily available: A CO2 or ABC dry chemical extinguisher is recommended. Know how to use it.
- Clean the cutting bed regularly: Accumulated debris can be a fire risk.
- Proper air assist: Ensures molten material is expelled and reduces the chance of flare-ups.
Electrical Safety: Laser cutters operate with high voltages.
- Never attempt to service internal electrical components without professional training and ensuring the machine is completely powered off and unplugged.
- Ensure the machine is properly grounded.
- Avoid operating the machine in humid environments.
Responsible Material Handling and Storage
Beyond the machine itself, proper handling and storage of materials contribute significantly to both safety and efficiency.
- Clear Work Area: Keep the area around the laser cutter free from clutter, flammable materials, and liquids.
- Secure Material: Ensure the acrylic sheet is flat and securely placed on the cutting bed to prevent movement during operation, which can lead to imprecise cuts or unexpected laser reflections.
- Storage: Store acrylic sheets flat to prevent warping, away from direct sunlight, and in a clean, dust-free environment. Avoid storing acrylic near heat sources or open flames. When handling large sheets, use proper lifting techniques to avoid injury.
By diligently adhering to these maintenance practices and rigorously observing all safety precautions, you ensure not only the longevity and performance of your acrylic cutting machine but, more importantly, the well-being of all operators and the integrity of your workspace when producing laser cut acrylic.
Conclusions
Mastering laser cut acrylic empowers creators to bring complex designs to life with unparalleled precision. By understanding machine settings, material properties, and design principles, one can achieve exceptional results in both cutting and engraving. This versatile material, combined with laser technology, offers endless possibilities for innovation and artistic expression in various applications.
FAQ
Q: What is the fundamental principle behind laser cutting acrylic?
A: Laser cutting acrylic relies on the principle of sublimation, where a highly concentrated CO2 laser beam rapidly heats a tiny spot on the acrylic, causing it to instantly transform from a solid directly into a gas. This non-contact process creates a clean, precise cut (kerf) without physical abrasion or tearing.
Q: Why is air assist crucial for quality laser cut acrylic?
A: Air assist is vital for two main reasons: it cools the immediate cutting zone to prevent localized melting, and it effectively blows away vaporized material and combustion byproducts from the kerf. This prevents residue redeposition, ensuring cleaner, smoother, and often “flame-polished” edges, free from frosting or stickiness.
Q: What is the difference between cast and extruded acrylic for laser cutting?
A: Cast acrylic, made by pouring liquid monomer, generally yields cleaner, flame-polished edges directly from the machine and is less prone to melting. Extruded acrylic, produced by forcing molten plastic through a die, is more cost-effective but has a lower melting point, making it more susceptible to melting and burring during laser cutting. Optimal settings vary significantly between the two types.
Q: What are some advanced creative uses for laser cut acrylic?
A: Beyond basic shapes, advanced uses include edge-lit acrylic designs (where engraved patterns glow when edges are illuminated), creating intricate 3D forms by layering multiple precisely cut sheets, and incorporating diverse specialty acrylic colors and finishes to achieve dynamic visual effects.
Q: What are the most important safety precautions when operating a laser cutter for acrylic?
A: Paramount safety precautions include wearing approved laser safety glasses at all times, ensuring the fume extraction system is fully engaged due to hazardous acrylic fumes, never leaving the machine unattended during operation (due to fire risk), having a fire extinguisher readily available, and adhering to strict electrical safety guidelines, especially regarding high voltages.

Subscribe to Our Newsletter
And enjoy FREE Download Files, SALE Alerts and Inspiring TIPS
Pricing Your Laser Engraving Work for Profitability
A Comprehensive Guide to Pricing Your Laser Engraving Services
A Comprehensive Guide on How to Price Laser Engraving Services
Charcuterie Board Engraving File – Wine & Grapes 3D Illusion…
$4.00Original price was: $4.00.$3.00Current price is: $3.00.(25% off)
Bee and Honey Jar Charcuterie Board Engraving File | PNG Download #007…
$4.00Original price was: $4.00.$3.20Current price is: $3.20.(20% off)
Valentine Love Captions: 6 Charcuterie Board Engraving Files…
$8.00Original price was: $8.00.$5.60Current price is: $5.60.(30% off)
American Eagle Flag Laser Engraving File for Charcuterie & Cutting…
$4.00Original price was: $4.00.$2.80Current price is: $2.80.(30% off)