

 Français
 Deutsch
 Español
 Italiano
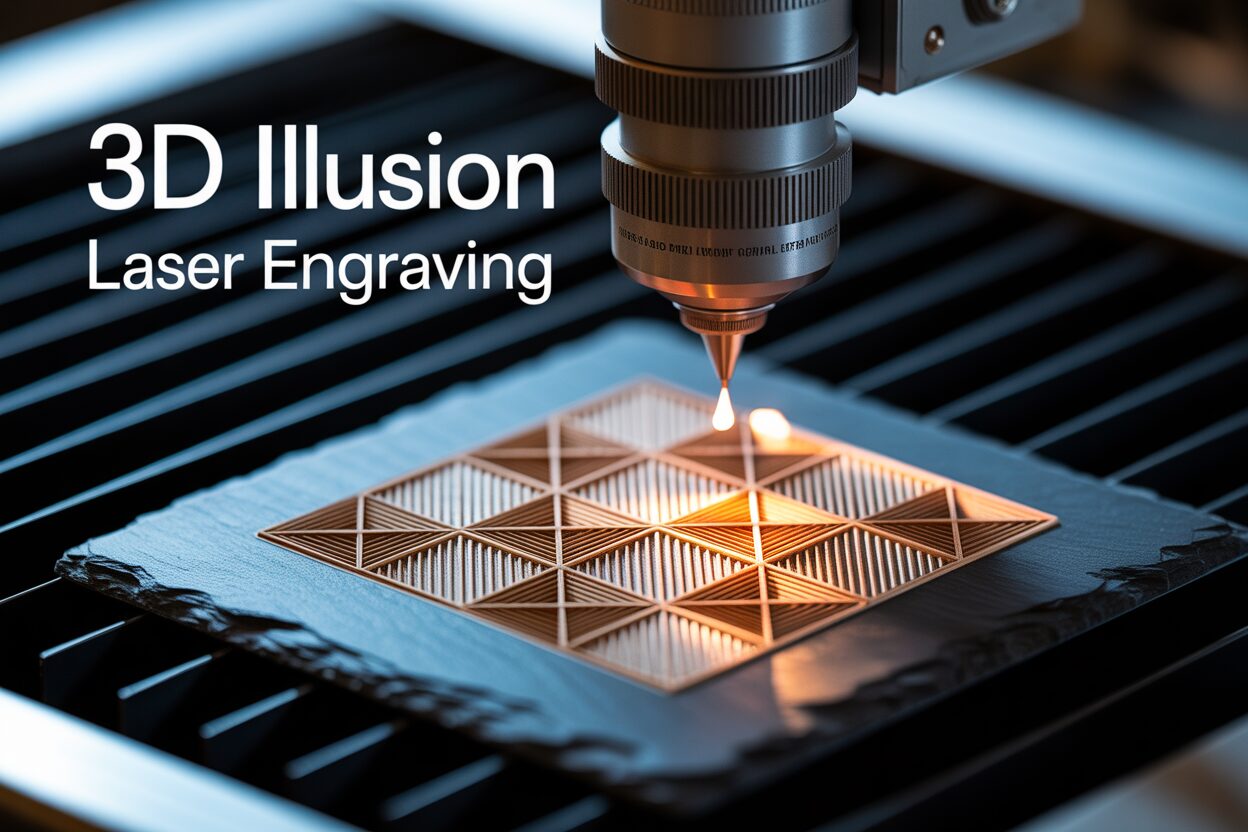
Mastering 3D Illusion Laser Engraving on Wood and Slate
Feb
Estimated reading time: 6 minutes
Key Takeaways
- Grayscale is Key: 3D illusion engraving works by translating the grayscale values (white to black) of an image into variable laser power, creating physical depth that tricks the eye. Darker shades mean more power and deeper burns.
- Use Grayscale Mode, Not Dithering: To achieve this variable-depth effect, you must set your laser software to “Grayscale” mode. Dithering uses fixed-power dots and cannot create the required physical topography for the illusion.
- High-Quality Design Files are Crucial: Start with a high-resolution (300+ DPI) depth map that has smooth, gradual transitions between light and dark areas. This prevents a “stair-stepped” look and ensures a clean, convincing result.
- Material Selection Matters: Choose materials with a uniform surface and minimal grain, such as basswood, cherry, alder, or slate. Heavily grained woods like oak can interfere with the visual illusion.
- Test, Test, Test: Always run a grayscale ramp test on a scrap piece of your chosen material before starting your final project. This allows you to perfectly calibrate your laser’s power and speed settings to achieve the ideal depth and contrast.
Table of Contents
- The Core Concept of 3D Illusion Engraving
- Design Preparation From Software to Files
- Engraving Process: Perfecting Depth and Detail
- Conclusions
- Frequently Asked Questions
Dive into the fascinating world of 3D illusion laser engraving. This advanced technique can transform a flat piece of wood or slate into a stunning work of art with perceived depth and dimension. This guide will walk you through the entire process, from design preparation to the final touches, helping you master this impressive skill and elevate your creative projects.
Interested in more 3D illusion? Check out our 3D illusion laser file designs: Click here!
The Core Concept of 3D Illusion Engraving
At its heart, 3D illusion laser engraving is an advanced technique that manipulates laser power to create the perception of depth on a two-dimensional surface. Unlike standard engraving, which typically involves either cutting lines (vector engraving) or filling shapes with a uniform pattern (raster fill), this method doesn’t operate on a simple on/off basis. Instead, it leverages a spectrum of power levels to produce varying shades and depths. The crucial takeaway is that you are not creating a physically three-dimensional object like with a 3D printer or a CNC router. The surface of the wood or slate remains relatively flat. The “3D” effect is a masterful deception, a visual trick played on the human eye through the careful application of light and shadow, created by the laser’s burn.
The magic behind this illusion lies in the direct relationship between grayscale image data and the laser’s power output. Your laser software interprets a grayscale image not as a picture, but as a power map. In this map, each pixel’s shade of gray, from pure white to solid black, corresponds to a specific power level.
How Grayscale Translates to Power
The principle is straightforward: the darker the shade, the more power the laser applies to that specific spot.
- Pure White (Value 255): This is interpreted as zero or minimum power. The laser beam may pass over this area without firing, leaving the material’s surface untouched and its original color. This becomes the highest point of your illusion.
- Pure Black (Value 0): This corresponds to 100% of the maximum power you’ve set for the job. The laser delivers its strongest burn, creating the darkest and deepest point in the engraving. This becomes the lowest point, or the deepest shadow.
- Shades of Gray (Values 1-254): Every shade in between is proportionally mapped to a power percentage. For example, a 50% gray pixel will command the laser to fire at 50% of its set maximum power, creating a burn that is moderately deep and colored. A 25% gray will receive even less power, resulting in a very light, shallow mark.
This variable depth and coloration create a micro-topography on the material’s surface. When light hits this textured engraving, it creates genuine highlights on the high points (lighter grays) and casts real shadows in the low points (darker grays), which our brain instinctively interprets as a three-dimensional form.
When preparing an image for raster engraving, software often presents two main processing options among its laser engraving techniques: dithering and grayscale. For creating 3D illusions, understanding the difference is non-negotiable. Dithering is a method used to simulate shades of gray on machines that can only operate in a binary (on/off) mode. It creates patterns of tiny, fixed-power dots; the density of these dots gives the impression of a particular shade from a distance. While excellent for engraving photographs on materials like acrylic that don’t shade well, it is completely unsuitable for creating 3D effects. Dithering does not vary the laser’s power, so it cannot create the physical depth variations required for the illusion. To achieve our goal, you must use the grayscale mode. This mode enables the software to directly modulate, or vary, the laser’s power based on the image’s gray values, which is the foundational requirement of this entire process.
Ultimately, success in 3D illusion engraving boils down to one critical skill: mastering laser engraving depth control. The entire effect is built upon the subtle, graduated differences in burn depth. If your power settings are too aggressive, you will lose all the delicate detail in the lighter gray areas, as they will burn too dark and deep. Conversely, if your settings are too weak, you won’t achieve enough contrast, and the black areas won’t be deep enough to create convincing shadows. Each material, whether it’s a soft pine, a dense maple, or a piece of slate, reacts differently to the laser. Achieving that perfect, jaw-dropping 3D pop requires a deep understanding of how to calibrate your laser’s power and speed to the specific material you are working with, a topic we will explore in detail in the upcoming chapters.
Design Preparation From Software to Files
A stunning 3D engraving begins long before the laser fires; it starts with a high-quality, properly prepared design file. You generally have two paths to obtaining this file: using pre-made designs or creating your own custom depth maps. For those new to the technique, starting with professionally made 3D illusion laser files is an excellent way to learn. When sourcing these files, look for key indicators of quality. The file should be high-resolution—at least 300 DPI—to ensure the laser software has enough data to work with, preventing pixelation or banding in the final piece. Most importantly, examine the image for smooth, gradual transitions between light and dark areas. Abrupt jumps in grayscale values will result in a “terraced” or “stair-stepped” look rather than a convincing, curved illusion. High-quality files are often provided in lossless formats like PNG, BMP, or TIFF, which preserve the full range of 256 grayscale levels necessary for this process.
Crafting Your Own Depth Map
For ultimate creative control, learning how to create 3D laser effect images is a game-changing skill. This process involves creating what is known as a “depth map” in image-editing software like Adobe Photoshop, GIMP, or Affinity Photo. A depth map is a grayscale image where the shades directly correspond to the desired height of the final engraving. The rules are simple and absolute:
- Pure White: Represents the highest point. The laser will use minimal or zero power, leaving the material’s surface untouched.
- Pure Black: Represents the lowest, deepest point. The laser will apply maximum power, burning deepest into the material.
- Grayscale Gradient: The shades of gray between white and black create the slopes, curves, and contours of your illusion.
The process often starts with converting a standard color photo or creating a design from scratch. When converting an existing image, don’t just desaturate it. Use tools like the Channel Mixer or Black & White adjustment layers to gain more control over how different colors translate into shades of gray, allowing you to emphasize certain features. The primary tool for refining your depth map is the “Levels” or “Curves” adjustment. By manipulating these, you can precisely control the contrast of your image. Increasing contrast will create a more dramatic, high-relief effect with steeper slopes. Decreasing it will result in a softer, lower-relief illusion. To ensure your gradients are perfectly smooth, a subtle application of a Gaussian blur filter can be invaluable. This can blend any harsh lines or digital artifacts, which translates directly into a smoother physical surface on your engraved piece.
Once your grayscale depth map is perfected, the final step in the design phase is often to create a complementary vector cut line. A well-executed 3D wood design laser cut can elevate your project from a simple engraved plaque to a finished piece of art. Using vector software like Adobe Illustrator, Inkscape, or LightBurn’s own tools, you can trace an outline around your engraved object. This allows you to precisely cut the piece out of the larger stock material, creating a standalone item like a contoured dragon, a beveled emblem, or a sculpted animal. This vector cut file (often an SVG or DXF) is then combined with your raster depth map in the laser software. By setting the grayscale image to “Fill” and the vector outline to “Cut,” you can run a single job that both engraves the intricate 3D illusion and perfectly cuts out the finished product.
Engraving Process: Perfecting Depth and Detail
With your depth map file prepared, the next critical phase is the physical engraving process, where software settings and material choice converge. The success of a 3D illusion laser engraving is heavily dependent on the canvas you choose. The ideal material is one with a uniform, consistent surface that won’t compete with the engraved illusion. For wood, this means selecting species with a tight, minimal grain pattern. Woods like basswood, cherry, and alder are excellent choices because their light color provides high contrast, and their smooth grain doesn’t create distracting lines that break the 3D effect. Conversely, heavily grained woods like oak or pine can be problematic, as their natural dark and light bands can interfere with the engraved shadows. Slate is another superb medium; its dark, uniform surface engraves to a light gray, offering fantastic natural contrast and a perfectly consistent canvas for the laser to work its magic.
Configuring Your Engraving Job
Once you’ve chosen your material, it’s time to import your grayscale depth map into your laser control software, such as LightBurn. Here, you’ll configure the settings that translate your digital image into physical depth. You must set the layer mode to “Image” and, most importantly, select the “Grayscale” image mode. This unlocks the key settings for creating the illusion.
- Power: In grayscale mode, you will set a Max Power and a Min Power. Max Power (e.g., 85%) corresponds to pure black in your image and determines the depth of your deepest shadows. Min Power (e.g., 5%) corresponds to the lightest grays just before pure white. Setting a Min Power slightly above zero ensures that even the most delicate highlights receive a faint mark, preventing a harsh drop-off to the raw material surface. This range is what gives you a full tonal spectrum.
- Speed: Speed is inversely proportional to the energy the laser delivers. Slower speeds allow more time for the laser to burn the material at a given power level, resulting in a darker and deeper engrave. Finding the right balance between speed and power is crucial for achieving good contrast without over-burning the material.
- Resolution (DPI/LPI): This setting, measured in Dots Per Inch or Lines Per Inch, dictates how close together the engraved lines are. For a smooth, photo-realistic 3D illusion, a high resolution is essential. A setting of 300 DPI or higher is recommended. A lower resolution will leave visible scan lines between passes, which will severely detract from the smooth, contoured appearance you are trying to achieve.
- Focus: Precise focus is non-negotiable. An out-of-focus laser beam creates a wider, less-intense spot, resulting in blurry, soft details. For the sharp lines and crisp shadows that make a 3D illusion pop, your laser’s focal point must be set perfectly on the material’s surface.
These settings are highly interdependent and vary drastically between different lasers and materials. Therefore, the single most important step is to perform tests. Before committing to your final workpiece, run a grayscale ramp test on a scrap piece of the exact same material. This involves engraving a simple image that transitions from pure white to pure black, allowing you to see how your chosen settings render the entire tonal range. By adjusting your speed and power, you can dial in the perfect combination to achieve a full spectrum of color and control your laser engraving depth, ensuring your lightest areas are barely kissed by the laser and your darkest areas have a deep, rich char that creates a convincing illusion of shadow.
Sample Starting Settings (20W Diode Laser on Basswood):
- Speed: 3000 mm/min
- Max Power: 90%
- Min Power: 5%
- DPI: 318
- Image Mode: Grayscale
Remember, this is only a starting point. Test and adjust for your specific machine and material.
Conclusions
You now have the knowledge to create incredible 3D effects with your laser engraver. By understanding the principles of grayscale mapping and carefully calibrating your machine’s settings, you can produce intricate designs that captivate and impress. Don’t be afraid to experiment with different materials and settings. Practice is key to perfecting your 3D illusion laser engraving technique.
Frequently Asked Questions
Q: What is the main difference between 3D illusion engraving and regular engraving?
A: Regular engraving typically uses a fixed power level to either etch lines (vector) or fill shapes with a uniform pattern (raster). 3D illusion engraving uses a variable power level based on a grayscale image, where darker shades get more power. This creates varying depths and shades on a flat surface, tricking the eye into seeing a three-dimensional object.
Q: Why must I use grayscale mode instead of dithering?
A: Dithering simulates shades of gray by varying the spacing of fixed-power dots. It cannot change the laser’s power output. For a 3D illusion, you need to physically alter the depth of the engrave, which requires modulating the laser’s power. Only grayscale mode allows the software to directly link the shade of gray in an image to a specific power percentage, creating the necessary depth variation.
Q: What are the best materials for 3D illusion laser engraving?
A: The best materials have a consistent, uniform surface that doesn’t compete with the illusion. Woods with a tight, minimal grain pattern like basswood, alder, and cherry are excellent choices. Slate is also a superb medium due to its dark, uniform surface that engraves with high contrast.
Q: How do I create my own design file for a 3D illusion?
A: You need to create a “depth map” using image-editing software like Photoshop or GIMP. This is a grayscale image where pure white represents the highest (untouched) surface and pure black represents the deepest point of the engraving. The shades of gray in between create the slopes and curves. Smooth gradients are essential for a convincing effect.

Subscribe to Our Newsletter
And enjoy FREE Download Files, SALE Alerts and Inspiring TIPS
A Comprehensive Guide on How to Price Laser Engraving Jobs
Pricing Your Laser Engraving Work for Profitability
A Comprehensive Guide to Pricing Your Laser Engraving Services
Charcuterie Board Engraving File – Wine & Grapes 3D Illusion…
$4.00Original price was: $4.00.$3.00Current price is: $3.00.(25% off)
Bee and Honey Jar Charcuterie Board Engraving File | PNG Download #007…
$4.00Original price was: $4.00.$3.20Current price is: $3.20.(20% off)
Valentine Love Captions: 6 Charcuterie Board Engraving Files…
$8.00Original price was: $8.00.$5.60Current price is: $5.60.(30% off)
American Eagle Flag Laser Engraving File for Charcuterie & Cutting…
$4.00Original price was: $4.00.$2.80Current price is: $2.80.(30% off)