

 Français
 Deutsch
 Español
 Italiano
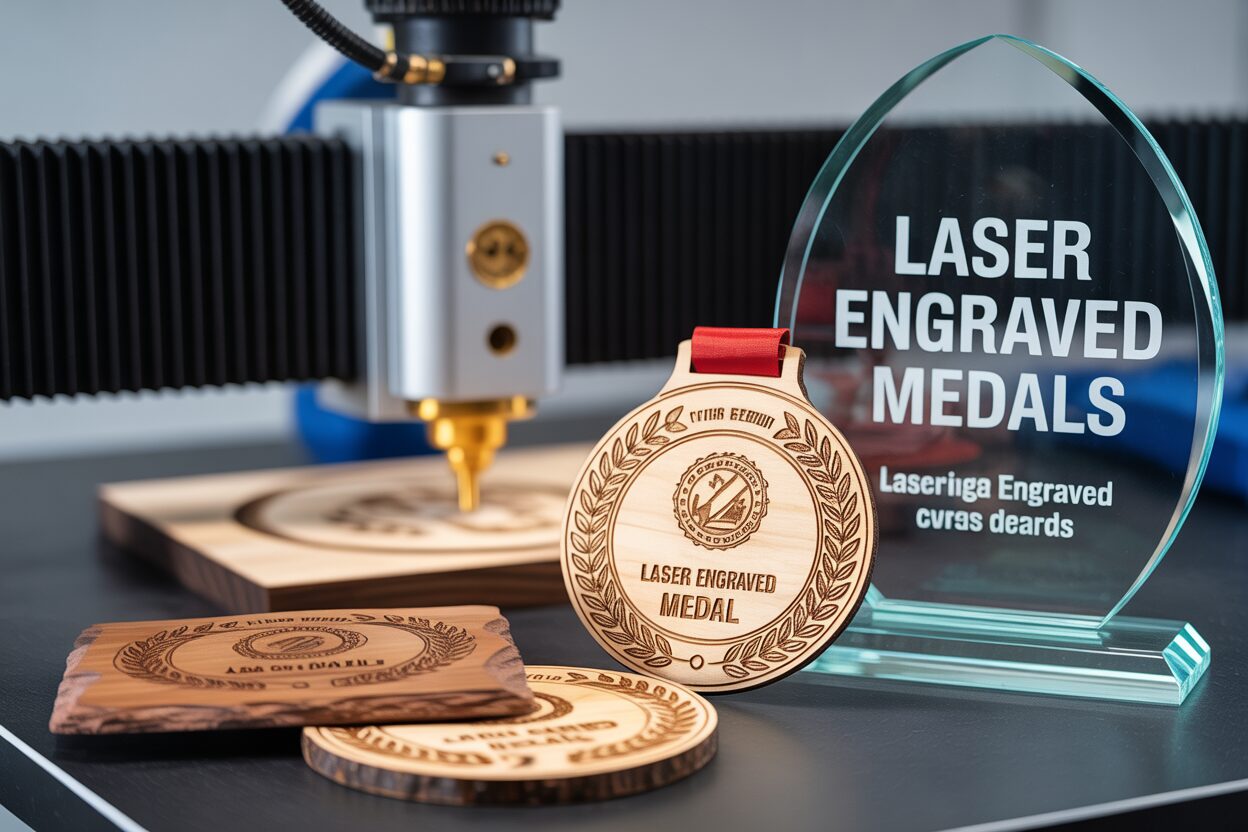
Creating Custom Laser Engraved Medals and Trophies
Aug
Estimated reading time: 8 minutes
Key Takeaways
- Material Selection is Foundational: The choice of wood, acrylic, or slate fundamentally defines the award’s look, feel, and perceived value, catering to different themes from rustic to modern.
- Design with Hierarchy: Effective award design relies on clear visual hierarchy, legible fonts, and the correct use of vector (for cutting) and raster (for engraving) elements.
- Test Your Settings: Always use a material test grid to determine the perfect combination of laser power, speed, and DPI for your specific material, preventing waste and ensuring professional-quality results.
- Finishing Elevates Quality: Professional finishing techniques like masking for clean engraving, color-filling for vibrancy, and proper assembly with the right adhesives are crucial for transforming raw parts into a treasured keepsake.
Table of Contents
- Choosing the Right Materials for Your Awards
- Design Principles for Impactful Trophies and Medals
- Mastering Laser Settings for Flawless Engraving
- Assembly and Professional Finishing Techniques
- Frequently Asked Questions
Discover the rewarding process of creating custom awards from scratch. This guide explores how to make unique laser engraved medals and trophies for any occasion. We’ll delve into selecting the right materials, designing personalized awards, and mastering the laser engraving techniques to produce professional-quality results for your club, school, or business.
Choosing the Right Materials for Your Awards
The material you select is the foundation of your award’s identity, dictating its weight, texture, and overall aesthetic. Your choice will influence not only the design possibilities but also the recipient’s perception of value. The three most popular and versatile materials for creating laser engraved medals and trophies are wood, acrylic, and slate, each offering distinct advantages and characteristics that cater to different styles and budgets.
Classic and Natural: Working with Wood
Wood brings a timeless warmth and organic feel to any award. It is an excellent choice for events with a rustic, traditional, or eco-conscious theme.
- Birch Plywood: As a light-colored and relatively inexpensive wood, birch is a fantastic starting point. It engraves with a rich, dark brown contrast, making text and intricate logos pop. Its smooth, consistent grain provides a reliable surface for detailed work. Birch is ideal for creating cost-effective yet charming medals and layered wood award plaques.
- Walnut: For a more prestigious and elegant award, walnut is an exceptional choice. This premium hardwood has a deep, dark color. The laser engraving on walnut is more subtle and tonal, creating a sophisticated, high-end look rather than a stark contrast. It’s perfect for corporate recognition awards or championship trophies where a sense of luxury is desired.
Wood’s main pro is its natural beauty, but be mindful that grain patterns can vary, making each piece unique. It may also require light sanding and sealing after engraving to protect the surface and enhance the finish.
Modern and Versatile: The Power of Acrylic
Acrylic is the go-to material for a modern, clean, and vibrant aesthetic. It can mimic the appearance of glass while being more durable and cost-effective, making it a popular choice for all types of awards.
- Clear Acrylic: Engraving on clear cast acrylic produces a crisp, frosted white mark that looks incredibly professional. This material is perfect for creating sleek, contemporary trophies. For a unique effect when engraving acrylic medals, consider reverse engraving—etching the design on the back of the acrylic so it shows through the front, leaving a perfectly smooth face.
- Colored Acrylic: Available in a vast spectrum of opaque, translucent, and fluorescent colors, colored acrylic allows for awards that can perfectly match event branding. A particularly useful type is two-layer acrylic, which features a thin top color layer over a different colored core. Engraving removes the top layer to reveal the core color, creating instant, sharp contrast without needing paint-filling.
While highly versatile, acrylic can scratch more easily than wood or slate and shows fingerprints, so careful handling is necessary, especially for high-gloss finishes.
Rugged and Unique: The Charm of Slate
For an award that feels substantial and permanent, slate is an excellent and often overlooked material. Each piece is naturally unique, with its own texture and chipped edges, ensuring no two awards are exactly alike. The laser etches away the dark grey surface to reveal a lighter, almost white layer underneath, resulting in superb natural contrast. Slate’s heft and cool, stony feel give it a high perceived value, making it perfect for culinary awards, outdoor competitions, or any event seeking a rustic yet refined look. Its main drawback is its weight, which can increase shipping costs, and its brittle nature requires careful handling to avoid chipping.
Thickness and Sourcing Considerations
Material thickness plays a crucial role in the final product’s feel and durability. A 3mm (1/8 inch) material is generally sufficient for medals or as layers on a plaque. For freestanding trophies or substantial wood award plaques, a thickness of 6mm (1/4 inch) or more provides necessary stability and a more premium feel. Thicker clear acrylic, for example, can capture and refract light beautifully, adding to its visual appeal. You can source these materials from specialized online laser supply stores, which offer sheets cut to size. For wood, local lumberyards or woodworking shops are great resources, while slate can often be found as coasters or tiles at home improvement or craft stores, providing a cost-effective option for smaller projects.
Design Principles for Impactful Trophies and Medals
Effective award design begins long before the laser fires up; it starts in your design software. This is where you transform a blank digital canvas into a blueprint for a memorable award. Programs like Adobe Illustrator or the free alternative Inkscape are ideal for creating complex shapes and preparing logos from scratch. LightBurn, on the other hand, is a powerful tool for both designing and directly controlling your laser, making it excellent for arranging elements and setting up your final job. The core principle to understand is the difference between vector lines and raster images. Vector paths, which are defined by mathematical equations, are used to tell the laser where to cut. Raster images, made of pixels like a photograph, are used for engraving filled areas. Your design will be a combination of these two elements: a vector outline to create the shape of your DIY laser cut awards, and a mix of raster and vector elements inside for the engraved details.
Layout, Hierarchy, and Legibility
The arrangement of text and graphics is what makes personalized trophies clear and impactful. Apply a strong visual hierarchy to guide the viewer’s eye. The most important information—such as “Champion,” “First Place,” or the event’s name—should be the largest and most prominent element. The recipient’s name, the date, and the specific category should be secondary but still clearly legible. When choosing fonts, prioritize readability. Bold, clean sans-serif fonts like Helvetica, Arial, or Montserrat work exceptionally well for engraving, especially for smaller text, as their simple letterforms remain crisp. Avoid thin, delicate, or overly ornate script fonts for critical information, as they can become unreadable when engraved on materials with a prominent grain like wood. A crucial best practice is to convert all text to paths or outlines before sending the file to the laser. This turns the letters into fixed vector shapes, ensuring there are no font substitution errors when you open the file on the machine’s computer.
Designing for Specific Themes and Logos
For projects like custom sports trophies, integrating thematic elements is key. Instead of a standard circle or shield, design a cut path that incorporates the shape of a football, a tennis racket, or a dynamic swoosh that evokes motion. When working with team or sponsor logos, always strive to obtain a vector version (files ending in .svg, .ai, or .eps). Vector logos can be scaled to any size without losing quality and will produce perfectly clean engraved lines. If you only have a raster logo (like a .jpg or .png), you will need to process it carefully. Use your software’s image trace function to convert it to vectors, or adjust the image settings in LightBurn (like brightness, contrast, and dithering mode) to get the cleanest possible engrave. For a truly professional touch, consider creating multi-layered awards. You can cut a backing piece from walnut, a middle frame from colored acrylic, and a top layer with engraved details from birch, creating a design with depth, color, and texture that looks far more premium than a single flat piece.
Mastering Laser Settings for Flawless Engraving
Translating your digital design into a physical award requires a command of your laser’s core settings: speed, power, and resolution (DPI/LPI). These three variables work in concert to determine the final look of your engrave and cut. Speed is how fast the laser head moves across the material. Power is the percentage of the laser’s maximum output being used. A simple rule governs their relationship: more time on target equals more energy delivered. Therefore, a slow speed with high power results in a deep, dark engrave or a clean cut. Conversely, a high speed with low power produces a light surface mark. DPI (Dots Per Inch) or LPI (Lines Per Inch) applies to raster engraving and controls the density of the engraved lines. A higher DPI creates more overlap between lines, resulting in a smoother, darker, and more “filled-in” appearance, but it also increases job time.
The Indispensable Material Test Grid
Never assume settings found online will work perfectly for your machine and material. Every laser tube has unique characteristics, and material batches can vary slightly. The single most important step before engraving your final piece is to run a material test grid on a scrap piece of the same material. Most laser software, including LightBurn, has a built-in feature to create this grid automatically. It creates a matrix of small squares, where each square is engraved with a different combination of speed and power. By examining the grid, you can pinpoint the exact setting that produces the desired effect—from a light brown etch on birch to a deep, rich burn on walnut, or a crisp white frost on acrylic. This five-minute test saves you from wasting expensive materials and ensures consistent, repeatable results. For cutting, you can create a similar test with a series of small squares or lines using different speed and power combinations to find the lowest power and highest speed that cuts cleanly through the material in a single pass. This minimizes charring on the edges and reduces the risk of flare-ups.
To get you started, here are some baseline settings for a common 60W CO2 laser. Use these as the center point for your material test grid:
- 3mm Birch Plywood: For a clean cut, start your test around 15mm/s at 60% power. For a standard engrave on wood award plaques, try 300mm/s at 25% power and 250-300 DPI. A higher power will produce a deeper, darker char.
- 3mm Cast Acrylic: For cutting, begin around 20mm/s at 65% power. When engraving acrylic medals, the goal is a smooth frost, not a melted mess. Start with a high speed and low power, such as 400mm/s at 18% power. A higher DPI (300-400) can help smooth the engraving.
Your design file should use different colors to distinguish between operations. For example, a red line can be assigned your vector cutting settings (slow speed, high power) to cut out the medal shape. A black-filled area can be assigned your raster engraving settings (high speed, lower power) for the text and logos. This separation allows you to send a single file to the laser that performs multiple operations in the correct sequence—typically engraving first, then cutting.
Assembly and Professional Finishing Techniques
Once the laser has finished its job, your award components are ready for the crucial final steps that transform them from raw cutouts into polished, professional products. The first and most important task is cleaning. Engraving wood inevitably leaves a smoky residue or soot around the etched areas. The best way to manage this is proactively: apply a layer of low-tack paper masking tape over the wood surface before you engrave. The laser will etch through the tape and into the wood, and when you’re done, you can simply peel the tape away, taking the majority of the soot with it for perfectly clean lines. If you didn’t use a mask, gently wipe the surface with a microfiber cloth lightly dampened with denatured alcohol. Be careful not to scrub, as this can press the soot into the wood grain. For acrylic, cleaning is simpler; a quick wipe with a soft, lint-free cloth is usually enough to remove any dust and fingerprints.
Elevating Your Design with Color and Assembly
To make your engravings truly stand out, consider adding color. Color-filling is a highly effective technique that turns a simple engraving into a vibrant design feature. The process works best when you’ve masked your material beforehand. After engraving, use a small brush or a spray can to apply acrylic craft paint directly into the etched areas, right over the masking tape. Let the paint dry completely, then peel away the mask. The paint will remain perfectly nested inside the engraving, creating a sharp, colorful inlay that contrasts beautifully with the base material. This is an excellent way to incorporate brand colors into personalized trophies.
For multi-part awards, careful assembly is key. When creating layered awards or attaching an engraved plate to a base, your choice of adhesive is critical.
- Wood to Wood: A quality PVA wood glue (like Titebond II) creates an incredibly strong bond. Apply a thin, even layer, clamp the pieces together, and wipe away any excess glue with a damp cloth before it dries.
- Acrylic to Wood/Acrylic: For an instant, clear bond, cyanoacrylate (CA) glue, or super glue, is the best choice. Use it sparingly, as excess glue can “fog” clear acrylic. A CA glue activator spray can set the bond in seconds. For creating freestanding acrylic trophies, specialized acrylic cement that chemically welds the pieces together provides the cleanest and strongest joint.
Use clamps or heavy objects to hold pieces in place while the adhesive sets to ensure a tight, permanent fit.
The Final Touches for a Premium Finish
The small details are what elevate good DIY laser cut awards to great ones. For laser engraved medals, the final step is attaching the ribbon. Ensure the slot or hole you designed is wide enough for the ribbon to pass through easily. A simple V-stitch sewn at the base of the ribbon provides a durable and professional-looking connection. For wooden awards, consider applying a finish. A light coat of clear spray lacquer or a wipe-on polyurethane will protect the wood from moisture and fingerprints, deepen its color, and give it a subtle sheen that signifies quality. By investing time in these finishing techniques, you ensure the final product is not just an award, but a lasting and treasured keepsake.
Conclusions
You now have the knowledge to create stunning, personalized trophies and awards. From choosing materials to the final finishing touches, this guide has shown how accessible DIY laser cut awards can be. Experiment with different designs and materials to craft unique pieces that will be cherished by recipients for years to come.
Frequently Asked Questions
Q: What are the best materials for a beginner making laser-engraved awards?
A: For beginners, birch plywood and cast acrylic are excellent choices. Birch is inexpensive, engraves with high contrast, and has a consistent surface. Cast acrylic is also affordable, durable, and produces a professional-looking frosted engraving. Both are forgiving and versatile for various projects.
Q: Why is it so important to run a material test grid before engraving my final award?
A: A test grid is essential because every laser and material batch is slightly different. It allows you to find the exact speed and power settings that produce your desired result—from a light etch to a deep burn—on a small scrap piece. This five-minute test prevents wasting expensive materials and ensures your final award looks perfect.
Q: How can I make text on my custom trophies easy to read?
A: Prioritize legibility by using a strong visual hierarchy, making the most important text the largest. Choose clean, bold sans-serif fonts (like Arial or Montserrat) that remain crisp when engraved. Avoid thin or overly decorative fonts for critical information, and always convert your text to paths or outlines in your design software to prevent font errors.
Q: What is the best way to clean a wooden award after laser engraving?
A: The most effective method is to apply a layer of low-tack paper masking tape to the wood surface before engraving. The laser cuts through the tape, and you can simply peel it off afterward, removing all the smoke residue. If you don’t use a mask, gently wipe the surface with a microfiber cloth lightly dampened with denatured alcohol.

Subscribe to Our Newsletter
And enjoy FREE Download Files, SALE Alerts and Inspiring TIPS
A Comprehensive Guide to Pricing Your Laser Engraving Services
A Comprehensive Guide on How to Price Laser Engraving Services
How to Price Your Laser Engraving and Cutting Services
Charcuterie Board Engraving File – Wine & Grapes 3D Illusion…
$4.00Original price was: $4.00.$3.00Current price is: $3.00.(25% off)
Bee and Honey Jar Charcuterie Board Engraving File | PNG Download #007…
$4.00Original price was: $4.00.$3.20Current price is: $3.20.(20% off)
Valentine Love Captions: 6 Charcuterie Board Engraving Files…
$8.00Original price was: $8.00.$5.60Current price is: $5.60.(30% off)
American Eagle Flag Laser Engraving File for Charcuterie & Cutting…
$4.00Original price was: $4.00.$2.80Current price is: $2.80.(30% off)