
-
×
 3D Illusion Cat Laser Engraving PNG | High-Res File 1 × Original price was: $4.00.$3.20Current price is: $3.20.
(20% off)
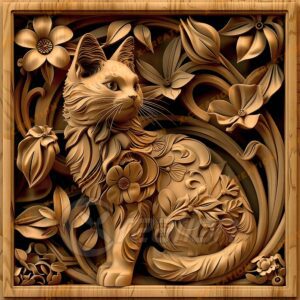 3D Illusion Cat Laser Engraving PNG | High-Res File
 Français
 Deutsch
 Español
 Italiano
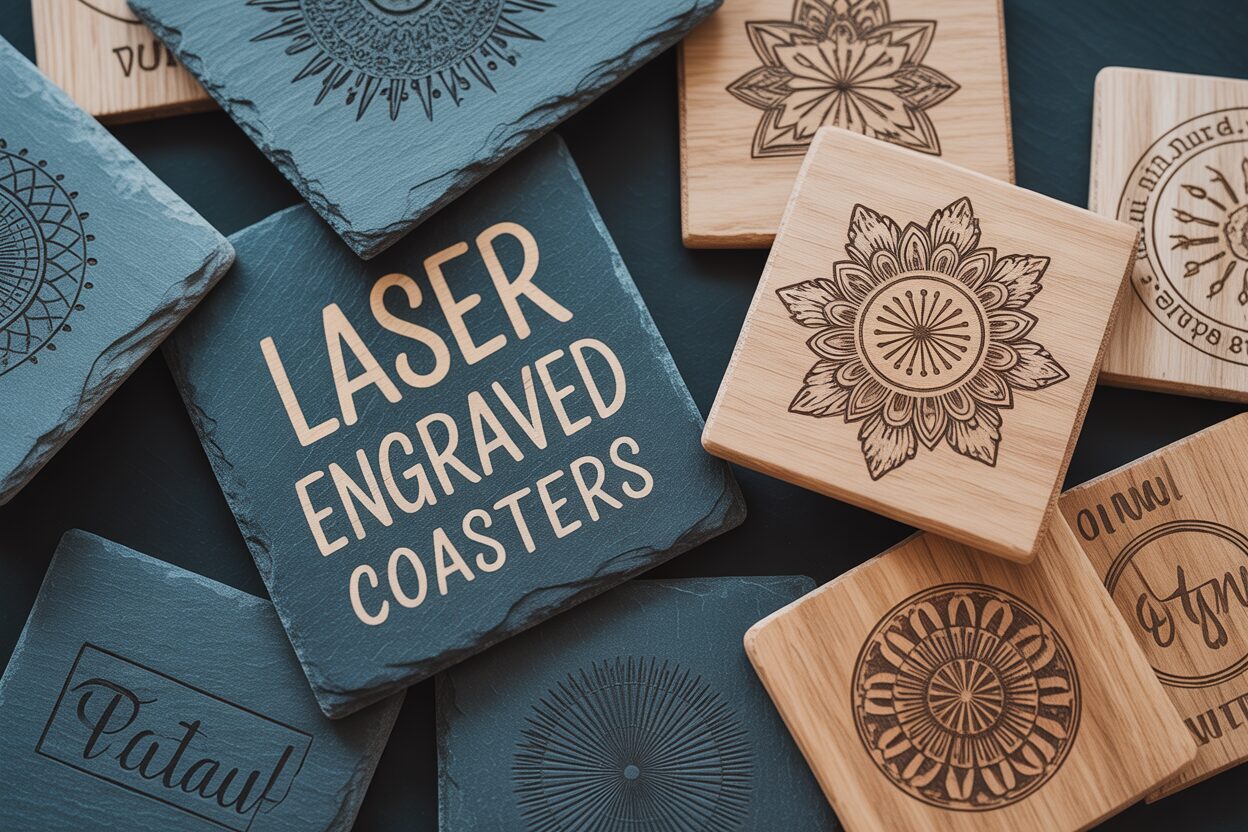
Creating Custom Laser Engraved Coasters for Any Occasion
31
Jul
Jul
Estimated reading time: 7 minutes
Key Takeaways
- The choice of material—primarily wood or slate—is crucial as it dictates the design possibilities, laser settings, and final aesthetic of your coasters.
- For a small canvas like a coaster, simple, bold designs with ample negative space are more impactful than overly complex artwork, which can appear cluttered.
- Proper post-engraving finishing, including cleaning residue and applying a protective sealant like mineral oil, is essential for durability and dramatically enhancing the visual contrast of the design.
- Always conduct a test run on scrap material to dial in the perfect laser settings for power and speed, as these vary significantly between different materials and even batches.
Table of Contents
Discover the art of making beautiful laser engraved coasters. This guide will walk you through everything from selecting the right materials like wood and slate to the final finishing touches. Whether for personal use, as a unique gift, or to sell, creating custom coasters is a rewarding project that combines technology with creativity, perfect for any skill level.
Selecting the Perfect Material for Your Coasters
The foundation of a stunning laser engraved coaster is the material you choose. This decision impacts not only the final aesthetic but also your design process and laser settings. While many materials can be engraved, wood and slate have become the go-to choices for their durability, beauty, and excellent reaction to the laser. Let’s explore the most popular options to help you select the perfect canvas for your project.
Comparing Popular Wood Coaster Materials
Wood offers a classic, warm feel that is universally loved. However, not all woods engrave equally. The grain, density, and natural oils of the wood all play a crucial role in the final result.
- Acacia: Known for its rich, warm tones and dramatic, varied grain patterns, acacia is a fantastic choice for a rustic and high-end look. Pros: It’s extremely durable and water-resistant, making it ideal for coasters. The engraving produces a nice, dark burn. Cons: The inconsistent grain can be a challenge. Darker and lighter bands of wood run through a single piece, meaning the contrast of your engraving will vary across the surface. A design that looks bold on a light section might appear more subtle on a dark section.
- Bamboo: Technically a grass, bamboo is a sustainable and popular choice for laser engraving. It has a very light, consistent color that provides a perfect backdrop for high-contrast designs. Pros: It’s strong, eco-friendly, and engraves very cleanly, producing a rich, dark brown mark that stands out beautifully. It’s excellent for intricate designs and fine text. Cons: Bamboo can sometimes be fibrous, which may lead to minor “splintering” at the edges of an engraving if your settings aren’t dialed in. The prominent horizontal lines (nodes) are part of its look and can interrupt a design, which is something to consider during the layout phase.
- Cork: If you’re looking for a lightweight, absorbent, and budget-friendly option, cork is an excellent starting point. Pros: It’s very forgiving for beginners, and its primary function as a coaster is enhanced by its natural absorbency. Cons: Cork is not as durable as solid wood or slate and can crumble with rough use. The laser doesn’t “burn” cork in the traditional sense; it vaporizes the material, creating a debossed effect. The resulting contrast is low, so bold, simple graphics work much better than detailed photos or fine text. Be prepared for a distinct, smoky smell during engraving.
The Unique Appeal of Slate Coaster Engraving
For a modern, elegant, and incredibly striking result, nothing beats slate. Unlike wood, which the laser burns, slate is fractured by the laser beam. This process, called ablation, chips away the top surface, revealing a light gray or almost white layer underneath. This creates a permanent, high-contrast mark against the dark, natural slate that is simply stunning. This makes slate the superior choice for engraving detailed photographs, complex logos, and delicate text. When working with slate, keep a few tips in mind. First, always clean the surface with isopropyl alcohol before engraving to remove any dust or oils. Second, less power is often more; you want to fracture the surface, not melt it. Start with low power and high speed and run tests. Finally, after engraving, you can wipe the coaster with a bit of food-safe mineral oil. This will darken the slate itself, making the light-colored engraving “pop” even more dramatically.
Pre-Made Blanks vs. Laser Cutting From Scratch
Your final material consideration is whether to use pre-made coaster “blanks” or to create your coasters from scratch. Engraving pre-made blanks, available in wood, slate, and cork, is the most common and convenient method. It saves time, ensures consistent size and shape, and is perfect for beginners or fulfilling larger orders. The alternative, primarily for wood, is to purchase larger sheets of material and use your laser to cut custom coaster shapes—think hexagons, puzzle pieces, or unique outlines that match your design. This gives you ultimate creative freedom but requires a laser cutter powerful enough to cut through 3-6mm of wood and adds the extra steps of sanding and finishing the newly cut edges. For slate, you will almost always work with pre-made blanks, as cutting it requires specialized, high-power equipment beyond the scope of most hobbyist lasers.
Developing Compelling Coaster Designs
With your material selected, the next step is the creative heart of the project: developing a compelling design. The limited canvas of a coaster—typically a 4×4 inch square or circle—is both a challenge and an opportunity. A well-executed design will not only look beautiful but will also complement the material it’s engraved on. The goal is to create artwork that is clear, impactful, and tailored to the unique properties of wood or slate. The best engraving designs for coasters are those that embrace these constraints to create something truly special.
Designing for a Small Canvas
When working with a small format, every element matters. Overly cluttered designs can become a “muddy” mess, as fine details may be lost or bleed together during the engraving process. Simplicity is often your greatest asset. Think in terms of bold lines, clear shapes, and good contrast. The “negative space”—the un-engraved surface of the coaster—is just as important as the engraved part of your design. It provides breathing room and helps the artwork stand out. Consider the material you chose in the previous chapter. A simple monogram might be perfect for a piece of acacia with a dramatic grain, as a complex design would compete with the wood’s natural beauty. Conversely, the uniform, high-contrast surface of slate is an ideal canvas for more detailed work, like intricate patterns or even photographs.
High-Impact Design Elements and Software Choices
Certain design elements are particularly effective for coasters. These are great starting points for your own DIY laser projects:
- Monograms and Custom Text: A classic for a reason. Perfect for weddings (couple’s initials and date), housewarming gifts (family name), or personal branding. Choose fonts carefully; thick, clear sans-serif or bold serif fonts engrave much better than thin, delicate script fonts whose lines can get lost.
- Intricate Patterns: Geometric patterns, mandalas, floral motifs, or Celtic knots can turn a simple coaster into a piece of art. These designs require clean vector artwork to ensure the laser follows crisp, precise paths.
- Logos and Graphics: Ideal for corporate gifts or fans of a particular brand or team. Always use a high-quality vector file (like SVG, AI, or DXF) of the logo to avoid pixelation and ensure a professional result.
- Themed Sets: Instead of engraving the same image on every coaster, create a cohesive set. For a set of custom wood coasters, you could design four different leaf silhouettes for an autumn theme, four different constellations, or a series of related quotes. This approach elevates a simple gift into a curated collection.
To create these designs, you will need vector design software. Professional-grade options include Adobe Illustrator and CorelDRAW. However, for those on a budget, Inkscape is a powerful and completely free alternative, while Affinity Designer is an excellent, low-cost one-time purchase. These programs allow you to create scalable graphics with clean lines, which is essential for quality laser engraving. Inspiration is everywhere: look at textile patterns, architectural details, botanical illustrations, or browse online vector marketplaces for ideas you can adapt and make your own.
The Engraving and Finishing Process
With your design finalized, it’s time to bring it to life. This is where precision and process are key to transforming a digital file and a blank coaster into a finished product. The engraving and finishing stages are what separate a simple hobby project from a professional-quality gift or product. Following these steps will ensure your laser engraved coasters are clean, durable, and impressive.
Preparation and Laser Settings
Before you press ‘start’, proper setup is essential. First, prepare your material. For wood, simply wipe it with a clean, dry cloth to remove any dust. For slate, it is highly recommended to wipe the surface with isopropyl alcohol to remove any oils or residue that could interfere with the engraving. Next, prepare your laser.
- Secure the Coaster: Place your coaster in the laser bed. To ensure it doesn’t shift during the engraving process, secure it against a corner, use honeycomb pins, or create a simple jig out of scrap material.
- Focus the Laser: A perfectly focused laser beam is critical for a sharp, detailed engraving. Use your machine’s focusing tool to set the correct height between the laser nozzle and the surface of the coaster. An out-of-focus laser will produce a blurry, weak-looking result.
Now, let’s talk settings. There are no universal settings; every laser and material batch is slightly different. Always perform a test run on a scrap piece or the back of a coaster. For wood, you are looking for a rich, dark burn without excessive charring. A good starting point for a diode laser is around Power: 50-70%, Speed: 2000-4000 mm/min, and DPI (Dots Per Inch): 254-318. For slate, the goal is different; you want to fracture the surface, not melt it. This often requires less power and higher speed. Start with Power: 25-40%, Speed: 3000-5000 mm/min, and a higher DPI: 318 or more for detailed images.
Post-Engraving Cleaning and Finishing
Once the laser has finished its job, the final and most crucial steps begin. Raw engraved coasters are unfinished and vulnerable.
- Cleaning Wood: Wood engraving creates soot and resin residue around the edges of the burn. The best way to prevent this is to cover the wood with masking tape before engraving. Once done, you simply peel the tape off, taking all the residue with it for a perfectly clean result. If you don’t use tape, you can clean the coaster with a soft brush and a cloth lightly dampened with isopropyl alcohol. Be gentle to avoid smearing the soot into the wood grain.
- Cleaning Slate: Slate is much easier to clean. It will be covered in fine gray dust. Simply wash it under running water with a soft brush (an old toothbrush works well) and a bit of dish soap. Rinse it thoroughly and let it dry completely.
- Applying a Protective Finish: This final step protects the coaster from moisture and makes the engraving stand out. It is essential for turning your DIY laser projects into durable goods. For both wood and slate, you can apply a thin coat of food-safe mineral oil with a lint-free cloth. On wood, it enriches the color and grain. On slate, it has a magical effect, darkening the natural slate and making the light-gray engraving pop with incredible contrast. For extra durability on wood, you can apply a few light coats of a clear, food-safe spray sealant like shellac or polyurethane, allowing it to dry completely between coats. Your coasters are now complete, protected, and ready for use.
Conclusions
You now have the knowledge to create stunning laser engraved coasters from wood and slate. This rewarding process allows for endless creativity and personalization. By applying these techniques, you can produce high-quality, professional-looking coasters for your home, as thoughtful gifts, or even to start your own collection of for-sale items. Experiment with designs and materials to find your unique style.
Frequently Asked Questions
Q: What is the best coaster material for a beginner?
Interested in more Coaster? Check out our Coaster laser file designs: Click here!
A: Cork is an excellent starting point as it’s budget-friendly and very forgiving. However, slate is also a great choice for beginners because the high-contrast mark it produces is easy to achieve and looks incredibly professional with minimal effort.
Q: How do I make the engraving on my slate coasters “pop”?
A: After engraving and cleaning the coaster with water, apply a thin coat of food-safe mineral oil. This darkens the natural slate, which makes the light gray engraved areas stand out with dramatic contrast.
Q: My wood engraving looks blurry and weak. What’s wrong?
A: The most common cause of a blurry engraving is an improperly focused laser. Double-check the distance between your laser nozzle and the coaster’s surface. Weak results can also be due to incorrect settings, such as having the power too low or the speed too high for the specific type of wood.
Q: Do I need expensive software like Adobe Illustrator to create designs?
A: Not at all. While professional software is great, powerful and completely free alternatives like Inkscape are perfect for creating the high-quality vector graphics needed for laser engraving.

Subscribe to Our Newsletter
And enjoy FREE Download Files, SALE Alerts and Inspiring TIPS
Pricing Your Laser Engraving Work for Profitability
A Comprehensive Guide to Pricing Your Laser Engraving Services
A Comprehensive Guide on How to Price Laser Engraving Services
Charcuterie Board Engraving File – Wine & Grapes 3D Illusion…
$4.00Original price was: $4.00.$3.00Current price is: $3.00.(25% off)
Bee and Honey Jar Charcuterie Board Engraving File | PNG Download #007…
$4.00Original price was: $4.00.$3.20Current price is: $3.20.(20% off)
Valentine Love Captions: 6 Charcuterie Board Engraving Files…
$8.00Original price was: $8.00.$5.60Current price is: $5.60.(30% off)
American Eagle Flag Laser Engraving File for Charcuterie & Cutting…
$4.00Original price was: $4.00.$2.80Current price is: $2.80.(30% off)