

 Français
 Deutsch
 Español
 Italiano
Creating Custom Laser Cut Boxes: Designs, Materials, and Techniques
Jun
Estimated reading time: 15 minutes
Key Takeaways
- Precision is paramount: Laser cutting demands exact measurements and kerf compensation for successful joints, unlike traditional woodworking where minor discrepancies can be sanded away.
- Diverse Joint Techniques: Master various joints like finger joints for strength, living hinges for flexibility, and T-slots for modularity, selecting based on application needs.
- Strategic Material Selection: Choose materials like Baltic birch, MDF, or hardwoods based on aesthetic, structural, and cost considerations, and prepare them properly by accounting for thickness and storage.
- Optimize Laser Settings: Tailor speed, power, focus, and multi-pass strategies for different components and materials to achieve clean cuts, precise fits, and minimize thermal effects like charring and warping.
- Functionality Meets Decoration: Successful laser cut box designs seamlessly integrate structural integrity with aesthetic appeal, often integrating decorative elements that serve dual purposes or enhance the overall look.
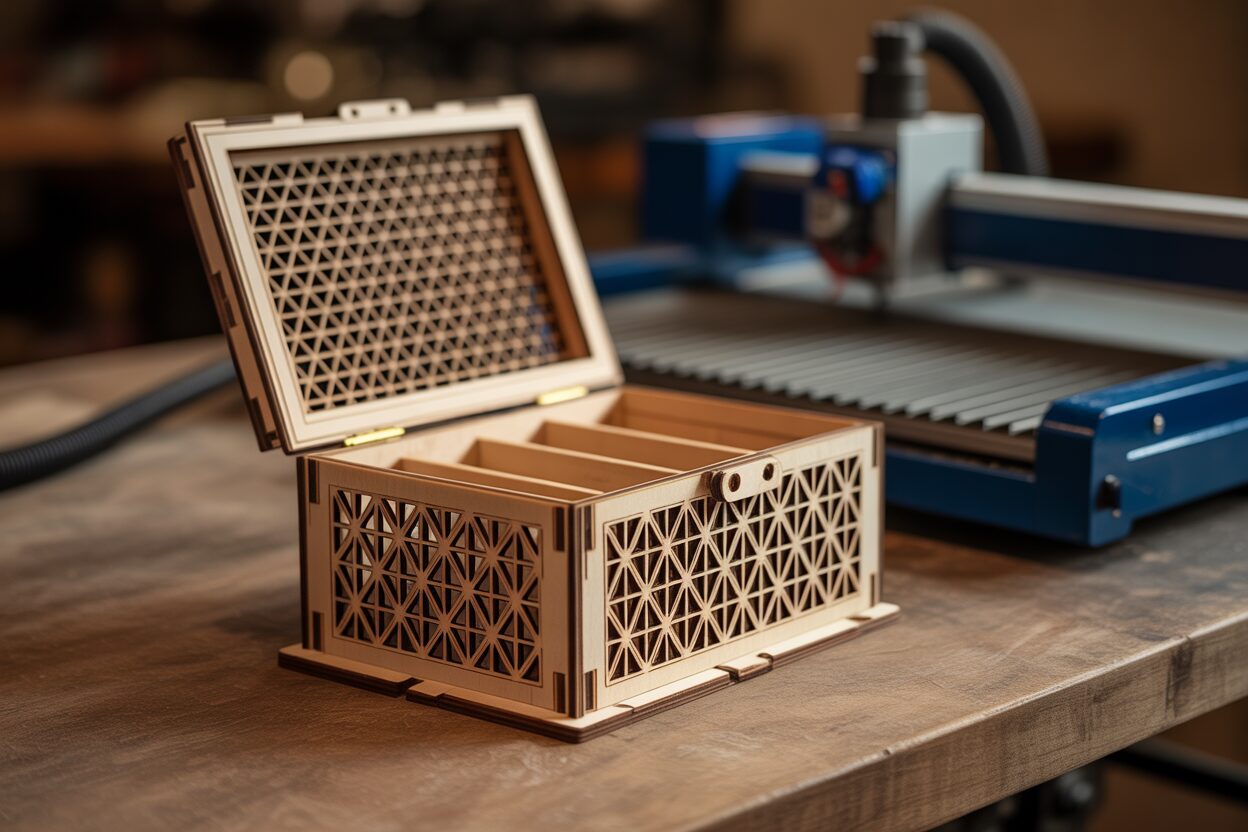
Laser cut boxes represent the perfect blend of functionality and artistic expression in the laser cutting world. From elegant jewelry containers to practical storage solutions, custom boxes showcase the versatility of laser technology while creating products with high market demand. This comprehensive guide explores everything you need to know about designing, cutting, and assembling stunning wooden boxes that will impress clients and elevate your laser cutting portfolio.
Understanding Box Design Fundamentals
The Precision Principle
Precision is the cornerstone of successful laser cut boxes. Unlike traditional woodworking where minor discrepancies can be sanded away, laser cutting demands exactness down to fractions of a millimeter. A 0.2mm error might seem negligible on paper, but can result in joints that either won’t fit together or are too loose to provide structural integrity. When designing custom laser cut box templates, always work in vector software that allows precise measurements and use decimal points rather than rounding.
Box Design Varieties
The world of laser cut boxes offers diverse design options to suit various needs. Simple lift-off lid boxes represent the entry point for beginners—featuring a base with four sides and a separate top piece. Hinged boxes add complexity by incorporating flexible connections, typically using living hinges cut into the material itself or separate hardware components. Sliding lid boxes utilize parallel grooves to create a smooth opening mechanism, while puzzle boxes incorporate interlocking components that must be manipulated in specific sequences to open.
Each wooden laser cut box design requires different approaches to joints and connections. Finger joints (also called box joints) provide excellent structural strength for rectangular boxes. Dovetail joints offer superior holding power but demand more precise cutting. Slot-and-tab designs allow for quick assembly without adhesives, making them ideal for prototype development.
Material Thickness Considerations
One of the most common mistakes in laser cut box design is failing to properly account for material thickness. Unlike working with paper or cardboard, wood and acrylic materials have significant thickness that affects how pieces fit together. When designing box joints, the depth of each finger must precisely match the material thickness to create flush corners.
Most design software doesn’t automatically compensate for this, so you must manually adjust measurements. For example, if creating a 100mm square box from 3mm plywood, the actual cut length for each side would be 94mm (100mm minus two material thicknesses) when using simple butt joints. With finger joints, the calculation becomes more complex as you must account for the interlocking pattern.
Understanding Kerf Adjustment
Kerf—the width of material removed by the laser beam—significantly impacts how tightly components fit together. Typical laser cutters remove between 0.1-0.3mm of material during cutting. For precisely fitting custom laser cut box templates, this small amount matters tremendously. When designing press-fit connections, subtract the kerf width from the slot size to achieve the perfect fit.
Different materials and laser power settings produce varying kerf widths. Creating a simple test piece with incrementally sized slots (increasing by 0.05mm) helps determine the exact kerf adjustment needed for your specific machine and material combination.
Material Selection Strategies
Material properties dramatically influence design decisions for laser cut boxes. Plywood offers good strength and attractive edge patterns but can have inconsistent thickness. MDF provides consistent dimensions and cuts cleanly but lacks the natural beauty of wood grain. Hardwoods deliver superior aesthetics but may require power adjustments to prevent charring.
When designing wooden laser cut box designs, consider how the material will respond to bending forces. Plywood allows for living hinges through parallel kerf cuts, while acrylic requires heat-bending or mechanical hinges. The grain direction in natural woods affects both strength and flexibility, making it crucial to align your design with the material’s natural properties.
Balancing Function and Decoration
The most compelling laser cut boxes seamlessly integrate functional elements with decorative features. Joints can be designed with decorative profiles while maintaining structural integrity. Surface engravings can follow the natural contours of the box rather than appearing as disconnected elements. When planning custom laser cut box templates, consider how decorative cutouts might serve dual purposes, such as ventilation or creating interesting light patterns.
Mastering Box Joints and Connection Methods
Finger Joints: The Foundation of Strength
Finger joints represent the cornerstone of laser cut box construction, providing both structural integrity and visual appeal. The optimal finger width-to-material thickness ratio typically falls between 1:1 and 1.5:1. For 3mm plywood, fingers between 3-4.5mm wide create the strongest connections while remaining visually balanced. Spacing between fingers should equal finger width for maximum strength, though aesthetic considerations might dictate variations.
When designing laser cut box joints, consider the corner stress patterns. Boxes that will bear weight benefit from higher finger counts, while decorative pieces might use fewer, wider fingers for visual impact. The finger length should penetrate completely through the adjoining piece, extending exactly to the outer edge without protruding. For materials prone to splitting, like thin hardwoods, round the interior corners of each finger slightly (0.2-0.3mm radius) to distribute stress more evenly.
Living Hinges: Flexibility Through Precision
Living hinges transform rigid wood into flexible connections through strategic cutting patterns. The most common pattern—parallel lines with alternating connections—creates flexibility perpendicular to the cuts. For optimal performance in laser cut boxes, use cuts that are 80-90% of the material thickness in depth and spaced approximately 0.5-1mm apart depending on material flexibility requirements.
The kerf width significantly impacts hinge performance. Wider kerfs create more flexible hinges but reduce durability, while narrower kerfs maintain strength but limit bend radius. For plywood living hinges, orient the grain perpendicular to the bend direction to prevent splitting. Pre-flexing newly cut hinges helps break internal fibers without damaging the outer veneer, increasing long-term durability in functional laser cut boxes.
T-Slot and Tab Construction
T-slot construction excels for boxes requiring frequent disassembly or modular designs. The classic T-slot consists of a narrow entry slot widening to a larger interior channel that captures a corresponding tab. For optimal fit, design the tab width at 95-98% of the T-slot width to account for material variations while ensuring secure connections.
Tab and slot construction offers simpler assembly for permanent laser cut boxes. The ideal tab length equals material thickness plus 0.2-0.3mm to ensure tabs bottom out in their slots without forcing. When designing slots, add 0.1-0.2mm clearance to the width dimension while maintaining exact depth measurements. This slight looseness in one dimension coupled with precision in the other creates joints that assemble easily yet remain structurally sound.
Kerf-Compensated Press-Fit Joints
Press-fit joints rely on material elasticity to create tension-held connections. Calculating proper kerf compensation requires understanding your specific laser’s cutting width. Create a test grid with slots varying from exactly material thickness to 0.3mm less in 0.05mm increments. The slot that allows firm insertion without forcing identifies your optimal kerf compensation value.
Different materials require varying compensation factors. Acrylic, being less forgiving, typically needs precise compensation of 0.1-0.15mm, while plywood’s natural compression allows for slightly tighter fits of 0.15-0.2mm under material thickness. For laser cut box joints using press-fit techniques, always factor in material thickness variations—especially in natural woods and plywood—by designing joints that can accommodate ±0.2mm variance.
Closure and Hardware Integration
Removable lids benefit from subtle undercuts where the inner dimension of the lid is 0.3-0.5mm larger than the outer dimension of the box body, creating a slight lip that prevents the lid from sliding while remaining easily removable. For sliding mechanisms, create parallel channels with depth equal to tab thickness plus 0.3mm clearance to ensure smooth operation without binding.
Integrating hardware enhances laser cut boxes with features impossible to achieve through cutting alone. When designing for hinges, create mortises exactly matching hardware dimensions, accounting for swing clearance. Magnetic closures work best when embedded in recessed pockets cut to 90% of magnet depth, allowing adhesive to secure them flush with the surface. For more complex clasps, design mounting points with pilot holes 0.5mm smaller than fasteners to allow self-tapping without splitting.
Selecting Joints by Application
Small decorative laser cut boxes (under 100mm) benefit from simplified finger joints with fewer, wider fingers to maintain structural integrity while simplifying assembly. Medium utility boxes perform best with standard finger joints at corners and tab-slot construction for internal dividers. Large storage boxes require reinforced corners—consider double-layer finger joints where each layer offsets by half a finger width, effectively doubling corner strength.
For boxes requiring water resistance, tight miter joints with interior reinforcement strips provide better sealing than traditional laser cut box joints. Display cases benefit from transparent front panels secured with specialized slot joints that hide connection points behind solid sides. When aesthetics are paramount, consider blind joints where connection mechanisms remain completely hidden from external view, achieved through precisely placed internal tabs that lock into concealed slots.
Material Selection and Preparation
Wood Types for Laser Cut Boxes
The foundation of exceptional laser cut boxes begins with selecting the right material. Baltic birch plywood stands as the gold standard for precision box making, featuring void-free core layers that create distinctive striped edges when cut. Available in thicknesses from 1.5mm to 12mm, its consistent density allows for predictable kerf width and minimal charring. Aircraft grade plywood offers similar benefits with lighter weight, though at a premium price point.
MDF (Medium Density Fiberboard) provides unmatched dimensional stability and smooth cutting surfaces ideal for intricate designs. Its homogeneous composition eliminates grain issues that can affect cut quality, making it perfect for detailed small laser cut boxes. However, MDF edges absorb finish unevenly and lack the natural beauty of real wood. For boxes requiring superior edge appearance, consider MDF core with hardwood veneer facing.
Solid hardwoods deliver unmatched aesthetic appeal but present unique challenges. Cherry produces minimal charring and develops a rich patina over time, making it excellent for heirloom-quality laser cut boxes. Maple offers exceptional hardness and clean cutting, while walnut’s dark tones create dramatic contrast with engraved details. When working with solid hardwoods, select quarter-sawn stock whenever possible to minimize warping and ensure consistent thickness.
Specialty Materials Beyond Wood
Acrylic sheet creates striking transparent or colored laser cut boxes with glass-like clarity. Opt for cast acrylic rather than extruded varieties for cleaner edge quality and reduced stress cracking. Acrylic thickness should typically exceed 3mm for structural boxes to prevent flexing.
Bamboo sheet material offers exceptional sustainability credentials with distinctive grain patterns and excellent cutting characteristics. Its natural silica content creates minimal flame during cutting, resulting in remarkably clean edges requiring minimal post-processing.
Cork sheet produces unique textural qualities perfect for decorative or lightweight applications. When used for laser cut boxes, cork works best as an accent material rather than structural components, typically laminated to more rigid substrates.
Thickness Considerations
Material thickness fundamentally shapes both design possibilities and structural outcomes. For small laser cut gift boxes under 100mm in any dimension, 2-3mm materials provide sufficient strength while allowing for delicate details. Medium-sized utility boxes benefit from 4-5mm stock, offering improved durability without excessive weight. Large storage boxes require 6mm or thicker materials to prevent side panel bowing.
The relationship between material thickness and joint design proves critical. Finger joints should maintain a minimum finger width approximately equal to material thickness—any thinner risks breaking during assembly. For living hinges, thinner materials (1.5-3mm) produce more flexible results, while box lids generally require slightly thinner material than their corresponding bases to ensure proper fit.
Material Preparation Techniques
Proper storage fundamentally affects cutting results. Store sheet goods flat with even support to prevent warping. For the best materials for laser cut boxes, maintain consistent humidity levels between 35-50% and allow materials to acclimate to your workspace for 24-48 hours before cutting.
Preparing warped sheets requires intervention. For mild warping, apply gentle moisture to the concave side and weight the sheet flat overnight. Severely warped plywood may require dampening and progressive clamping to flat surfaces over several days. MDF rarely recovers from significant warping and should be replaced.
Surface preparation significantly impacts cut quality. Remove all labels, adhesives, and surface contaminants with isopropyl alcohol. For woods with raised grain, light sanding with 220-grit paper improves surface consistency. Apply low-tack masking tape to surfaces prone to smoke staining, particularly when creating presentation-quality laser cut boxes.
Material Safety and Testing
Not all materials suitable for woodworking are appropriate for laser cutting. Avoid pressure-treated lumber, PVC, vinyl, and materials containing halogens which produce toxic chlorine gas when cut. Questionable composite materials should undergo small test cuts with proper ventilation before full production.
When sourcing unfamiliar plywood, examine edge quality for voids or inconsistent core layers that may compromise joint strength. Test unknown materials by cutting small samples at various power settings to determine optimal parameters before committing to full box production.
Cost Optimization Strategies
Material yield significantly impacts the economics of laser cut boxes. Nest designs efficiently by arranging parts with minimal spacing (typically 2-3mm between components). Orient grain-sensitive parts consistently to maintain structural integrity while maximizing sheet usage.
For production work, consider purchasing sheet goods in half or quarter sheets rather than full 4’×8′ panels, reducing waste from unused portions. When creating multiple boxes, arrange components from different-sized projects together on single sheets to utilize material that would otherwise become scrap.
Source materials strategically by developing relationships with cabinet shops that may sell offcuts of premium materials at reduced prices. For small laser cut gift boxes, these remnants often provide sufficient material at fraction of retail cost while maintaining professional quality.
Optimizing Laser Settings for Box Components
Component-Specific Parameters
Successful laser cut boxes require tailored settings for each component type. Box sides demand absolute dimensional accuracy with perpendicular edges to ensure proper joint alignment. For these critical structural elements, prioritize consistent power delivery over maximum cutting speed. Exterior faces typically benefit from 5-10% higher power settings than interior components to counteract the subtle charring that occurs on first-contact surfaces.
Box bottoms often contain alignment notches that interface with side panels, requiring precision comparable to joinery cuts. However, since bottoms frequently use thicker material for structural support, increase power by approximately 15% compared to side panel settings while reducing speed proportionally. For removable or sliding lids, reduce power by 3-5% from your standard settings to create slightly tighter tolerances that ensure secure closure without binding.
Decorative elements introduce variable depth requirements within single components. When cutting intricate patterns on box faces, sequence your operations with internal cuts first, followed by outer perimeter cuts. This approach maintains material stability during complex cutting operations, preventing the shifting that occurs when delicate components separate from the main sheet prematurely.
Speed-Power Relationship for Perfect Joints
The cornerstone of professional-quality laser cut boxes lies in the precise balance between cutting speed and power when creating joinery components. Rather than maximizing cutting speed, prioritize consistency by keeping speed below 70% of your machine’s maximum capability while adjusting power to achieve complete cutting. This approach provides more uniform power delivery across directional changes where acceleration forces typically cause variations.
For finger joints in 3mm Baltic birch plywood, starting parameters might include 50% speed with 65% power (on a 60W machine), focusing on achieving clean separation without visible charring at intersection points. Test these settings by creating a small three-finger test joint, examining the fit, then incrementally adjusting power in 2% increments while maintaining constant speed until achieving ideal fit.
Critical corners where multiple joints converge require special attention. These areas receive higher cumulative heat exposure as the laser decelerates and changes direction. Compensate by programming a 0.1mm overcut (where vectors extend slightly beyond their intersection points) to ensure complete separation despite potential power variations at directional changes.
Focus Optimization Techniques
Material thickness significantly impacts focus requirements for laser cut boxes. The theoretical focal point—where laser energy concentrates most intensely—should typically position at approximately 1/3 depth from the top surface for materials up to 6mm thick. This positioning creates a slightly conical kerf that facilitates joint assembly while maintaining structural integrity.
For thicker materials (8mm+), consider implementing dual focus techniques where the first pass utilizes standard focus position, followed by a second pass with focus adjusted 2-3mm deeper. This approach maintains consistent kerf width throughout the material depth, preventing the problematic trapezoidal cut profile that often occurs in single-pass cutting of thick materials.
Verify focus optimization by examining cut edges under magnification—properly focused cuts show consistent charring patterns from top to bottom, while improperly focused cuts display obvious variations in char density and kerf width. Document optimal focus positions for each material thickness used in your laser cut boxes to ensure repeatability across projects.
Multiple Pass Strategies
Single-pass cutting works well for thin materials and simple box designs, but complex laser cut boxes often benefit from multi-pass approaches. For materials thicker than 4mm, program two passes at 60% of full cutting power rather than one pass at 100%. This strategy reduces heat accumulation, minimizes charring, and produces cleaner edge quality, particularly important for visible box joints.
When creating precise finger joints, implement a three-pass strategy: first pass at 40% power cuts approximately 60% through the material, second pass at 30% power extends to 90% depth, and final pass at 25% power completes separation with minimal thermal impact. This graduated approach dramatically reduces the “blow-out” effect on the bottom edge of the material where excess energy typically causes irregular charring.
For decorative components with mixed cutting requirements, program progressive depth passes beginning with the shallowest engraving operations and concluding with through-cuts. This sequence maintains material stability throughout the process while optimizing focus for each operation type.
Controlling Thermal Effects
Material warping during cutting presents a significant challenge for precision laser cut boxes. Minimize thermal distortion by programming cut sequences that distribute heat evenly across the workpiece. Alternate between cutting operations in different areas rather than completing all cuts in one region before moving to another.
For boxes with extensive internal cutouts, sequence operations from the center outward. This approach removes internal material (which can trap heat) early in the process, allowing better thermal dissipation before cutting critical joint components. When creating living hinges within box components, always cut these heat-sensitive elements last to prevent warping that would affect adjacent structural elements.
Adjust air assist pressure based on material characteristics—higher pressure for materials prone to flaming (like MDF), moderate pressure for standard plywood, and reduced pressure for thin veneers that might distort under strong airflow. For exceptional precision in small laser cut boxes, consider adding a 30-second pause after every 25% of cutting operations, allowing material cooling before proceeding.
Living Hinge Optimization
Creating functional living hinges requires specific parameter adjustments. Reduce power to 75-80% of your standard cutting setting while maintaining normal speed. This approach leaves a microscopic layer of material intact at the bottom of each cut, providing the flexibility essential for hinge functionality without compromising structural integrity.
Hinge cut patterns demand precise focus control—set focus exactly at material surface rather than using the 1/3-depth standard for through-cuts. This surface-focused approach ensures uniform kerf width across all hinge lines, critical for consistent bending properties. For maximum durability in functional laser cut boxes, program double-pass engraving for the connecting elements between hinge cuts, strengthening these potential failure points.
Operation Transitions and Documentation
Efficient workflow requires strategic transitions between cutting and engraving operations. Sequence operations by focus requirements rather than by component, minimizing focus adjustments during production. Program all surface engravings first with identical focus settings, followed by through-cuts grouped by material thickness.
Create a comprehensive settings library documenting optimal parameters for each material type and thickness used in your laser cut boxes. Record power percentage, speed, frequency, focus position, and number of passes for both cutting and engraving operations. Supplement these records with small test samples demonstrating successful results, creating a physical reference library for future projects.
When troubleshooting incomplete cuts, examine the bottom edge for consistency—intermittent separation indicates power fluctuations requiring stabilized power input. Address excessive charring by increasing speed rather than reducing power, maintaining sufficient energy for complete cutting while reducing dwell time. For dimensional inaccuracies, verify mechanical calibration before adjusting cutting parameters, as belt tension and mirror alignment often contribute to precision issues in ways that parameter adjustments cannot resolve.
Conclusions
Mastering the art of laser cut boxes opens up countless creative and business opportunities. By understanding material selection, joint techniques, and design principles, you can create functional, beautiful pieces that stand out in the marketplace. Whether you’re making simple gift boxes or intricate jewelry cases, the skills developed through box making transfer to numerous other laser projects. Start with basic designs and gradually challenge yourself with more complex constructions to build a remarkable portfolio of laser cut boxes.

Subscribe to Our Newsletter
And enjoy FREE Download Files, SALE Alerts and Inspiring TIPS
Pricing Your Laser Engraved Products for Profit
A Comprehensive Guide on How to Price Laser Engraving Jobs
Pricing Your Laser Engraving Work for Profitability
Charcuterie Board Engraving File – Wine & Grapes 3D Illusion…
$4.00Original price was: $4.00.$3.00Current price is: $3.00.(25% off)
Bee and Honey Jar Charcuterie Board Engraving File | PNG Download #007…
$4.00Original price was: $4.00.$3.20Current price is: $3.20.(20% off)
Valentine Love Captions: 6 Charcuterie Board Engraving Files…
$8.00Original price was: $8.00.$5.60Current price is: $5.60.(30% off)
American Eagle Flag Laser Engraving File for Charcuterie & Cutting…
$4.00Original price was: $4.00.$2.80Current price is: $2.80.(30% off)