

 Français
 Deutsch
 Español
 Italiano
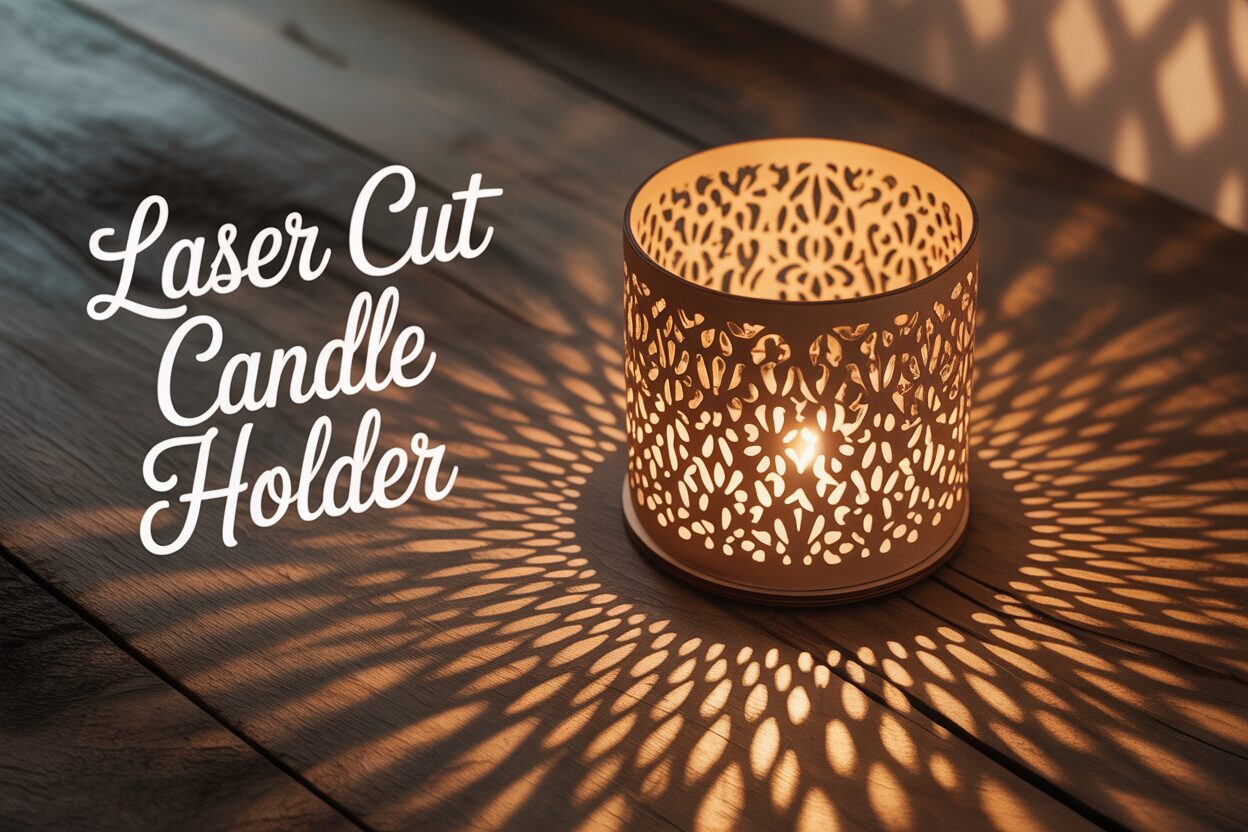
Create a Beautiful Laser Cut Candle Holder
Oct
Estimated reading time: 8 minutes
Key Takeaways
- Material Matters: The success of your project hinges on choosing the right material. 3mm Baltic Birch Plywood is ideal for a natural wood grain finish, while 3mm MDF provides a smooth surface perfect for painting. Always measure your material’s actual thickness with calipers.
- Test Cuts are Non-Negotiable: Before cutting your full design, always perform a small test cut on a scrap piece of your material to dial in the perfect power and speed settings. This step prevents wasted material and ensures clean, precise cuts.
- Dry Fit Before Gluing: Always assemble your lantern completely without glue first (a “dry fit”). This ensures you understand how the pieces connect and that everything fits correctly before committing with wood glue.
- Safety First: Never use a real flame candle in a wooden lantern. The risk of fire is significant. Always use battery-operated LED tea lights or fairy lights for safe and beautiful illumination.
Table of Contents
- Choosing Your Materials and Design
- Setting Up Your Laser Cutter
- Assembling and Finishing Your Candle Holder
- Conclusions
- Frequently Asked Questions
Learn how to create a stunning laser cut candle holder with our easy-to-follow guide. This project is perfect for adding a touch of warmth and elegance to your home decor. We’ll walk you through everything from selecting the right wood lantern SVG file to assembling your finished piece, making it a great project for both beginners and experienced makers.
Choosing Your Materials and Design
Choosing the right materials and a well-crafted design are the foundational steps that will determine the success and beauty of your candle holder. Before you even power on your laser, making thoughtful decisions here will save you time, prevent frustration, and ensure your final piece is something you can be proud of. The type of wood you select not only influences the aesthetic but also how cleanly it cuts and assembles. The most popular and reliable choices for laser cutting are Baltic Birch Plywood and MDF (Medium-Density Fiberboard). Baltic Birch is favored for its beautiful, light-colored grain, which can be left natural or stained to a rich finish. It’s a strong, stable material with a consistent density, which helps the laser cut through it evenly. MDF, on the other hand, is an engineered wood product with no grain. Its perfectly smooth surface is ideal if you plan to paint your lantern, as it provides a flawless canvas. It’s also typically more affordable than plywood, but be aware that it can produce more charring on the cut edges and a less pleasant smell during cutting.
The Importance of Material Thickness
Just as crucial as the type of wood is its thickness. The vast majority of digital designs for laser-cut projects are engineered for a specific material thickness, most commonly 3mm (approximately 1/8 inch). This is because the design relies on interlocking tabs and slots for assembly. If you use a material that is thicker than what the design calls for, the tabs will be too large to fit into the slots. Conversely, if your material is too thin, the joints will be loose and sloppy, resulting in a wobbly lantern that will require a significant amount of glue to hold together. Before you purchase wood, check the description of the design file you intend to use. Then, when you receive your wood, it is highly recommended to measure its actual thickness with a pair of digital calipers. A sheet of wood sold as “3mm” can vary in thickness from 2.8mm to 3.2mm, and that small difference is enough to affect the fit of your project. A quality design file may even include a small test piece with various slot sizes so you can run a quick test cut to determine the perfect fit for your specific material.
Finding the Perfect Lantern Design
With your material in mind, the next step is finding the perfect digital blueprint. The internet is a treasure trove of stunning designs, with online marketplaces being the best place to start your search. Websites like Etsy, Design Bundles, and Creative Fabrica are filled with thousands of files created by talented designers specifically for laser cutting. Using search terms like “laser cut lantern SVG,” “wooden candle holder DXF,” or “3D lantern file” will yield a vast array of options, from simple, elegant four-sided lanterns to complex, ornate hexagonal structures.
When browsing for your ideal laser cut lantern design, there are a few key indicators of quality to look for. A well-made file is more than just a collection of lines; it’s a complete package designed for success. Pay close attention to the following:
- Clear Instructions: Look for listings that mention the inclusion of a PDF assembly guide. A good designer will provide step-by-step instructions, often with pictures, showing how the pieces fit together. This is invaluable and will save you from a frustrating puzzle-solving session.
- Slot-and-Tab Construction: The product photos and description should show that the design uses interlocking tabs for assembly. This “press-fit” or “snap-fit” construction is a sign of a well-engineered file and results in a sturdy lantern that often requires no glue.
- Multiple File Formats: A quality download will typically include several file types, such as SVG, DXF, AI, and LBRN. This ensures compatibility with whatever software you and your laser cutter use.
- Reviews and Photos: Check for reviews and photos from other customers. Seeing successfully completed projects from other makers is the best proof that the design is well-tested and cuts cleanly.
By carefully selecting both your wood and your digital design file, you set yourself up for a smooth and enjoyable making process, culminating in a beautiful, professionally finished wooden lantern.
Setting Up Your Laser Cutter
With your chosen wood and design file in hand, it’s time to translate your digital vision into a physical reality. This stage involves preparing your laser cutter, a process that blends technical precision with a bit of artistic trial-and-error. Properly setting up your machine is the single most important factor in achieving crisp, clean cuts that will make assembly a breeze. The first step is always to prepare your workspace. Ensure your laser cutter’s lens and mirrors are clean, as any smudges or debris can diffuse the laser beam and lead to incomplete cuts. Place your sheet of wood onto the machine’s bed, making sure it lies completely flat. Even a slight warp in a piece of plywood can alter the focus distance of the laser, resulting in areas that don’t cut through. Use hold-down pins or strong magnets along the edges of the wood to secure it firmly to the honeycomb bed. Finally, and most critically, double-check that your ventilation system is turned on and properly venting to the outside. The smoke and fumes produced from cutting wood are harmful and must be safely extracted.
Dialing in Your Laser Settings
Once your material is secure, upload your lantern SVG file to your laser cutter’s software. You will see the design laid out over a camera image of your wood. Now, you must assign the correct settings for cutting and any engraving elements. These settings are primarily a balance of three variables: power, speed, and focus.
- Power: This determines the intensity of the laser beam. For cutting through 3mm plywood or MDF, you will typically use a high power setting, often close to 100%.
- Speed: This controls how quickly the laser head moves across the material. A slower speed allows the laser to dwell on one spot for longer, resulting in a deeper cut. Cutting requires a much slower speed than engraving.
- Focus: The laser beam must be precisely focused on the surface of the material to work effectively. Most modern lasers, like a Glowforge, have an autofocus feature. However, you must always ensure the software knows the correct thickness of your material. If you measured your “3mm” wood and found it’s actually 3.15mm, entering that precise value will yield significantly better results.
If you are using a branded material like Glowforge Proofgrade, the machine will scan a QR code and apply the perfect settings automatically. However, for most projects, you’ll use non-branded wood and will need to input settings manually. For a typical glowforge lantern project on 3mm Baltic Birch, a good starting point might be a speed of 165 and full power. But this is only a starting point.
The Indispensable Test Cut
Never run a full project with untested settings. Every laser is slightly different, and every piece of wood has variations in density and moisture content. To avoid wasting a whole sheet of material, always perform a small test cut first. Most design files come with a small test piece, or you can simply draw a one-inch square with a small circle inside it on a scrap area of your wood. Run the cut with your proposed settings. After the cut, try to poke the circle and square out with a fingertip. If they fall out easily with no resistance, your settings are perfect. If they are stuck, you need to either decrease the speed slightly (e.g., from 165 to 160) or increase the power. If the edges have excessive charring or “flashback” marks on the back, your power might be too high or your speed too low, so you could try increasing the speed. It may take two or three small tests to dial in the settings perfectly, but this small investment of time is guaranteed to save you headaches later. Once you’re confident in your settings, you are ready to press the button and watch your laser cutter bring your lantern to life.
Assembling and Finishing Your Candle Holder
Once the laser has finished its precise work, you’ll be left with a sheet of wood containing all the perfectly cut components of your lantern. Carefully pop each piece out from the main sheet. Some parts, especially those with intricate details, can be delicate, so handle them with care to avoid snapping any thin sections. Before you begin assembly, it’s a good practice to clean the pieces. A light film of smoke residue often settles on the wood surface during cutting. You can easily wipe this away with a cloth lightly dampened with isopropyl alcohol or even a baby wipe. This ensures your glue will adhere properly and prevents smudges if you plan on leaving the wood in its natural state. Lay out all the pieces and consult the assembly guide that came with your design file. Always perform a “dry fit” first. Assemble the entire lantern without any glue to understand how the parts connect and to ensure everything fits snugly. This test run allows you to identify the correct orientation of each piece and the best order of operations for the final gluing.
The Assembly Process
When you are ready for the final assembly, a quality wood glue is your best friend. A small bottle of PVA wood glue (like Titebond) with a fine-tipped nozzle is ideal. Disassemble your dry-fitted lantern and begin reassembling it, this time applying a very thin bead of glue to the inside faces of the slots or along the edges of the tabs that will form the joints. A little goes a long way; you want just enough to create a strong bond without having excess glue squeeze out and mar the surface. Use a toothpick or a small brush to spread the glue evenly for a clean application. As you connect the pieces, use a damp cloth to immediately wipe away any glue that does squeeze out. For lanterns with more complex shapes, you may find it helpful to use painter’s tape or small rubber bands to hold the structure together and keep the joints tight while the glue cures. Allow the fully assembled laser cut candle holder to dry completely, following the time recommended on your glue bottle, before moving on to the finishing touches.
Enhancing and Protecting Your Lantern
With the construction complete, you can now enhance the beauty of your creation. The finishing technique you choose will depend on the wood you used and the aesthetic you desire.
- Sanding: A light sanding with fine-grit sandpaper (220-grit or higher) can smooth any slightly rough edges and remove any remaining laser char for an exceptionally clean look. If you plan to stain, sanding the flat surfaces beforehand will help the stain absorb more evenly.
- Staining: If you used a wood like Baltic Birch, applying a wood stain is a wonderful way to bring out the natural grain and give your lantern a rich, professional finish. Apply the stain with a clean cloth, let it penetrate for a few minutes, and then wipe off the excess.
- Painting: For a pop of color or if you used MDF, painting is an excellent option. For best results, apply a coat of primer first, which will seal the wood and provide an even base for your color. Spray paint often provides the smoothest, most even finish for intricate laser-cut designs.
Regardless of your choice, consider applying a final clear coat of polyurethane or acrylic sealer. This will protect the wood from moisture and dust, ensuring your lantern remains beautiful for years to come.
A Note on Safety and Illumination
Finally, it’s time to light up your new creation. While it is called a candle holder, it is crucial to remember that your lantern is made of wood, which is a flammable material. For this reason, you should never use a real flame wax candle inside your wooden lantern. The heat can scorch the wood, create a serious fire hazard, and the soot can stain the interior. The best and safest way to illuminate your lantern is with a battery-operated LED tea light or a small string of fairy lights. Modern LED candles provide a realistic, warm, flickering glow without any of the risks, allowing you to enjoy the beautiful patterns of light cast by your handcrafted lantern with complete peace of mind.
Conclusions
With this guide, you can confidently create your own beautiful laser cut candle holder. This project not only enhances your crafting skills but also results in a personalized piece of decor. Experiment with different designs and finishes to make unique lanterns for yourself or as thoughtful gifts for friends and family. Happy crafting!
Frequently Asked Questions
Q: What is the best wood for a laser cut candle holder?
A: The best choices are 3mm Baltic Birch Plywood for a beautiful, natural wood grain finish, or 3mm MDF (Medium-Density Fiberboard) for a perfectly smooth surface that is ideal for painting.
Q: Why is a test cut so important?
A: A test cut allows you to fine-tune your laser’s power and speed settings for your specific piece of wood before cutting the entire project. This ensures clean cuts, proper fit, and prevents wasting a whole sheet of material on incorrect settings.
Q: Can I use a real candle in my wooden lantern?
A: No. You should never use a real flame candle inside a wooden lantern as it is a serious fire hazard. Always use safe alternatives like battery-operated LED tea lights or fairy lights.
Q: What should I look for in a good lantern design file?
A: A quality design file should include clear assembly instructions (like a PDF guide), use slot-and-tab construction for a sturdy fit, come in multiple file formats (SVG, DXF, etc.), and have positive customer reviews with photos of completed projects.

Subscribe to Our Newsletter
And enjoy FREE Download Files, SALE Alerts and Inspiring TIPS
How to Find and Use the Best Laser Engraving Files for Wood and Slate Projects
Pricing Your Laser Engraved Products for Profit
A Comprehensive Guide on How to Price Laser Engraving Jobs
Charcuterie Board Engraving File – Wine & Grapes 3D Illusion…
$4.00Original price was: $4.00.$3.00Current price is: $3.00.(25% off)
Bee and Honey Jar Charcuterie Board Engraving File | PNG Download #007…
$4.00Original price was: $4.00.$3.20Current price is: $3.20.(20% off)
Valentine Love Captions: 6 Charcuterie Board Engraving Files…
$8.00Original price was: $8.00.$5.60Current price is: $5.60.(30% off)
American Eagle Flag Laser Engraving File for Charcuterie & Cutting…
$4.00Original price was: $4.00.$2.80Current price is: $2.80.(30% off)