

 Français
 Deutsch
 Español
 Italiano
Crafting the Perfect Laser Engraved Charcuterie Board
Aug
Estimated reading time: 10 minutes
Key Takeaways
- Material Selection is Crucial: The choice of material, such as closed-grain hardwoods like Maple, Cherry, and Walnut, is fundamental for achieving high-quality engraving results, ensuring durability, and maintaining food safety.
- Thoughtful Design and Sourcing: Personalization is key to a memorable board. Use vector files (like SVG) for scalable, clean designs and create a paper mock-up to perfect the placement and sizing before engraving.
- Master Your Laser Settings: There are no universal settings. Always perform a material test grid to find the optimal balance of power, speed, and resolution for your specific wood or slate to avoid issues like charring or faint engravings.
- Finishing is for Safety and Longevity: After cleaning off post-engraving residue, applying a food-safe finish like mineral oil or a beeswax blend is essential to protect the wood and make the board safe for serving food.
Table of Contents
- Choosing the Right Wood and Board Style
- Designing Your Custom Engraving
- Mastering Laser Engraver Settings for Perfect Results
- The Engraving Process and Applying a Food-Safe Finish
- Conclusions
- Frequently Asked Questions
A laser engraved charcuterie board is more than just a serving platter; it’s a personalized piece of art. Whether for a gift or your own home, this guide will walk you through creating a stunning and unique board. We’ll cover everything from choosing the right materials and design to the final, food-safe finishing touches, making your project a success.
Interested in more Charcuterie Board? Check out our Charcuterie Board laser file designs: Click here!
Choosing the Right Wood and Board Style
The foundation of any stunning laser engraved charcuterie board is the material itself. The choice of wood or alternative material not only dictates the board’s final appearance and durability but also how well it accepts the intricate details of your laser design. Making an informed decision at this stage is crucial for a successful project that is both beautiful and functional.
Popular Wood Choices for Engraving
When selecting wood, you are looking for a balance of hardness, grain pattern, and color contrast. Hardwoods are preferred for their durability and resistance to bacteria. Closed-grain woods, which have smaller pores, provide a smoother surface for engraving and are generally more hygienic. Here are some of the best options:
- Maple: A classic and popular choice, maple is a very hard, dense, and closed-grain wood. Its light, creamy color creates a high-contrast canvas, making laser engravings stand out sharply. It’s incredibly durable and resistant to scratches, making it ideal for a board that will see frequent use. The grain is typically subtle and straight, ensuring it doesn’t distract from your engraved design.
- Cherry: Known for its warm, reddish-brown hue that deepens beautifully over time with exposure to light, cherry offers a rich and elegant look. It’s slightly softer than maple but still very durable. Engravings on cherry produce a lovely dark tone, offering a subtle, sophisticated contrast rather than the stark pop seen on maple. Its smooth, straight grain makes for a consistent engraving surface.
- Walnut: For a luxurious and dramatic appearance, walnut is unparalleled. Its deep, chocolate-brown colors, often highlighted with lighter sapwood streaks, provide a premium feel. Laser engraving on walnut results in a dark-on-dark, low-contrast effect that is understated and refined. While it offers less visual “pop,” the result is exceptionally classy. Walnut is a durable hardwood that will stand the test of time.
- Acacia: Valued for its sustainability and striking, often variegated grain patterns, acacia is a very hard and water-resistant wood. Its color can range from light amber to a deep mahogany within a single piece. While its visual appeal is high, the inconsistency in its grain and density can sometimes lead to uneven engraving results. It’s a great choice for a rustic look, but achieving perfect uniformity can be a challenge.
Edge Grain vs. End Grain Construction
The way a wooden board is constructed significantly impacts its performance and suitability for engraving. Edge grain boards are made by laminating long strips of wood together with the edge of the grain facing up. This creates a smooth, uniform, and stable surface that is ideal for laser engraving, as the laser can move across a consistent density. They are durable and excellent for serving. End grain boards are made by fusing together short blocks of wood with the tough end fibers facing up. This “checkerboard” style is prized by chefs because it is “self-healing” and gentle on knife blades—the fibers separate to accept the knife and then close back up. However, the porous and varied surface of end grain is much more challenging for laser engraving, often resulting in inconsistent depth and clarity. For a decorative and serving-focused laser engraved charcuterie board, an edge grain construction is almost always the superior choice.
Exploring Alternative Materials: Slate
If you desire a modern, non-wood alternative, slate is an excellent option. This natural stone provides a dark, textured background that creates a stunning, high-contrast effect when engraved, turning a crisp white or light gray. Slate is non-porous, easy to clean, and imparts a chic, contemporary aesthetic. Keep in mind that it is more brittle than wood and can chip or break if dropped. It will also dull knives quickly, so it’s best suited for serving cheeses, fruits, and cured meats rather than for active cutting.
Regardless of the material you choose, the most important consideration for a board intended for serving is safety. Ensure that the board you select is either unfinished—allowing you to apply your own finish—or has been pre-treated with a food safe wood finish. Common food-safe finishes include mineral oil, beeswax, or a blend of both. Always verify this before purchasing or using a board, as chemical stains and varnishes are not safe for food contact.
Designing Your Custom Engraving
Once you have selected the perfect piece of wood or slate, the next step is to bring your vision to life through design. This is where you infuse the board with personality and meaning, transforming it from a simple kitchen utensil into a cherished keepsake. A well-thought-out design elevates a standard board into a truly personalized charcuterie board, making it an ideal gift for weddings, housewarmings, or anniversaries. The key is to balance aesthetic appeal with personal significance.
Finding Inspiration and Personalization Ideas
The most compelling designs often stem from personal stories. Think about the recipient or the occasion for the board. Popular and effective personalization options include:
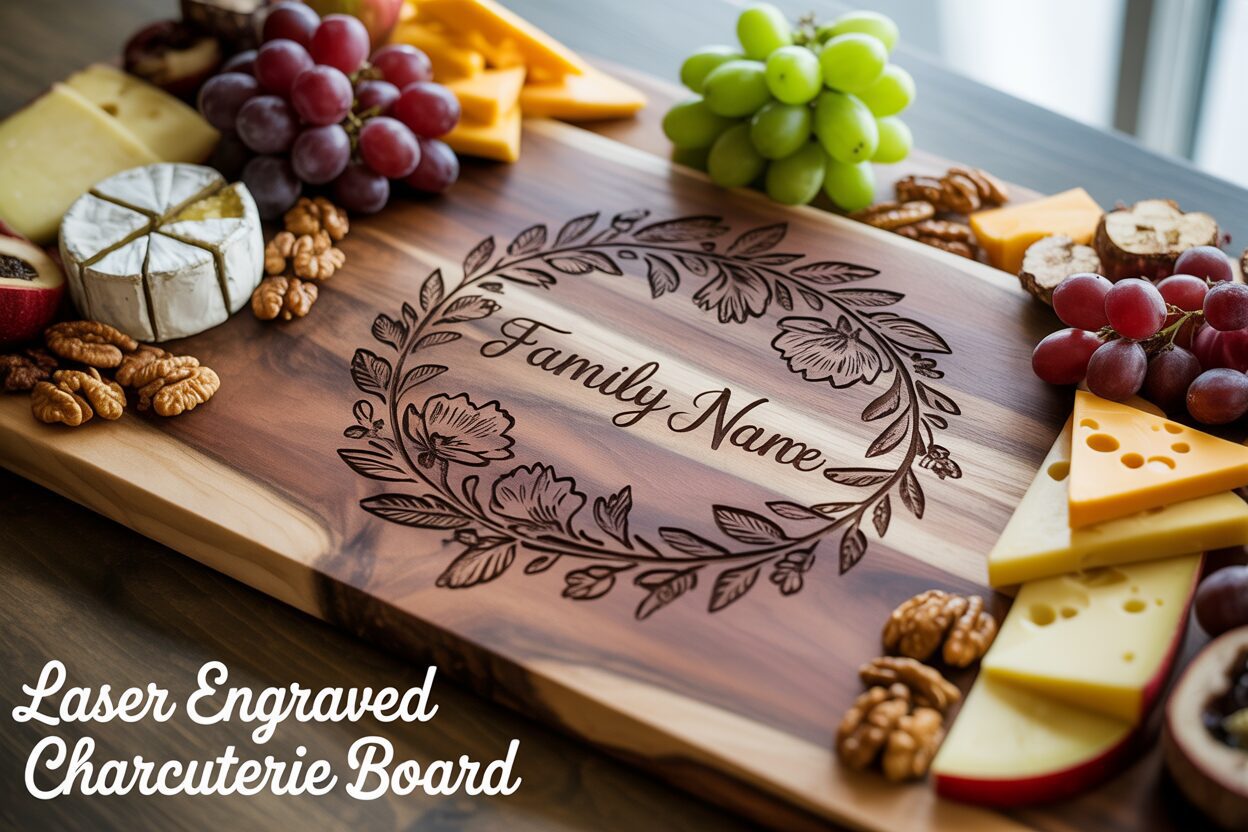
- Names and Monograms: A timeless choice. You can engrave a family name (“The Millers”), a couple’s first names, or an elegant interlocking monogram. The font choice here is critical: a classic serif font conveys tradition, a clean sans-serif font offers a modern feel, and a flowing script font adds a touch of romance.
- Significant Dates: Commemorate a special day by adding a wedding date, the year a family was established (“Est. 2024”), or the date of a new home purchase. These are often paired with names for a complete, narrative design.
- Custom Quotes or Phrases: A favorite quote, a family motto, a witty kitchen-related saying, or even the geographic coordinates of a meaningful location can add a unique and personal touch.
- Handwritten Recipes: For a truly one-of-a-kind heirloom, consider engraving a handwritten family recipe. This process involves scanning a high-resolution image of the original recipe card and converting it into a vector file that the laser can trace. The result is a beautiful and functional piece of family history, preserving a loved one’s handwriting forever.
Using and Sourcing Digital Design Files
While you can create a design from scratch using software like Adobe Illustrator or the free alternative Inkscape, using pre-made design elements can save time and ensure a professional result. For laser engraving, you need vector files (formats like SVG, AI, EPS, or DXF) because they can be scaled to any size without losing quality. A high-quality charcuterie board svg file is designed with clean lines and appropriate complexity for engraving. Marketplaces like Etsy, Creative Fabrica, and Design Bundles are excellent sources for professionally designed SVG files, offering everything from intricate floral wreaths and kitchen utensil motifs to customizable monogram templates. When choosing a file, look for designs that are not overly detailed or filled with tiny, complex shapes, as these can get lost or appear muddy when engraved on wood grain.
Strategic Placement and Sizing
The placement and scale of your design are just as important as the design itself. The goal is to enhance the board, not overwhelm it. Before you begin engraving, consider the primary function of your custom cutting board. If it will be heavily used for serving, placing the design in a lower corner or along the handle keeps the main surface clear while still adding a decorative touch. A centrally located design creates a strong focal point, ideal for a board that will be displayed as a piece of art. To ensure you get it right, always create a mock-up. Print your design to scale on a piece of paper, cut it out, and place it on the board. This simple step allows you to visualize the final result and adjust the size and position until it looks perfectly balanced and harmonious with the board’s shape and wood grain.
Mastering Laser Engraver Settings for Perfect Results
With your design finalized and your material chosen, it’s time to move to the most technical part of the process: calibrating your machine. Achieving a professional-quality finish on your laser engraved charcuterie board depends entirely on mastering your laser engraver settings. The interplay between power, speed, and resolution is a delicate balance that turns a good design into a stunning physical object. Rushing this step or relying on generic presets will often lead to disappointing results, so investing time in testing is non-negotiable.
Understanding the Core Laser Settings
Every laser engraver is different, but they all operate on three fundamental principles. Understanding how these variables interact is the key to success.
- Power: This setting, usually expressed as a percentage, controls the intensity of the laser beam. Higher power outputs more energy, resulting in a deeper and darker burn on wood. For slate, higher power can cause chipping or melting, so a lower setting is required.
- Speed: This dictates how fast the laser head moves across the material’s surface, typically measured in mm/s or in/s. Slower speeds allow the laser to dwell on one spot for longer, depositing more energy and creating a darker, deeper mark, similar to increasing power. Conversely, higher speeds result in a lighter engraving.
- Resolution (DPI/LPI): Dots Per Inch (DPI) or Lines Per Inch (LPI) determines the density of the engraved lines. A higher DPI means the lines are closer together, creating a darker, more filled-in appearance and a smoother finish. A lower DPI will be faster but may leave visible lines and produce a lighter result.
The relationship between power and speed is inverse; to achieve a similar result, you can use high power with high speed, or low power with low speed. The best combination depends on the material and desired effect.
Dialing in Your Settings: The Material Test
There are no universal settings that work for every machine and every piece of wood. The density, resin content, and moisture level of two boards of the same species can vary. Therefore, the most critical step is to run a material test grid on a scrap piece of the same wood or on the back of the board itself. A test grid consists of a series of small squares, each engraved with a different combination of power and speed. This visual reference allows you to see exactly how the material reacts and choose the settings that produce the crisp, clean look you want.
Starting Point Recommendations:
- Hardwoods (Maple, Cherry, Walnut): These dense woods require more energy. Start your test grid in a range of 40-70% power and a moderate speed. Maple provides excellent contrast, while walnut creates a subtle, tone-on-tone effect.
- Acacia: Due to its varying density, acacia can be tricky. You may need to find a balanced setting that works reasonably well across both the light and dark grain. A medium power and speed setting is a good starting point.
- Slate: Engraving slate is about ablating, or frosting, the surface, not burning it. Use very low power (10-25%) and high speed. The goal is a bright white mark without fracturing the stone.
Troubleshooting Common Engraving Issues
Even with testing, problems can arise. Here’s how to fix them:
- Excessive Charring and Soot: Your engraving is too dark, deep, and covered in residue. The Fix: Decrease your power, increase your speed, or both. If your machine has air assist, ensure it is on and directed at the nozzle to blow away smoke and debris, resulting in a cleaner cut.
- Engraving is Too Light or Lacks Contrast: The design is faint and hard to see. The Fix: Increase power or decrease speed. You can also try increasing the LPI/DPI for a denser fill. On some light woods like maple, slightly defocusing the laser (moving the material a tiny bit closer to the lens) can produce a wider, darker burn.
- Uneven or Inconsistent Depth: Some areas are darker than others. The Fix: First, ensure your board is perfectly flat and your laser is correctly focused across the entire engraving area. Warped boards are a common cause. If the material itself has variable density (like acacia), this may be unavoidable, but a good test will help you find the best compromise.
The Engraving Process and Applying a Food-Safe Finish
With your laser settings calibrated and your design ready, you are prepared for the final and most satisfying stages: the physical engraving and the protective finishing. These steps will transform your raw, designed board into a beautiful, durable, and functional piece ready for serving. Proper execution here is essential for both the appearance and the longevity of your project.
Preparing the Board and Running the Engraving Job
Before placing your board in the laser, ensure the surface is perfectly clean. Wipe it down with a lint-free cloth, and if necessary, a small amount of isopropyl alcohol to remove any oils or residues that could interfere with the laser. Position the board in the laser bed, making sure it is level and secure. A warped board will lead to an out-of-focus engraving, so use weights on the corners or honeycomb pins if needed to hold it flat. Double-check your laser’s focus to the top surface of the wood. Once you are confident in the placement and focus, send your design file to the laser. It’s crucial to stay with the machine while it is operating and ensure your ventilation system is running effectively to exhaust all smoke and fumes.
Post-Engraving Cleanup
After the engraving process is complete, you will notice a layer of soot and resin residue around the engraved area. This must be cleaned off to reveal the crisp detail underneath and to prevent it from smudging. Start with the gentlest method first. Use a soft-bristled brush (like a new toothbrush) to gently scrub away the loose particles. For more stubborn residue, dampen a clean, lint-free cloth with water or isopropyl alcohol and carefully wipe the engraved area. Be mindful not to be too aggressive, as you don’t want to damage the fine details or sand down the wood. Some makers have great success using a piece of masking tape; by pressing it firmly over the engraving and peeling it away, it can lift the soot without abrasion. Allow the board to dry completely before moving on to the final step.
Applying the Essential Food-Safe Finish
This is the most critical step for ensuring your board is safe for contact with food and protected from moisture. Never use varnishes, lacquers, or stains that are not explicitly rated as food-safe. The goal is to season the wood, allowing an oil to penetrate the fibers to prevent it from drying out and to create a barrier against bacteria and moisture.
- Choosing Your Finish: The two most popular and effective choices are food-grade mineral oil and a blend of mineral oil and beeswax (often sold as “board butter” or “cutting board conditioner”). Mineral oil is an inert, non-drying oil that soaks deep into the wood to hydrate it. The addition of beeswax creates a water-resistant layer on the surface, providing extra protection and a beautiful, soft sheen. Do not use cooking oils like olive or vegetable oil, as they will go rancid over time.
- The Application Process: The first oiling is the most important. Be generous. Pour a substantial amount of your chosen food safe wood finish directly onto the surface of the board. Using a clean cloth, work the oil into every part of the board—front, back, sides, and especially into the freshly engraved area. Let the oil soak in for at least four to six hours, or ideally, overnight. The wood will absorb as much as it needs.
- Final Touches and Long-Term Care: After the soaking period, use a new clean cloth to wipe away all the excess oil from the surface. If you are using a beeswax blend, you can now buff the board to a silky-smooth finish. Your custom cutting board is now ready for use. To maintain its beauty and protective qualities, re-apply a coat of oil whenever the wood starts to look dry or dull, typically once a month with regular use. For cleaning, always hand wash the board with mild soap and warm water; never soak it or put it in a dishwasher, as this will cause it to warp and crack.
Conclusions
You now have the knowledge to create a beautiful laser engraved charcuterie board that is both personal and professional. By carefully selecting your materials, perfecting your design, and using the correct finishing techniques, you can craft a functional masterpiece. Don’t hesitate to experiment with different designs and woods to create truly unique and memorable custom cutting boards for any occasion.
Frequently Asked Questions
Q: What is the best wood for a laser engraved charcuterie board?
A: The best woods are closed-grain hardwoods because they are durable, hygienic, and provide a smooth surface for clean engraving. Maple is a top choice for its hardness and high-contrast results. Cherry offers a rich, warm color with elegant, subtle engraving, while Walnut provides a luxurious, dark-on-dark look.
Q: How do I make my engraved board food-safe?
A: The key is to use a finish specifically rated as food-safe. The most popular choices are food-grade mineral oil or a conditioner made from mineral oil and beeswax. Apply a generous coat, let it soak into the wood for several hours or overnight, and then wipe off the excess. Never use chemical varnishes, stains, or cooking oils like olive oil.
Q: Why is my laser engraving too dark and sooty, or too light?
A: This is an issue with your laser settings. If the engraving is too dark and sooty, your power is too high or your speed is too low. Try decreasing the power or increasing the speed. If the engraving is too light, do the opposite: increase the power or decrease the speed. Running a material test grid on a scrap piece is the best way to find the perfect settings beforehand.
Q: Can I use an end grain cutting board for engraving?
A: While end grain boards are excellent for chopping, they are not ideal for laser engraving. The porous, uneven surface made of wood end fibers can lead to inconsistent engraving depth and clarity. For a decorative charcuterie or serving board, an edge grain construction provides a much smoother, more uniform surface for superior engraving results.

Subscribe to Our Newsletter
And enjoy FREE Download Files, SALE Alerts and Inspiring TIPS
Pricing Your Laser Engraved Products for Profit
A Comprehensive Guide on How to Price Laser Engraving Jobs
Pricing Your Laser Engraving Work for Profitability
Charcuterie Board Engraving File – Wine & Grapes 3D Illusion…
$4.00Original price was: $4.00.$3.00Current price is: $3.00.(25% off)
Bee and Honey Jar Charcuterie Board Engraving File | PNG Download #007…
$4.00Original price was: $4.00.$3.20Current price is: $3.20.(20% off)
Valentine Love Captions: 6 Charcuterie Board Engraving Files…
$8.00Original price was: $8.00.$5.60Current price is: $5.60.(30% off)
American Eagle Flag Laser Engraving File for Charcuterie & Cutting…
$4.00Original price was: $4.00.$2.80Current price is: $2.80.(30% off)