

 Français
 Deutsch
 Español
 Italiano
Choosing Your First Laser Engraving Machine
Jul
Estimated Reading Time
11 minutes
Key Takeaways
- Machine Features: Laser power, engraving area, connectivity, and compatible materials are crucial for beginners to match their projects and budget.
- Safety First: Prioritize eye protection (correct goggles), robust ventilation, fire safety (extinguisher, supervision), and machine enclosures to prevent hazards.
- Maintenance is Key: Regular cleaning of optics, workbed, and rails, along with proper calibration and software updates, ensures performance and extends machine lifespan.
- Diode vs. CO2: Understand the material compatibility differences between diode and CO2 lasers to choose the right technology for your desired projects.
Table of Contents
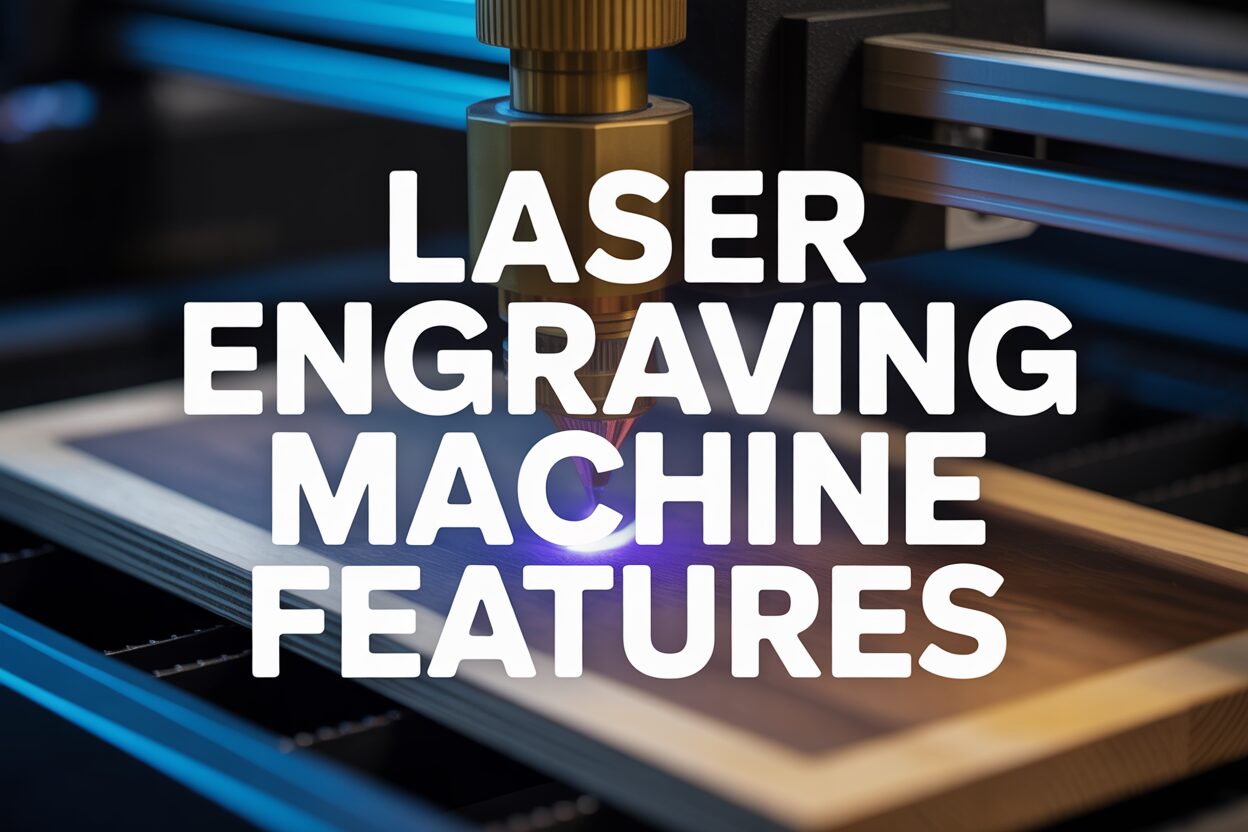
Embarking on the journey of laser engraving can be exciting, but selecting the right machine is crucial. This guide will help you understand the essential features of laser engraving machines, focusing on models suitable for beginners. We’ll cover key functionalities, safety protocols, and maintenance tips to ensure a successful and rewarding experience in the world of laser engraving.
Understanding Essential Laser Engraving Machine Features
When embarking on your laser engraving journey, deciphering the technical specifications of various machines can feel like learning a new language. However, understanding these fundamental features is paramount to choosing a machine that aligns with your creative aspirations and budget. This chapter will demystify the core components that dictate a laser engraver’s capabilities, particularly for the novice.
Laser Power: The Heart of the Engraver
The first and arguably most critical specification to grasp is laser power, measured in watts (W). This directly translates to the machine’s ability to engrave and cut various materials. For a beginner and hobbyist, the range of laser power typically falls between 5W and 20W for diode lasers, and sometimes higher for CO2 lasers (though these are often beyond a beginner’s typical investment).
A lower wattage machine, say 5W, is excellent for engraving details on softer materials like wood, paper, leather, and some plastics. It will also be able to cut thin materials like paper or very thin wood veneer. As you increase the wattage, the machine gains the ability to engrave deeper, faster, and cut through thicker materials. A 10W or 20W diode laser, for example, offers significantly more versatility, allowing you to engrave on a wider range of materials with greater speed and efficiency, and even cut through thicker wood or acrylic. For CO2 lasers, which use a different technology, typical hobbyist machines might start around 30W-40W, offering much higher cutting capabilities on a broader spectrum of materials, including thicker acrylics and glass etching.
Understanding your primary projects is key here. If you envision intricate engravings on thin wood and leather, a lower wattage might suffice. However, if cutting thicker materials or working with denser substrates is on your horizon, investing in a higher wattage machine will prevent future limitations and the need for an immediate upgrade. The impact on project speed and material compatibility is significant, making laser power a non-negotiable factor in your decision-making process. For instance, a 5W laser might take multiple passes to cut a 3mm piece of plywood, while a 20W laser could achieve it in one or two passes, drastically reducing project time.
Engraving Area: Your Creative Canvas
Next, consider the engraving area, also known as the work area or bed size. This specification, usually given in millimeters (mm) or inches, defines the maximum dimensions of the material you can place and engrave at one time. Common sizes for hobbyist machines might range from 200x200mm (approximately 8×8 inches) to 400x400mm (approximately 16×16 inches) or even larger.
The impact of engraving area on your projects is straightforward: a larger area provides more creative freedom. If your aspirations involve small intricate designs for jewelry, coasters, or personalized gifts, a smaller engraving area might be perfectly adequate. However, if you foresee working on larger signs, intricate wall art, or multiple items simultaneously (e.g., engraving a batch of identical keychains), a larger work area will be invaluable.
While it might be tempting to opt for the largest engraving area your budget allows, consider your available workspace. Laser engravers, especially those with larger beds, require significant table space and clearance for proper ventilation. Balance your creative ambitions with the practicalities of your environment to avoid purchasing a machine that overcrowds your workspace, making operation cumbersome.
Connectivity Options: Bridging the Gap Between Design and Reality
Modern laser engravers offer several connectivity options, each influencing the convenience and flexibility of your workflow. The most common methods are USB, Wi-Fi, and sometimes SD card slots or Ethernet.
USB connectivity is the most prevalent and reliable method. It involves directly connecting your computer to the laser engraver via a USB cable. This offers a stable connection, ideal for sending large design files and ensuring consistent communication during engraving. The primary drawback is that your computer needs to remain tethered to the machine throughout the engraving process.
Wi-Fi connectivity provides enhanced flexibility, allowing you to control your engraver wirelessly from a computer, tablet, or smartphone. This is particularly convenient if your engraver is located in a different room or if you prefer a less cluttered workspace. However, Wi-Fi can sometimes be susceptible to interference, potentially leading to slower file transfers or occasional disconnections, though modern implementations are increasingly robust.
Some machines also include an SD card slot, enabling you to load design files directly onto the engraver without a continuous computer connection. This is useful for repetitive tasks or if you prefer to operate the machine standalone once the design is loaded. Ethernet connectivity, while less common for beginner-level machines, offers a highly stable wired network connection, often found on more industrial-grade engravers.
For a beginner, USB is perfectly sufficient. Wi-Fi adds a layer of convenience that can be very appealing, but it’s not strictly necessary. Consider your typical workflow and how you prefer to interact with technology when weighing these options.
Compatible Materials: Expanding Your Creative Horizons
Finally, understanding the compatible materials a laser engraver can work with is crucial. Here, the type of laser technology (diode vs. CO2) is the primary determinant.
Diode lasers, common for beginners due to their lower cost and compact size, are excellent for engraving and cutting organic materials. This includes all types of wood, plywood, bamboo, paper, cardboard, leather, certain opaque plastics (like acrylic with dark colors, but not clear acrylic), cloth, rubber, and coated metals (the coating is engraved away to reveal the metal underneath). They can also engrave on stone and some ceramics, usually requiring a specialized marking spray for effective results. However, diode lasers generally cannot engrave or cut clear acrylic, glass, or bare metals directly.
CO2 lasers, while larger and more expensive, offer a much broader material compatibility. They can engrave and cut all the materials a diode laser can, but with greater efficiency and speed. Crucially, CO2 lasers can engrave and cut clear acrylic, engrave on glass, tile, and directly mark bare metals (though often requiring a marking compound or a higher wattage CO2 laser). If your projects involve glass etching or working with clear acrylic, a CO2 laser is the necessary choice.
Always check the manufacturer’s specifications for a definitive list of compatible materials for any given machine. Understanding these distinctions will prevent frustration and ensure that your chosen engraver is capable of executing the projects you envision. The choice between diode and CO2 laser technology is often the most significant factor impacting material versatility for a hobbyist, making it a critical consideration when assessing your long-term creative ambitions.
Safety Protocols and Considerations for Laser Engraving
While the allure of creating intricate designs with a laser engraver is strong, it’s crucial to acknowledge that you are operating a powerful tool that, if misused, can pose significant risks. For beginners, understanding and rigorously adhering to safety protocols is not just advised, it is absolutely essential. Prioritizing safety ensures not only your personal well-being but also the longevity of your machine and the prevention of property damage. Neglecting these fundamental aspects can quickly turn an exciting hobby into a dangerous endeavor.
Eye Protection: Your First Line of Defense
Perhaps the most critical safety measure is eye protection. Laser beams, even low-powered ones, can cause irreversible damage to your vision. The light emitted by a laser engraver is highly concentrated and can burn the retina, leading to permanent blind spots or even complete blindness. Standard sunglasses or safety glasses are insufficient. You need specialized laser safety goggles.
These goggles are designed to block the specific wavelength of light emitted by your laser engraver. Diode lasers, for instance, typically operate in the blue/violet spectrum (e.g., 450nm), while CO2 lasers operate in the infrared spectrum (e.g., 10,600nm). It is imperative to use goggles with the correct Optical Density (OD) rating for your specific laser’s wavelength. An OD of 6+ is generally recommended for hobbyist engravers. Always ensure that anyone in the vicinity of the active engraver is also wearing appropriate eye protection. Never look directly into the laser beam or at its reflection from a shiny surface. Even reflections can be hazardous. Treat eye protection as non-negotiable; it’s the simplest and most effective way to safeguard your sight.
Ventilation Systems and Fume Extraction: Breathing Easy
Laser engraving involves burning or vaporizing materials, which generates a variety of fumes, particulates, and volatile organic compounds (VOCs). These byproducts can range from unpleasant odors to highly toxic substances, depending on the material being processed. Inhaling these fumes can lead to immediate respiratory irritation, headaches, and in the long term, serious health issues. Therefore, an effective ventilation system and fume extraction are paramount.
For hobbyists, this typically means a dedicated exhaust fan connected to appropriate ducting that vents directly outdoors. Simply opening a window is often insufficient, as fumes can still linger or re-enter the space. The exhaust system should be powerful enough to create negative pressure within the enclosure, drawing all fumes and smoke away from the engraving area. Depending on the materials you plan to engrave, you might also consider an air filtration system with HEPA and activated carbon filters. These systems capture fine particulates and absorb chemical odors, offering an additional layer of protection, particularly if outdoor venting is not feasible or if you want to eliminate all traces of fumes. Always research the specific fumes produced by the materials you intend to engrave and ensure your ventilation system is adequate to handle them safely.
Fire Safety Measures: Preparedness is Key
Laser engraving inherently involves high heat and combustible materials, making fire safety a critical concern. While rare with proper precautions, accidental fires can occur. Preparedness is essential.
Always have a Class ABC fire extinguisher readily accessible within your workspace. Water is often ineffective on laser fires and can even spread them, especially if electrical components are involved. Never leave an active laser engraver unattended, especially when running a new material or a long job. A vigilant operator can detect and extinguish a small ember before it escalates. Keep the engraving area clean and free of flammable debris. Dust and small material offcuts can easily ignite. It’s also advisable to place your engraver on a non-combustible surface. Some materials, even those commonly engraved (like wood or acrylic), can flare up. Knowing your machine’s limitations and supervising its operation are the best preventative measures against fire.
Machine Enclosures: Containing the Risks
A well-designed machine enclosure contributes significantly to overall safety. Many hobbyist laser engravers come with an integrated enclosure, or one can be purchased separately or even DIY-built. An enclosure serves several vital safety functions:
- Fume Containment: A sealed enclosure allows for efficient extraction of fumes through a ventilation system, preventing them from escaping into your workspace.
- Light Containment: It blocks scattered laser light and reflections, providing an additional layer of eye protection, especially for bystanders. Many enclosures feature safety-interlocked doors that automatically pause the laser if opened during operation.
- Noise Reduction: Engraving can be noisy, and an enclosure helps dampen the sound, making the workspace more comfortable.
- Physical Barrier: It prevents accidental contact with the moving laser head or the material during operation, protecting fingers, hair, or loose clothing from entanglement or burns.
When choosing a machine, consider whether it comes with a robust enclosure or if you will need to add one. For raw, unenclosed diode lasers, creating a safe operating environment with a custom enclosure is highly recommended. Ensure the enclosure is made from materials that won’t easily ignite and that it has an effective seal for fume extraction. Investing in a safe setup from the outset is a small price to pay for peace of mind and accident prevention.
Maintenance and Longevity of Your Laser Engraving Machine
Acquiring your first laser engraving machine is an exciting step, but remember that it’s an investment requiring diligent care. Just like any precision tool, a laser engraver’s performance and lifespan are directly tied to how well it’s maintained. Neglecting routine maintenance can lead to degraded engraving quality, frequent malfunctions, and ultimately, a premature end to your machine’s operational life. For beginners, understanding and implementing a consistent maintenance schedule from day one is crucial, ensuring that your machine continues to deliver optimal results and preserves its laser engraving capabilities over time.
Routine Cleaning Procedures: The Foundation of Performance
The most frequent and critical maintenance task for any laser engraver is routine cleaning. During operation, especially when cutting or engraving materials like wood, acrylic, or leather, smoke, dust, and debris are inevitably produced. These particles can settle on crucial optical components, significantly impacting performance.
- Lenses and Mirrors (for CO2 lasers): CO2 laser engravers rely on a series of mirrors to direct the laser beam and a final lens to focus it onto the material. These are extremely sensitive components. Any dust, smoke residue, or smudges on their surfaces will absorb laser energy, reducing beam power, distorting the beam, and potentially leading to overheating and damage to the optic itself. Cleaning these should be done using specialist lens cleaning solution (often isopropyl alcohol or a specific optical cleaner) and lint-free optical wipes or swabs. Never use abrasive cloths or household cleaners. The frequency of cleaning depends on usage and material, but checking them before each significant engraving session is a good habit. For diode lasers, which use a fixed lens, ensuring the lens is free of dust and debris is also important. A soft brush or a gentle air blower can be used to remove loose particles. Always disconnect power to the machine before cleaning any internal components.
- Workbed and Interior: The machine’s work area, often a honeycomb or slat bed, accumulates dust and charred debris. This build-up can interfere with proper material placement, reflect the laser beam (especially with metal beds), and even pose a fire hazard. Regularly vacuum out or wipe down the workbed and the interior of the machine. Depending on your usage, this might be a weekly or even daily task.
- Rails and Bearings: The laser head moves along linear rails, often supported by bearings or wheels. Over time, these can accumulate dust and debris, leading to jerky movements, reduced engraving accuracy, or even mechanical failure. Use a soft cloth or brush to clean the rails and wheels. Some machines may require occasional lubrication of the rails with a specific lubricant recommended by the manufacturer. Avoid over-lubrication, as it can attract more dust.
Consistent cleaning directly translates to consistent beam quality, precise movement, and overall engraving accuracy, prolonging the life of expensive components.
Proper Calibration: Ensuring Precision and Quality
While not a daily task, proper calibration is crucial for maintaining the accuracy and quality of your engravings. Calibration involves fine-tuning various aspects of your machine to ensure the laser beam is perfectly aligned and focused, and that movements are precise.
- Focusing the Laser: Achieving the correct focal distance is paramount for sharp, clean engravings and efficient cutting. Most machines have a specific method for setting the focus, whether it’s a fixed-distance tool or an auto-focus feature. A well-focused beam creates the smallest spot size, concentrating energy optimally. If your engravings look blurry or your cuts are uneven, refocusing is often the first step.
- Beam Alignment (for CO2 lasers): For CO2 lasers, precise alignment of the mirrors is essential to ensure the laser beam travels perfectly down the optical path and hits the focus lens in the center. Misalignment causes power loss, uneven cuts, and poor engraving quality. This is a more advanced procedure, usually detailed in your machine’s manual, and may require specialized tools or even professional assistance if you’re uncomfortable doing it yourself. Diode lasers usually come pre-aligned and do not require this step.
- Mechanical Calibration (often software-driven): Over time, minor discrepancies in axis movement can occur. Many software interfaces allow for calibration of the X and Y axes to ensure that a commanded movement of, say, 100mm, actually results in a 100mm physical movement. This is vital for maintaining accurate scaling and geometry in your engraved designs.
Regularly checking and adjusting calibration ensures that your laser is delivering its maximum potential for sharpness and accuracy.
Software Updates: Enhancing Functionality and Stability
Never underestimate the importance of software updates for your laser engraver. Modern laser engraving machines are sophisticated pieces of equipment that rely heavily on their firmware and accompanying control software. Manufacturers frequently release updates that can offer:
- Improved Performance: Optimizations to engraving algorithms can lead to faster speeds or higher quality results.
- Bug Fixes: Updates often address glitches or errors that could cause crashes, connectivity issues, or unexpected behavior.
- New Features: Manufacturers might add new functionalities, material presets, or compatibility with new operating systems.
- Enhanced Stability and Security: Updates can improve the overall reliability of the system and address any potential security vulnerabilities.
Consistently check your manufacturer’s website or official channels for the latest firmware and software versions. Following the provided instructions carefully during the update process is crucial to avoid bricking your machine. Keeping your software up-to-date isn’t just about getting new toys; it’s about maintaining a stable, efficient, and well-supported engraving experience.
By dedicating time to these maintenance procedures – rigorous cleaning, periodic calibration checks, and timely software updates – you are actively preserving your investment. This proactive approach will empower you to consistently produce high-quality engravings, minimize frustrating downtime, and maximize the operational lifespan of your first laser engraving machine.
Conclusions
Choosing your first laser engraving machine involves understanding critical features, prioritizing safety, and committing to proper maintenance. By considering these aspects, beginners can confidently select a machine that meets their creative and practical needs, ensuring a smooth entry into the satisfying world of laser engraving and unlocking endless possibilities for personalized projects.
FAQ
Q: What’s the main difference between diode and CO2 lasers for beginners regarding material compatibility?
A: Diode lasers are generally more affordable and compact, ideal for engraving and cutting organic materials like wood, leather, and some opaque plastics. However, they cannot engrave or cut clear acrylic, glass, or bare metals directly. CO2 lasers, while larger and more expensive, offer broader compatibility, including the ability to engrave and cut clear acrylic, engrave on glass, and directly mark bare metals, making them more versatile for a wider range of projects.
Q: Why is eye protection so critical when operating a laser engraver?
A: Laser beams, even low-powered ones, can cause irreversible damage to your vision, potentially leading to permanent blind spots or blindness. Standard sunglasses are insufficient; specialized laser safety goggles are required to block the specific wavelength of light emitted by your machine. Always ensure anyone near the active engraver wears appropriate eye protection.
Q: How often should I clean my laser engraver’s components, especially lenses and the workbed?
A: Routine cleaning is crucial for performance and longevity. Lenses and mirrors (for CO2 lasers) should be checked before each significant engraving session and cleaned with specialized solutions and lint-free wipes as needed. The workbed and interior of the machine accumulate dust and debris, which should be vacuumed or wiped down regularly, possibly daily or weekly depending on usage, to prevent interference and fire hazards.

Subscribe to Our Newsletter
And enjoy FREE Download Files, SALE Alerts and Inspiring TIPS
Pricing Your Laser Engraving Work for Profitability
A Comprehensive Guide to Pricing Your Laser Engraving Services
A Comprehensive Guide on How to Price Laser Engraving Services
Charcuterie Board Engraving File – Wine & Grapes 3D Illusion…
$4.00Original price was: $4.00.$3.00Current price is: $3.00.(25% off)
Bee and Honey Jar Charcuterie Board Engraving File | PNG Download #007…
$4.00Original price was: $4.00.$3.20Current price is: $3.20.(20% off)
Valentine Love Captions: 6 Charcuterie Board Engraving Files…
$8.00Original price was: $8.00.$5.60Current price is: $5.60.(30% off)
American Eagle Flag Laser Engraving File for Charcuterie & Cutting…
$4.00Original price was: $4.00.$2.80Current price is: $2.80.(30% off)