

 Français
 Deutsch
 Español
 Italiano
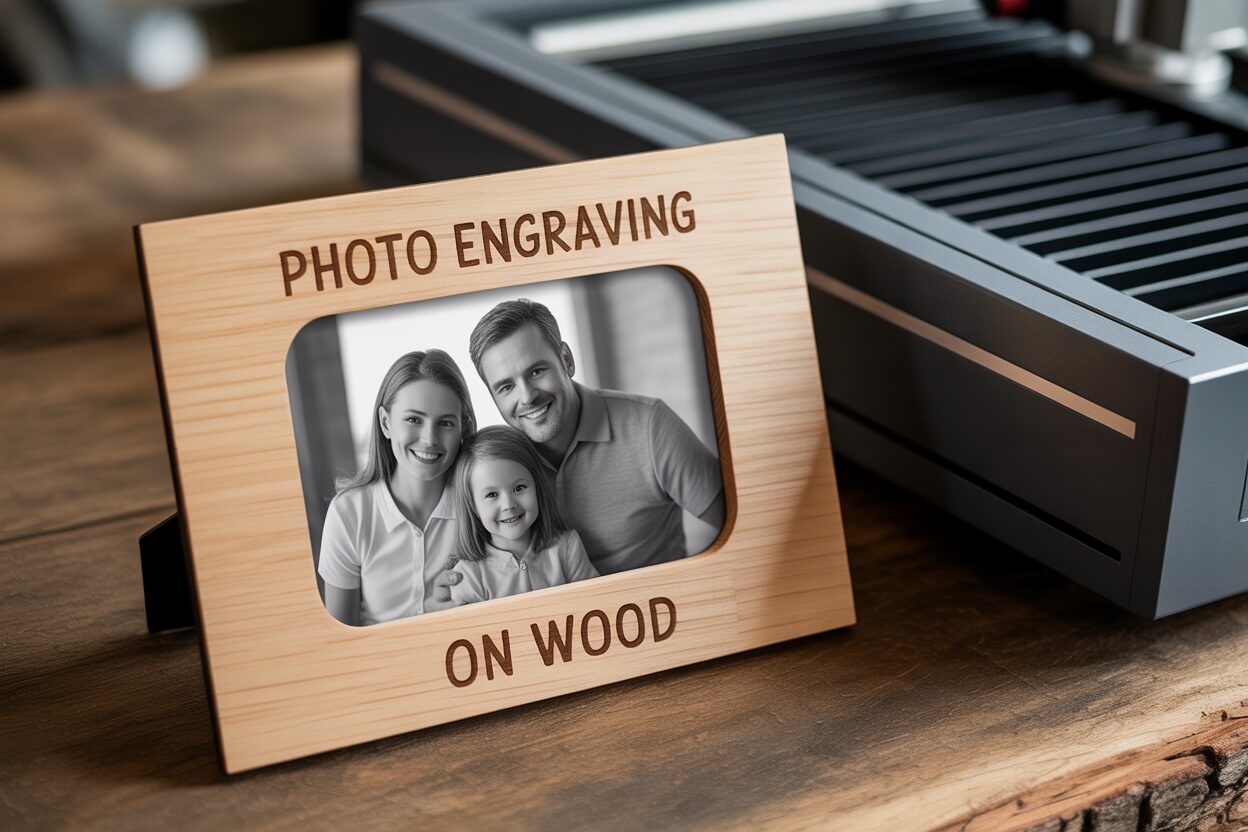
A Step-by-Step Guide to Photo Engraving on Wood Frames
Oct
Estimated reading time: 6 minutes
Key Takeaways
- Wood Selection is Crucial: For the best results, choose light-colored hardwoods like Maple, Alder, or Cherry. Their dense, fine grain and low resin content create high-contrast, detailed engravings, while softwoods like Pine should be avoided.
- Image Quality Matters: Start with a high-resolution, high-contrast photograph. Images with a simple, uncluttered background and a clearly focused subject translate best to wood.
- Digital Preparation is Key: Before engraving, convert your photo to grayscale, adjust brightness and contrast to enhance details, apply a subtle sharpening filter, and use a dithering algorithm in your laser software to simulate shades of gray effectively.
- Test Your Settings: There are no universal laser settings. Always perform a test grid on a scrap piece of the same wood to find the optimal power and speed combination for achieving the desired depth and tonal range.
- Proper Finishing Protects and Enhances: After engraving, carefully clean off soot and residue with a soft brush and a lightly dampened cloth. Apply a sealant like clear lacquer or Danish oil to protect the piece and enrich the wood’s natural beauty.
Table of Contents
- Choosing the Right Wood and Photograph for Engraving
- Preparing Your Image for Laser Photo Etching
- The Engraving Process and Finishing Touches
- Conclusions
- Frequently Asked Questions
Discover the art of photo engraving on wood, a unique way to create stunning personalized photo gifts. This guide will walk you through the process of turning a simple wooden frame into a cherished keepsake. We’ll explore everything from selecting the right materials to the final touches, ensuring your laser engraved photo projects are a success and treasured for years to come.
Choosing the Right Wood and Photograph for Engraving
The success of your photo engraving on wood project hinges on two critical choices made before the laser even warms up: the wood you select and the photograph you want to immortalize. These elements are the canvas and the paint for your masterpiece. Making the right decision here is the difference between a stunning, detailed keepsake and a muddy, disappointing result. Think of the wood as the foundation; a poor foundation cannot support a beautiful structure, no matter how perfect the blueprint.
The Ideal Canvas: Selecting Your Wood
Not all woods are created equal when it comes to holding the fine detail of a laser engraved photo. The primary distinction is between hardwoods and softwoods. For this application, hardwoods are overwhelmingly superior. Woods like Maple, Alder, and Cherry have a dense, tight grain structure and contain less resin. This uniformity allows the laser to burn the surface consistently, resulting in crisp lines and smooth tonal gradients. Maple, with its light color and minimal grain, is often considered the gold standard as it provides the highest contrast, making the dark, engraved portions of your image pop. Alder is another excellent choice, known for its consistent color and how smoothly it engraves.
Softwoods, such as Pine or Cedar, present significant challenges. Their grain structure consists of alternating hard and soft rings that absorb the laser’s energy differently. The laser will burn deeper and darker into the softer sections and lighter on the denser rings, creating an uneven, stripped appearance that distorts your photograph. Furthermore, the high resin or sap content in many softwoods can cause flare-ups during engraving and leave a sticky residue, compromising the quality of your personalized photo gifts. The wood’s grain pattern itself is also a major factor. A wood with a heavy, pronounced grain, like Oak, will compete visually with your image. The strong lines of the grain can interrupt the delicate shading of a face or the subtlety of a landscape, creating unwanted noise in your final piece. For the clearest and most detailed result, always opt for a light-colored wood with a subtle, fine grain.
The Perfect Image: Choosing and Preparing Your Photograph
Just as crucial as the wood is the photograph itself. A laser engraver doesn’t see color; it interprets the lights and darks of an image. Therefore, the single most important quality for a successful engraving is contrast. A photo with a wide dynamic range—meaning bright whites, dark blacks, and a good spread of tones in between—will translate beautifully onto wood. Photos taken in flat, overcast light often lack this contrast and will result in a flat, muddy engraving. Look for images with clear light sources and defined shadows. A snapshot where the sun is highlighting your subject’s features while casting shadows behind them is a much better candidate than one taken in a dimly lit room.
Beyond contrast, consider these key factors for your custom photo engraving:
Interested in more Custom Photo? Check out our Custom Photo laser file designs: Click here!
- Focus and Resolution: The laser is incredibly precise and will faithfully reproduce every detail of your source image. If your photo is blurry or low-resolution, your engraving will be blurry and pixelated. Always start with the highest resolution file you have. A sharp, in-focus subject is non-negotiable.
- Composition: Simplicity is your friend. A photo with a clean, uncluttered background will always produce a better result than one with a busy, distracting backdrop. The focus should be on your subject. A portrait against a simple wall or an open sky works much better than a person standing in a cluttered room.
- Subject Detail: Avoid photos with large, dark areas, such as a person wearing a black shirt against a dark background. This can result in a large, overly charred patch on the wood that loses all detail. Before committing to an image, try converting it to grayscale on your computer. This gives you a much better preview of how the tones and shadows will appear when engraved on wood.
Preparing Your Image for Laser Photo Etching
Once you have selected the perfect photograph, the next phase involves digitally sculpting it to communicate effectively with the laser. This preparation is not merely a technical step; it is an artistic process that translates the nuances of a color photograph into a format a laser can understand and physically burn into wood. Proper image preparation for laser photo etching is what elevates a project from a simple transfer to a detailed work of art on your photo frame. Most of this work can be done in standard image editing software like Adobe Photoshop, GIMP (a free alternative), or directly within specialized laser control software like LightBurn.
The first, non-negotiable step is to convert your image to grayscale. A laser engraver operates on a monochromatic scale, interpreting different shades of gray as different levels of power or density of dots. It has no concept of color. Converting your image to grayscale allows you to see exactly what the laser will see, removing the distraction of color and letting you focus on the essential elements: light, shadow, and contrast. This is typically a simple one-click process in any editing software (e.g., Image > Mode > Grayscale in Photoshop). This initial conversion forms the foundation upon which all subsequent edits will be built.
Fine-Tuning for a Flawless Engraving
With your image in grayscale, the real work begins. Your primary goal is to optimize the tonal range for wood. Wood as a medium has a lower dynamic range than a computer screen, meaning it can’t reproduce as many subtle shades between pure white (unburned wood) and solid black (fully charred wood). Therefore, you must often exaggerate the contrast in your digital file.
- Brightness and Contrast: Start with the basic brightness and contrast sliders. Often, you’ll need to slightly increase the brightness to lighten the mid-tones and boost the contrast to make the darks darker and the lights lighter. This helps separate the subject from the background and ensures details don’t get lost in muddy, mid-gray areas. Use your judgment; you want to enhance the image, not make it look unnatural.
- Sharpening: A subtle sharpening filter can work wonders for a laser engraved photo. It enhances the edges and fine details, giving the laser more defined lines to follow. Use a filter like “Unsharp Mask” and apply it sparingly. Over-sharpening will create ugly white halos around your subjects, which will translate poorly to the wood. The goal is a crisp, not an over-processed, image.
- Dithering: This is the most critical technical step. Since a laser is essentially an on/off tool at any given point, it cannot create true shades of gray. Instead, it simulates them by varying the spacing and size of tiny burned dots, a process called dithering. Your laser software will handle this conversion, offering several algorithms like Jarvis, Stucki, or Floyd-Steinberg. These algorithms are specifically designed for this purpose and produce far better results than a standard halftone pattern. Experimenting with different dithering methods and dot-per-inch (DPI) settings in your software is key to finding the sweet spot for your specific image and wood type. A properly dithered image ensures smooth tonal transitions and avoids the banding or blotchiness that can ruin an otherwise perfect engraving.
The Engraving Process and Finishing Touches
With your wood selected and your image perfectly prepared, you are ready for the most exciting step: bringing your creation to life. The photo engraving on wood process transforms your digital file into a tactile object, burning your memory into the grain of the frame. Begin by securely placing your wooden frame piece in the laser cutter’s bed, ensuring it is perfectly flat and level. Use a jig if necessary to hold it in place. The next critical action is to focus the laser beam precisely on the surface of the wood. An improperly focused laser will produce a fuzzy, wide beam, resulting in a blurry engraving with a complete loss of detail. Your machine’s manual will guide you on the exact procedure for setting the focal height.
Calibrating Power and Speed for Perfect Shading
The heart of a successful custom photo engraving lies in mastering the laser’s settings, specifically its power and speed. These two variables work in tandem to control how dark the engraving will be. Higher power and slower speed result in a darker, deeper burn, while lower power and faster speed create a lighter mark. There are no universal settings; the ideal combination depends entirely on your specific laser’s wattage and the type of wood you are using. Maple, for instance, requires different settings than Alder to achieve the same shade. The only reliable method to find the perfect settings is to perform a test run on a scrap piece of the exact same wood you are using for your project. Create a test grid or “power scale” in your laser software—a series of small squares, each engraved with a different combination of power and speed settings. This test will give you a physical reference map, showing you exactly how the wood reacts. By referencing this map, you can select the settings that produce a rich black without excessive charring and a subtle light gray for the highlights, giving your image the depth and contrast it needs to stand out.
From the Laser Bed to a Finished Masterpiece
Once the laser has finished its work, your piece will be covered in a fine layer of soot and resin residue. The first finishing touch is a thorough cleaning. Do not wipe it with your hand, as this can smear the residue into the unburned wood grain and cause permanent staining. The best method is to use a soft-bristled brush (like a toothbrush) to gently whisk away the loose particles. For more stubborn residue, lightly dampen a clean cloth or a cotton swab with denatured alcohol or a specialized cleaning solution and carefully wipe the surface, always moving with the grain of the wood. Be careful not to use too much liquid, as it can cause the wood to swell or warp.
After cleaning, the final step is to seal and protect your work. Applying a finish not only safeguards the engraving from moisture and UV light but also dramatically enhances the natural color and grain of the wood, adding richness and contrast.
- Clear Spray Lacquer or Polyurethane: These are excellent choices for a durable, non-yellowing finish. Apply several light, even coats, allowing each coat to dry completely. This creates a protective shell over the entire photo frame.
- Tung Oil or Danish Oil: For a more natural, satin look, an oil finish is ideal. It penetrates the wood rather than sitting on top of it, beautifully accentuating the grain. Wipe it on with a clean cloth, let it soak in, and then wipe off the excess.
Once the sealant is fully cured, you can proceed with the final assembly: inserting the glass or acrylic, your chosen photo, and the backing board. With these finishing touches, your engraved wood is transformed into a complete, polished, and profoundly meaningful personalized photo gift, ready to be cherished for years to come.
Conclusions
Photo engraving on wood is a rewarding process that combines technology with heartfelt sentiment. By following these steps, you can create beautiful custom photo engraving pieces that make perfect personalized photo gifts for any occasion. Experiment with different woods and photos to create truly unique and memorable frames that capture the essence of your most treasured moments.
Frequently Asked Questions
Q: What is the best type of wood for photo engraving?
A: Light-colored hardwoods like Maple, Alder, and Cherry are ideal. They have a fine, consistent grain and low resin content, which results in a high-contrast, detailed engraving. Avoid softwoods like Pine, as their uneven grain and high resin content lead to poor results.
Q: What makes a good photo for laser engraving?
A: The best photos have high contrast (clear lights and darks), high resolution, and a simple, uncluttered background. The main subject should be in sharp focus. Photos taken in flat lighting or with busy backgrounds will not engrave well.
Q: Do I need to edit my photo before engraving it?
A: Yes. At a minimum, you must convert the image to grayscale. It’s also highly recommended to adjust brightness/contrast to enhance details, apply a subtle sharpening filter, and use a dithering algorithm in your laser software for the best possible results.
Q: How do I clean a wood engraving after the laser is done?
A: First, gently use a soft-bristled brush to remove loose soot. For any remaining stubborn residue, use a clean cloth lightly dampened with denatured alcohol, always wiping with the grain. Avoid using excess liquid to prevent the wood from warping.

Subscribe to Our Newsletter
And enjoy FREE Download Files, SALE Alerts and Inspiring TIPS
A Comprehensive Guide on How to Price Laser Engraving Services
How to Price Your Laser Engraving and Cutting Services
The Ultimate Guide to Crafting a Laser Cut Box
Charcuterie Board Engraving File – Wine & Grapes 3D Illusion…
$4.00Original price was: $4.00.$3.00Current price is: $3.00.(25% off)
Bee and Honey Jar Charcuterie Board Engraving File | PNG Download #007…
$4.00Original price was: $4.00.$3.20Current price is: $3.20.(20% off)
Valentine Love Captions: 6 Charcuterie Board Engraving Files…
$8.00Original price was: $8.00.$5.60Current price is: $5.60.(30% off)
American Eagle Flag Laser Engraving File for Charcuterie & Cutting…
$4.00Original price was: $4.00.$2.80Current price is: $2.80.(30% off)