

 Français
 Deutsch
 Español
 Italiano
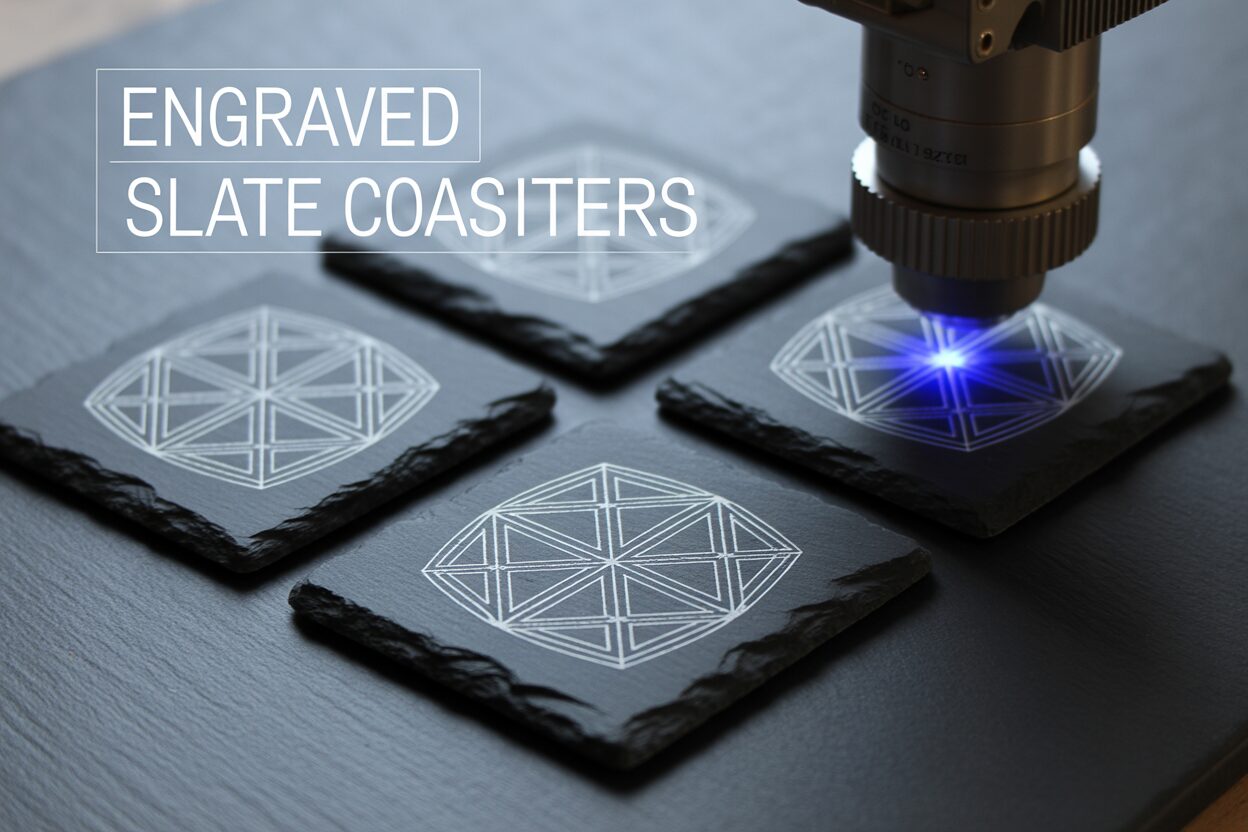
A Step-by-Step Guide to Creating Engraved Slate Coasters
Jan
Estimated reading time: 9 minutes
Key Takeaways
- Preparation is Paramount: A successful engraving starts with a clean, flat piece of slate. Always wipe your coasters with isopropyl alcohol to remove oils and debris before engraving.
- Design for Contrast: Use high-contrast vector files (like SVG) for crisp lines. For photos, convert them to a dithered pattern in your laser software to simulate grayscale tones effectively.
- Low Power, High Speed: The best settings for slate involve low laser power (15-30% for CO2) and high speed (3000-6000 mm/min). This cleanly fractures the surface for a bright mark without overheating or melting the stone.
- Test First, Engrave Second: Never engrave a final product without running a material test grid on a scrap piece of slate. This five-minute test is the single best way to find the perfect settings for your specific laser and material.
- Finish with Oil: After engraving and cleaning away the dust, apply a food-safe mineral oil. This dramatically darkens the slate and makes the engraved design “pop” with incredible contrast.
Table of Contents
- Preparing Slate and Your Design File
- Optimal Laser Settings for Engraving Slate
- The Engraving Process and Finishing Touches
- Conclusions
- Frequently Asked Questions
Discover the art of laser engraving on slate, a material that offers amazing contrast and a premium feel. This tutorial will walk you through the entire process of making beautiful engraved slate coasters. We’ll explore the essential steps, from finding the right design to the final touches, ensuring you can create high-quality, personalized items for gifts or sale.
Preparing Slate and Your Design File
Selecting and Cleaning Your Slate
The foundation of a beautiful engraving is a quality piece of slate. Before you even think about your design, take time to select the right coasters. Look for pieces that are as flat and uniform in thickness as possible. Slate is a natural, layered material, and variations are normal, but a significant warp or uneven surface will cause major issues. A warped coaster means the distance between the laser lens and the slate surface will change as the laser head moves across it. This leads to an inconsistent, out-of-focus engraving where some parts are sharp and bright while others are blurry and faint. Also, inspect the edges for excessive chipping. While a rustic look is often desired, large flakes missing can detract from the final product. Once you have your coasters, the first practical step is a thorough cleaning. Slate is porous and easily picks up dust, debris, and natural oils from your fingers. These contaminants can act as a barrier, causing the laser to engrave unevenly or weakly. To prepare the surface, dampen a clean, lint-free microfiber cloth with isopropyl alcohol (IPA) of 90% or higher. Gently but firmly wipe the entire surface of the coaster you plan to engrave. The alcohol will effectively cut through any oils and evaporate quickly without leaving a residue. Allow the slate to air dry completely for a few minutes before placing it in your laser engraver. This simple cleaning step is non-negotiable for achieving a consistently bright and professional-looking engraving.
Preparing Your Design for Slate
With a clean coaster ready, your focus shifts to the digital design file. High-contrast designs work best on slate. Intricate details with subtle shading can get lost, as the laser essentially bleaches the dark slate to a light gray or white. For logos, text, and line art, a vector file format is the superior choice. A slate engraving svg (Scalable Vector Graphics) file is ideal because it defines artwork using mathematical equations rather than pixels. This means you can scale it to any size without losing sharpness, resulting in perfectly crisp, clean lines on your coaster. For photographic or highly detailed raster images (like JPEGs or PNGs), you must process the image correctly. Simply converting a photo to grayscale is not enough. You need to convert it into a dithered pattern. Dithering is a process that uses a specific pattern of black and white dots to simulate shades of gray. Since the laser on slate is essentially a binary tool—it either fires (creating a white mark) or it doesn’t (leaving the slate dark)—dithering tricks the human eye into perceiving tones and depth. Most laser software, such as LightBurn or RDWorks, has built-in dithering options like Jarvis, Floyd-Steinberg, or Stucki. Experimenting with these patterns is key, as each one can produce a slightly different texture and result on the final product. Always size your design to fit the coaster, typically leaving a 1/4 inch (about 6mm) margin from the edge for a balanced look.
Positioning and Focusing in the Laser
The final preparatory stage happens inside the laser engraver. Precise positioning and perfect focus are critical for a sharp, professional result. First, place your clean slate coaster onto the laser bed. For a single coaster, placing it in the top-left corner (the “home” position for many lasers) is often easiest. If you are producing multiple coasters, creating a simple jig out of cardboard or plywood is highly recommended. A jig is a template with a cutout the exact size of your coaster, which allows you to place each coaster in the exact same spot every time, ensuring your design is perfectly centered and repeatable. Once the coaster is in position, you must focus the laser beam. The laser’s power is concentrated at a single focal point, much like a magnifying glass in the sun. If the slate surface is above or below this point, the beam will be wider, distributing the energy and resulting in a blurry, weak engraving. Use your machine’s specific focusing tool—this might be an auto-focus probe, a manual focus block of a specific height, or a red-dot pointer system. Carefully adjust the height of your laser bed (the Z-axis) until the nozzle is at the precise focal distance from the surface of the slate. Double-check your focus before every job, as even a small error can ruin the final piece.
Optimal Laser Settings for Engraving Slate
Understanding how a laser interacts with slate is the key to mastering your settings. Unlike wood, which burns and chars, slate does not burn. Instead, the intense, focused heat from the laser causes micro-fractures on the surface. This process, known as ablation or spalling, fractures the dark slate into a lighter gray or off-white material. The goal is to create these fractures cleanly and consistently without overheating the stone. The best laser engraving slate settings are a delicate balance of power, speed, and resolution designed to achieve this crisp, bright mark without causing excessive chipping or a melted, glassy appearance. Because every laser is different and every batch of slate can have slight variations in its composition, the settings provided here are a starting point for your own experimentation.
The three primary settings you will control are power, speed, and resolution. Finding the right combination is crucial for a professional result.
- Power: With slate, less is often more. A common mistake is to use too much power, thinking it will create a brighter white mark. In reality, excessive power can overheat the slate, causing larger flakes to break off, resulting in a pitted, rough texture and a loss of fine detail. It can even cause the minerals in the slate to melt slightly, creating a dull, glassy finish instead of a bright one. Start with a very low power setting, often in the 15-30% range for a CO2 laser, and work your way up only if necessary. The aim is to deliver just enough energy to fracture the surface cleanly.
- Speed: A moderate to high speed is generally preferred for slate. A faster laser head movement complements the low power setting by ensuring the beam doesn’t dwell on one spot for too long, which prevents heat buildup. A good starting range is between 3000mm/min and 6000mm/min (or 50mm/s to 100mm/s). Engraving too slowly, even at low power, can lead to the same overheating issues seen with excessive power.
- Resolution (DPI/LPI): Resolution, measured in Dots Per Inch (DPI) or Lines Per Inch (LPI), determines how close together the engraved lines are. For slate, a higher resolution is usually better as it creates a more solid, uniform appearance. A setting of at least 254 DPI, and often 300 DPI or higher, will ensure there are no visible gaps between the lines, which is especially important when engraving dithered photos for a smooth tonal look.
Settings for Diode Lasers and The Importance of Testing
For hobbyists using a diode laser engraving slate, the principles remain the same, although the specific numbers will differ. Diode lasers typically have lower wattage than CO2 lasers, but they are surprisingly effective on slate. For a 10-watt diode laser, a good starting point might be 2000mm/min at 80% power. For a 20-watt diode, you might try 4000mm/min at 60% power. The key is still to find the sweet spot that provides a bright mark without overcooking the material. The single most important step in this process is creating a test grid. Do not experiment on one of your good coasters. Use a spare or a broken piece of slate. Most laser control software, like LightBurn, has a built-in material test generator. This tool will create a grid of small squares, each engraved with a different combination of power and speed. Running this test will give you a clear, visual reference of how your specific laser interacts with your specific slate. You can then examine the grid and choose the square that shows the brightest, sharpest mark with the cleanest edges. This simple five-minute test will save you from wasting materials and will consistently give you the best possible results.
The Engraving Process and Finishing Touches
With your design prepared, your coaster positioned, and your settings dialed in, you are ready for the most exciting part. But before you press the start button, perform one last pre-flight check. Use your laser software’s “Frame” or “Trace” function. This will move the laser head around the boundary of your design without firing the laser, giving you a perfect visual preview of its size and position on the coaster. Adjust if necessary until the alignment is perfect. Double-check that you have entered the correct power and speed settings from your material test. Once you are confident everything is correct, close the lid of your laser engraver, turn on your air assist and exhaust fan, and start the job. The machine will begin to move, and you will see your design come to life on the stone. It’s a satisfying process, but what you see when it finishes isn’t the final product. The engraved area will be covered in a fine layer of gray slate dust, which can obscure the detail and dull the appearance. The next step, cleaning, is non-negotiable for a sharp result.
Cleaning and Preparing for the Finish
Once the engraving is complete and the machine is safe to open, carefully remove the coaster. Your primary task now is to remove all the residual dust created during the engraving process. Take the coaster to a sink and use a soft-bristled brush, like an old toothbrush or a soft nail brush, and a little bit of water. Gently scrub the engraved areas. You are not trying to scrub the engraving off; you are simply dislodging the fine powder that is sitting inside the newly created micro-fractures. Rinse the coaster thoroughly with cool water and let it air dry completely, or pat it dry with a lint-free cloth. Once dry, the engraving will look clean but may lack the high-contrast “pop” you’re looking for. The engraved area will be a light gray, and the surrounding slate may look a bit dull or chalky after being cleaned. This is normal. The final step is what transforms your project from a simple engraved stone into a professional-looking custom slate coaster.
Applying a Finish to Enhance Contrast
The secret to a stunning finish is applying a sealer or oil. This simple step dramatically darkens the raw slate, turning it from a medium-dark gray to a deep, rich black. This, in turn, makes the light gray engraved areas appear much brighter and whiter by comparison, creating a striking visual contrast. For coasters, it is essential to use a food-safe finish. The most common and effective choice is food-safe mineral oil, the same kind used for wooden cutting boards. You can also use a specialized stone sealer, but make sure it is rated as food-safe if the coaster will be used for beverages. The application is simple:
- Start with a completely dry and clean coaster.
- Apply a very small amount of mineral oil—just a few drops—onto a clean paper towel or microfiber cloth.
- Gently rub the oil onto the entire surface of the coaster, both the engraved and un-engraved parts. You will instantly see the slate darken and the design pop.
- The most important part of how to laser engrave slate with a perfect finish is the next step: using a new, clean part of the cloth, thoroughly buff the entire coaster to remove all excess oil. You want to leave behind only what has been absorbed into the stone. If you leave excess oil on the surface, it will feel greasy and attract dust.
- Let the coaster sit for a few hours to allow the oil to fully absorb and cure. The result is a beautifully finished, protected, and high-contrast coaster that looks truly professional.
Conclusions
You now have the knowledge to create stunning engraved slate coasters. By preparing your material, dialing in the correct settings, and applying a finishing oil, you can produce professional-quality results. Don’t hesitate to experiment with different designs and settings to develop your unique style. Start your next slate engraving project today and see the incredible results for yourself.
Frequently Asked Questions
Q: What are the best laser settings for slate?
A: The best starting point is low power and high speed. For a CO2 laser, try 15-30% power at 3000-6000 mm/min. For a diode laser, the numbers will be different. The most critical step is to run a material test grid on a scrap piece to find the perfect settings for your specific machine and slate batch.
Q: Why is my slate engraving blurry or inconsistent?
A: This is almost always an issue with focus or the material itself. Ensure your slate coaster is as flat as possible, as a warped surface will cause the focus to vary. Double-check that your laser is perfectly focused on the surface of the slate before starting the job.
Interested in more Coaster? Check out our Coaster laser file designs: Click here!
Q: How do I make the engraving on slate “pop” and look high-contrast?
A: The secret is the finishing step. After cleaning all the engraving dust off the coaster, apply a thin coat of food-safe mineral oil to the entire surface. This darkens the slate to a deep black, which makes the light gray engraved design stand out dramatically.
Q: Can I use a diode laser to engrave slate?
A: Absolutely. Diode lasers are very effective on slate. The core principles of using low power and high speed still apply, but the specific settings will differ from a CO2 laser. For example, a 10W diode might require a starting point of 2000mm/min at 80% power. A test grid is essential to dial in your results.

Subscribe to Our Newsletter
And enjoy FREE Download Files, SALE Alerts and Inspiring TIPS
A Comprehensive Guide to Pricing Your Laser Engraving Services
A Comprehensive Guide on How to Price Laser Engraving Services
How to Price Your Laser Engraving and Cutting Services
Charcuterie Board Engraving File – Wine & Grapes 3D Illusion…
$4.00Original price was: $4.00.$3.00Current price is: $3.00.(25% off)
Bee and Honey Jar Charcuterie Board Engraving File | PNG Download #007…
$4.00Original price was: $4.00.$3.20Current price is: $3.20.(20% off)
Valentine Love Captions: 6 Charcuterie Board Engraving Files…
$8.00Original price was: $8.00.$5.60Current price is: $5.60.(30% off)
American Eagle Flag Laser Engraving File for Charcuterie & Cutting…
$4.00Original price was: $4.00.$2.80Current price is: $2.80.(30% off)