

 Français
 Deutsch
 Español
 Italiano
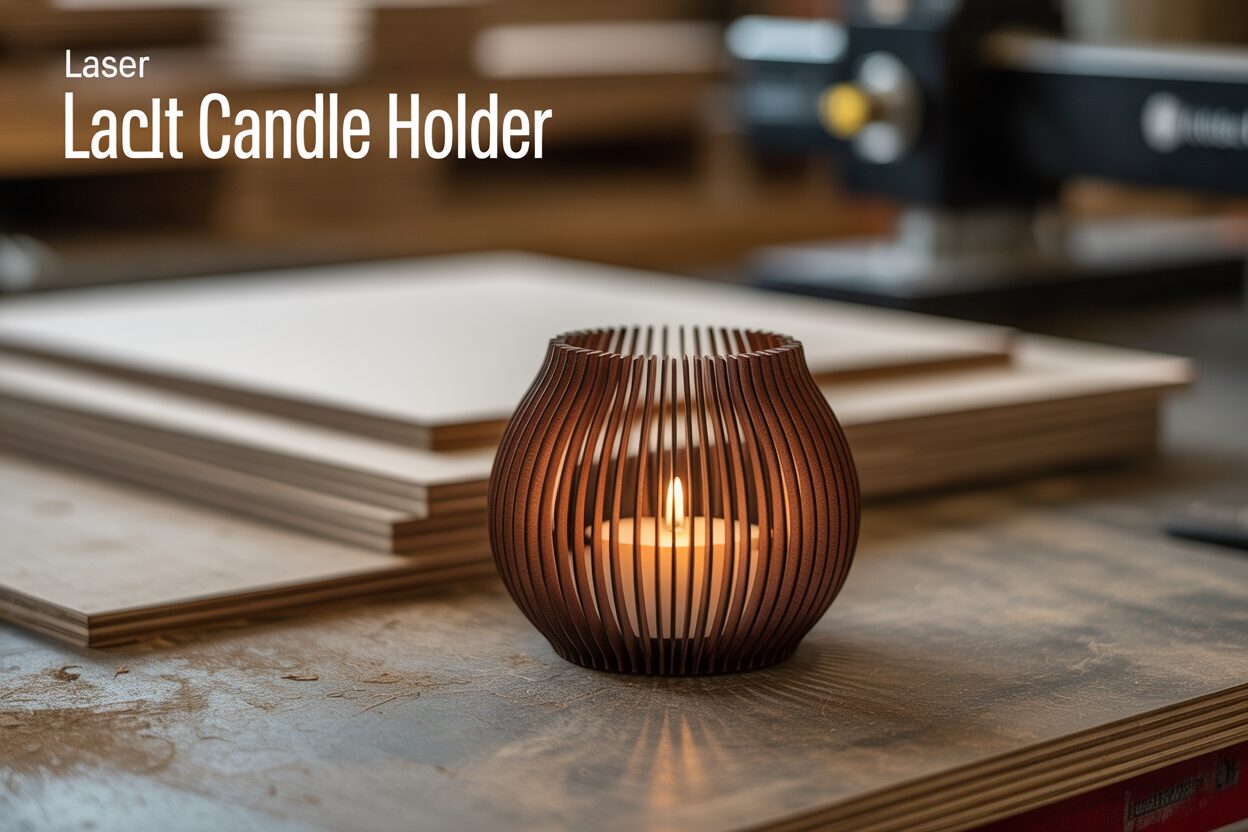
A Step-by-Step Guide to Crafting Wooden Laser Cut Candle Holders
Oct
Estimated reading time: 7 minutes
Key Takeaways
- Material Matters: The choice of wood—such as versatile Birch Plywood, paint-friendly MDF, or premium Cherry Wood—is fundamental to your project’s final look, durability, and cutting process.
- Calibrate for Success: Before cutting your final design, always perform a test cut on scrap material to perfectly balance laser power, speed, and air assist. This prevents wasted material and ensures clean, precise results.
- Design Sourcing: High-quality vector files (SVG, DXF, AI) are essential. Find them on marketplaces like Etsy or create your own, ensuring the design’s complexity matches your skill level for an enjoyable experience.
- Safety First with Lighting: Never use a real flame candle in your wooden lantern. Opt for battery-operated LED candles or fairy lights to achieve a beautiful, warm glow without the significant fire risk.
Table of Contents
- Finding the Perfect Design and Materials
- Preparing Your File and Laser Cutter Settings
- Assembly and Finishing Touches for Your Lantern
- Conclusions
- Frequently Asked Questions
Discover the art of creating beautiful laser-cut candle holders. This project blends technology with craftsmanship, allowing you to produce elegant decor pieces perfect for your home or as personalized gifts. We’ll guide you through material selection, finding the best designs, and the step-by-step process of cutting and assembling your unique candle lantern, ensuring a beautiful result every time.
Finding the Perfect Design and Materials
The journey to creating a beautiful laser cut candle holder begins with two critical choices: the wood you will use and the design you will bring to life. These decisions will influence the final look, durability, and complexity of your project. Let’s explore the best options to ensure your project is a glowing success.
Choosing Your Wood: The Foundation of Your Creation
The type of wood you select is more than just an aesthetic choice; it directly impacts how well your laser cutter performs and how sturdy your final lantern will be. Each material has unique properties.
- Birch Plywood: A popular choice for a reason. Birch plywood is strong, stable, and relatively affordable. Its light, uniform surface is a perfect canvas for paints and stains, and it handles intricate cuts exceptionally well, making it ideal for detailed wood lantern designs. The primary downside is the layered appearance on the cut edges and the small risk of hitting an internal glue pocket or void, which can mar a perfect cut.
- MDF (Medium-Density Fiberboard): If you plan to paint your candle holder, MDF is an excellent option. It’s an engineered wood product with a completely uniform density and a smooth surface, resulting in incredibly clean and consistent cuts with no wood grain to worry about. However, MDF isn’t as durable as plywood and can be susceptible to moisture. Its primary drawback is that it lacks the natural beauty of real wood and produces very fine dust when cut.
- Cherry Wood: For a premium, elegant finish straight off the laser bed, solid hardwoods like cherry are unmatched. Cherry wood boasts a rich, warm color and beautiful grain that deepens over time. It’s strong and finishes beautifully with a simple coat of oil. On the other hand, it is more expensive and can be more prone to charring than plywood, requiring you to dial in your laser settings precisely. The grain direction can also create weak points in very delicate parts.
Sourcing Your Blueprint: Finding High-Quality Laser Cut Lantern Patterns
Once you’ve chosen your material, it’s time to find a design. The internet is a vast resource for high-quality laser cut lantern files, catering to all tastes and skill levels. Online marketplaces like Etsy, Design Bundles, and Creative Fabrica are treasure troves of professionally designed patterns. A search for “candle lantern svg” or “laser cut lantern patterns” will yield thousands of options, from simple geometric boxes to ornate, multi-layered pagodas. For free options, explore community-driven sites like Thingiverse or Instructables, but always check the usage rights if you plan to sell your creations. When downloading a file, ensure it’s a vector format like SVG, DXF, or AI, as these are scalable and provide the clean lines your laser needs to follow. A well-made file will have clearly defined cut and score lines, often color-coded for convenience.
Interested in more Boxes? Check out our Boxes laser file designs: Click here!
For the adventurous, designing your own lantern using software like Adobe Illustrator or the free alternative Inkscape offers ultimate creative freedom. This allows you to craft a truly one-of-a-kind piece tailored to your exact vision.
Matching the Design to Your Skill Level
It’s crucial to select a design that aligns with your experience. A project that is too complex can be frustrating, while one that is too simple may not be satisfying. For a beginner, a good design features fewer pieces, robust parts with minimal intricate fretwork, and straightforward slot-together assembly. These designs are more forgiving and help you build confidence. An advanced user might seek out a challenge with a design that incorporates dozens of delicate pieces, living hinges for curved surfaces, or complex, multi-layered scenes. These projects demand a well-calibrated machine, a steady hand during assembly, and a good deal of patience, but the stunning results are well worth the effort. Always review the design’s complexity before committing to a cut to ensure a smooth and enjoyable crafting experience.
Preparing Your File and Laser Cutter Settings
With your chosen wood and design file in hand, you are ready to bridge the gap between digital design and physical creation. This stage is crucial for translating your vision into a clean, precise cut. Careful preparation of your laser cut lantern files and calibration of your machine settings will prevent wasted material and ensure the final pieces assemble perfectly.
First, import your design file (typically an SVG or DXF) into your laser control software, such as LightBurn or RDWorks. Before you even think about hitting the ‘start’ button, take a moment to inspect the digital blueprint. Zoom in and look for any potential issues. Are all the lines that are meant to be cut part of a single, closed shape? Many software programs have a tool to highlight open shapes, which will not cut out correctly. Another common issue in downloaded files is duplicate lines stacked on top of each other. This will cause the laser to pass over the same spot multiple times, resulting in a wider cut (kerf), excessive charring, and an increased fire risk. Use your software’s ‘Remove Duplicates’ function to clean up the file. Finally, assign different colors to different operations. For instance, you might set all the outer cut lines to red and any decorative score lines to blue. This allows you to apply different power and speed settings for each specific job within the same file.
Calibrating Your Laser for a Perfect Cut
The key to a perfect cut in wood lies in the balance between three main settings: power, speed, and air assist. Think of them as a team working together.
- Power: This setting dictates the intensity of the laser beam. For cutting through 3mm birch plywood, you might start with a setting around 60-70% power. Too little power will fail to cut through the material, while too much will result in heavy charring and a wider kerf.
- Speed: This determines how quickly the laser head moves. Speed and power have an inverse relationship. A slower speed allows the laser to dwell on the material longer, effectively increasing the energy applied. For cutting, you’ll need a slower speed than you would for engraving. A starting point could be around 15-20 mm/s. The faster you can run the laser while still cutting through cleanly, the less charring you will get.
- Air Assist: This is non-negotiable when cutting wood. A steady stream of compressed air directed at the cutting point clears away smoke and debris, reduces flare-ups, and produces a much cleaner, sharper edge. Ensure your air assist is on and providing strong, consistent airflow.
Because every laser cutter is slightly different and every sheet of wood has minor variations in density and moisture content, you must perform a test cut. This is the single most important step for anyone undertaking a DIY laser cut lantern project. On a small scrap piece of the exact material you plan to use, cut a small test shape—a one-inch square with a one-inch circle inside is a popular choice. Did it cut all the way through? Did the circle fall out cleanly? How charred are the edges? Adjust your power and speed settings in small increments until you achieve a clean, one-pass cut with minimal browning. This small-five minute step will save you from potentially ruining a full sheet of wood and guarantees that when you cut your final project, the results will be exactly what you expect.
Assembly and Finishing Touches for Your Lantern
The laser has finished its work, and you now have a collection of precisely cut wooden pieces. This is where your creation truly comes to life. A patient and methodical approach to assembly and finishing will transform these flat components into a beautiful, three-dimensional laser cut candle holder.
Before reaching for the glue, perform a ‘dry fit’. Carefully assemble the lantern without any adhesive to understand how the parts interlock. This is your chance to identify any joints that are too snug or too loose. If a joint is tight, you can lightly sand the inside of the tab or slot with a small file or a piece of folded sandpaper. Once you’re confident that everything fits together correctly, you can begin the permanent assembly. Apply a very thin, even bead of wood glue to the edges of the joints. A small brush or a cotton swab can be helpful for precise application on delicate parts. Avoid using too much glue, as it will squeeze out and can be difficult to clean up. As you join the pieces, immediately wipe away any excess glue with a damp cloth. For stubborn joints, a gentle tap with a small rubber mallet can ease them into place without marring the wood. Use small spring clamps, rubber bands, or even painter’s tape to hold the structure together securely while the glue dries completely, following the manufacturer’s recommended curing time.
From Assembled to Art: Finishing Your Creation
With your lantern fully assembled, the final step is to apply a finish that will protect the wood and enhance its beauty. Even with perfect laser settings, you might notice a slight haze of smoke residue on the wood’s surface. A light sanding with fine-grit sandpaper (220-grit or higher) will remove this and prepare the surface for a finish. Be gentle, especially around intricate details, and decide if you want to sand the dark, laser-cut edges—many makers prefer to leave them as a contrasting design element. Once the surface is smooth and clean, you have several finishing options:
- Wood Stain: If you want to enrich the natural color and highlight the grain of your wood, a stain is an excellent choice. Apply it with a clean cloth, let it penetrate for a few minutes, and then wipe off the excess.
- Paint: For a pop of color or a modern, opaque look, acrylic or spray paints work wonderfully. If you used MDF, applying a coat of primer first will ensure an even and vibrant color finish.
- Varnish or Clear Coat: To protect the natural wood while giving it a durable finish, apply a clear polyurethane or acrylic varnish. It comes in various sheens, from matte to high gloss. Apply it in thin, even coats with a soft brush, lightly sanding between coats for the smoothest possible result.
A Note on Safety: Choosing Your Light Source
Finally, and most importantly, consider the source of your glow. While they are called candle holders, placing a real flame inside an enclosed wooden structure is a significant fire hazard. For the safety of your home and your beautiful new creation, it is strongly recommended to use battery-operated LED candles or fairy lights. They perfectly replicate the warm, flickering ambiance of a real candle without any risk of fire, heat damage to the wood, or soot. These alternatives are safe, long-lasting, and allow you to enjoy the warm glow of your lantern worry-free.
Conclusions
You now have the skills to create stunning laser-cut candle holders that bring warmth and intricate beauty to any room. By following these steps, you can confidently turn digital designs into physical art. Don’t be afraid to experiment with different wood lantern designs and materials to develop your unique style. Start crafting today and light up your world with your creations.
Frequently Asked Questions
Q: What is the best wood for a beginner making a laser-cut candle holder?
A: Birch plywood is an excellent choice for beginners. It’s affordable, stable, cuts well, and is a great surface for paints or stains. It’s more forgiving than solid hardwoods and more durable than MDF.
Q: Can I use a real candle in my wooden lantern?
A: No, it is strongly recommended not to use a real flame. A real candle poses a significant fire hazard in an enclosed wooden structure. Use battery-operated LED candles or fairy lights instead for a safe and beautiful glow.
Q: Why is a test cut so important?
A: A test cut is crucial because every laser cutter and every piece of wood is slightly different. It allows you to fine-tune your power, speed, and air assist settings on a small scrap piece, ensuring your final project cuts cleanly and accurately without wasting a large sheet of material.
Q: Where can I find designs for laser-cut lanterns?
A: You can find a vast number of high-quality designs on online marketplaces like Etsy, Design Bundles, and Creative Fabrica by searching for “candle lantern svg” or “laser cut lantern patterns.” For free options, you can check sites like Thingiverse, but always verify the usage rights.

Subscribe to Our Newsletter
And enjoy FREE Download Files, SALE Alerts and Inspiring TIPS
Pricing Your Laser Engraving Work for Profitability
A Comprehensive Guide to Pricing Your Laser Engraving Services
A Comprehensive Guide on How to Price Laser Engraving Services
Charcuterie Board Engraving File – Wine & Grapes 3D Illusion…
$4.00Original price was: $4.00.$3.00Current price is: $3.00.(25% off)
Bee and Honey Jar Charcuterie Board Engraving File | PNG Download #007…
$4.00Original price was: $4.00.$3.20Current price is: $3.20.(20% off)
Valentine Love Captions: 6 Charcuterie Board Engraving Files…
$8.00Original price was: $8.00.$5.60Current price is: $5.60.(30% off)
American Eagle Flag Laser Engraving File for Charcuterie & Cutting…
$4.00Original price was: $4.00.$2.80Current price is: $2.80.(30% off)