

 Français
 Deutsch
 Español
 Italiano
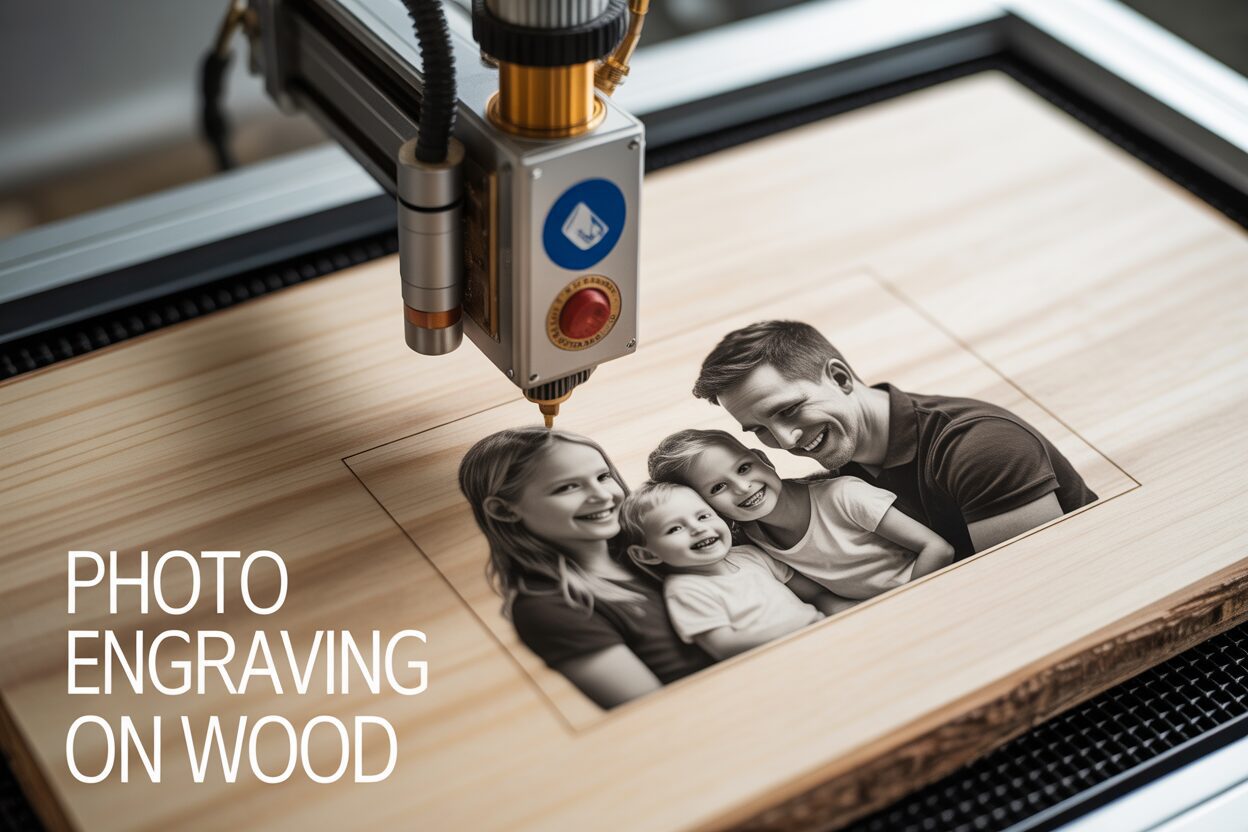
A Guide to Perfect Photo Engraving on Wood
Nov
Estimated reading time: 9 minutes
Key Takeaways
- Wood Selection is Crucial: The success of a photo engraving heavily depends on the wood. Opt for materials with a light, uniform color, a fine grain, and low resin content like Alder, Maple, or Basswood for the best contrast and clarity.
- Image Preparation is Non-Negotiable: A raw photo file is unsuitable for engraving. You must convert the image to grayscale, increase contrast, apply sharpening, and use a dithering algorithm (e.g., Floyd-Steinberg, Jarvis) to simulate shades of gray with dots.
- Calibrate Laser Settings Methodically: There are no universal settings. The interplay between power, speed, and DPI (Dots Per Inch) determines the final look. Creating a test grid on scrap material is the most effective way to find the optimal settings for your specific wood and laser.
- Perfect Focus Equals Sharp Detail: An improperly focused laser is the fastest way to ruin an engraving. Always use your machine’s focus tool before every job and consider performing a ramp test to find the precise focal point for ultimate sharpness.
Table of Contents
- Choosing the Right Wood for Your Engraving Project
- Preparing Your Image for Flawless Engraving
- Mastering Your Laser Engraver Settings
- Conclusions
- Frequently Asked Questions
Transform your favorite photographs into timeless wooden keepsakes. This guide provides a comprehensive walkthrough of the photo engraving process, from selecting the ideal materials to fine-tuning your laser for professional-quality results. Discover the secrets to creating stunning, detailed, and personalized wood-engraved photos that will be cherished for years to come.
Choosing the Right Wood for Your Engraving Project
The foundation of a stunning photo engraving is the material itself. While image preparation is crucial, selecting the right wood is arguably the most important decision you will make. The wood acts as your canvas, and its intrinsic properties—color, grain, and chemical composition—will directly dictate the clarity, contrast, and overall quality of the final piece. An otherwise perfect digital image can be rendered unrecognizable on an unsuitable piece of wood. The goal is to choose a material that provides a consistent, uniform surface, allowing the laser-burned details of your photograph to be the star of the show, not the wood’s natural features.
The Ideal Canvas: Characteristics to Look For
The best woods for photo engraving share a few key characteristics. First and foremost is a light and uniform color. Laser engraving is a process of burning, which creates shades of brown and black. To achieve maximum contrast and make the details of your photo pop, you need a bright, pale background. Woods that are naturally light-colored provide the perfect backdrop for the dark tones created by the laser. Secondly, look for a fine, tight grain pattern. Woods with a prominent, wide, or uneven grain will interfere with the fine details of a photo. The laser will burn differently on the harder and softer parts of the grain, creating a “banding” effect that disrupts the image. A smooth, consistent surface ensures that every dot of the engraved photo is rendered clearly. Finally, a low sap or resin content is critical. Resinous woods, like pine, tend to burn unevenly, creating blotchy, dark spots and leaving behind a sticky residue that can be difficult to clean and can even foul your laser’s optics.
Recommended Woods for Flawless Photo Engraving
Based on the ideal characteristics, a few wood species consistently deliver exceptional results for photo engraving.
- Alder: Often considered the go-to choice by professionals, Alder has a light tan color with a subtle reddish tint. Its grain is remarkably fine and straight, providing a smooth, consistent surface. It has very little resin, so it burns to a clean, rich dark brown, offering superb contrast without producing much residue.
- Basswood: This is an excellent wood for beginners. It is very soft, extremely light in color, and has a grain that is so fine it’s almost invisible. This uniformity allows the laser to produce incredibly consistent shading. Because of its softness, it requires less laser power to achieve a dark burn, making it forgiving on a wider range of machines.
- Cherry: For a premium, elegant result, Cherry is a fantastic option. It has a beautiful, warm pinkish-brown hue and a very fine, straight grain. It engraves to a deep, rich brown, offering a slightly more subtle and sophisticated contrast compared to the starkness of Maple or Basswood. Be aware that Cherry wood will naturally darken over time when exposed to light.
- Maple: As a dense hardwood, Maple is known for its durability and creamy white color. Its hardness requires a bit more laser power, but the reward is exceptionally sharp and crisp detail. The minimal grain and very light color provide some of the best contrast possible, making it a top choice for high-resolution photographs where fine details are paramount.
Woods to Avoid for Photo Engraving
Just as important as knowing which woods to use is knowing which to avoid. Using the wrong wood will lead to frustration and disappointing results.
- Pine: While inexpensive and widely available, pine is one of the worst choices for photo engraving. Its grain structure is composed of extremely different densities—very soft earlywood and very hard latewood. This causes dramatic banding in the engraving, as the laser burns the soft parts much darker than the hard parts. Furthermore, its high resin content leads to flare-ups, inconsistent blotchy burns, and a sticky mess.
- Oak: Particularly Red Oak, is not suitable due to its prominent and porous grain structure. The deep, open grain lines create a coarse texture that completely overwhelms the fine dots of a photo engraving. The natural pattern of the wood competes visually with the image you are trying to create, making the final product look busy and unclear.
- Plywood: While some high-quality, single-species plywoods (like Baltic Birch) can work, most common plywoods are a poor choice. The internal layers often contain voids, fillers, and different types of wood, and the glues used can release toxic fumes and burn inconsistently, resulting in an uneven and unpredictable engraving.
Preparing Your Image for Flawless Engraving
Once you have selected the perfect piece of wood, your focus must shift to the digital image itself. The translation from a vibrant, full-color photograph on a screen to a series of burned dots on a natural surface is a delicate process that demands careful preparation. Simply sending a photo directly to the laser will almost always result in a muddy, unrecognizable mess. The key to a crisp, detailed, and lifelike engraving lies in meticulously editing your image to work with the laser, not against it. Start by choosing a high-quality source photo. A high-resolution image (ideally 300 DPI or higher at the intended engraving size) is non-negotiable. Look for a photo with good focus, strong lighting, and a clear distinction between the subject and the background. Images with a wide dynamic range—containing bright whites, dark blacks, and plenty of mid-tones—tend to produce the best results.
Fundamental Image Adjustments
Your first step in any photo editing software (like Photoshop, GIMP, or Lightburn’s built-in tools) is to convert the image to grayscale. Lasers interpret shades of gray as different levels of power, so removing color information is essential. Next, you will need to adjust the brightness and contrast. What looks good on a backlit monitor will often appear washed out when engraved on wood. You typically need to increase the contrast more than you think. Make the bright areas brighter and the dark areas darker to ensure there is enough separation between tones. Pay special attention to mid-tones, as they are often the first details to get lost. A slight boost in overall brightness can also help, preventing the entire image from looking too dark. Finally, apply a sharpening filter, such as an “Unsharp Mask.” This enhances the edges and fine details within the photo—like hair, eyes, and textures—which helps them remain distinct and clear after being burned into the grain of the wood.
The Critical Role of Dithering
This is the single most important step in preparing your image. A laser engraver is fundamentally a binary device: for any given point in time, it is either firing (burning a dot) or it is off. It cannot naturally create the smooth gradients you see in a grayscale photo. This is where dithering for laser engraving comes in. Dithering is a digital process that converts a grayscale image into a black-and-white image by arranging patterns of tiny dots. These patterns trick the human eye into perceiving shades of gray. For darker areas, the dots are placed closer together; for lighter areas, they are spaced further apart. Without dithering, your laser software would interpret your grayscale image using simple thresholds, resulting in a posterized, blotchy image with no subtle shading. Mastering dithering is essential for achieving the photorealistic quality that makes a custom photo engraving so special.
Interested in more Custom Photo? Check out our Custom Photo laser file designs: Click here!
Comparing Dithering Algorithms
Most laser software offers several dithering algorithms, and the one you choose will have a significant impact on the final texture and detail of your engraving. While there are many, a few are industry standards:
- Floyd-Steinberg: This is one of the most common and well-regarded algorithms. It produces a very smooth and natural-looking dot pattern that is excellent for portraits and images with soft gradients. It does a great job of preserving detail without creating obvious patterns.
- Jarvis: The Jarvis, Judice, and Ninke algorithm (often just called Jarvis) tends to produce a slightly finer, more detailed result than Floyd-Steinberg. It diffuses the image error over a larger area of pixels, which can bring out more subtle textures. This makes it a great choice for highly detailed images, though it can sometimes look a bit “busier.”
- Stucki: Often considered a good middle ground, the Stucki algorithm produces a clean, sharp dither with less blotchiness than some other methods. It is generally faster to process and provides excellent results for a wide variety of images, balancing detail and smoothness effectively.
There is no single “best” algorithm; the ideal choice depends on your source image, the wood you are using, and your desired aesthetic. It is always recommended to create a small test file with the same image dithered using different methods and engrave it on a scrap piece of the same wood to see which one gives you the best result before starting your final project.
Mastering Your Laser Engraver Settings
With your perfectly prepared image and carefully selected wood, you are now at the control panel of the process. The photo laser engraving settings you choose are the final, critical instructions that tell the machine how to interpret your digital file and translate it into a physical object. There is no universal “magic number” for these settings; they are a delicate balance that depends on your specific laser’s wattage, the type of wood, and the desired outcome. The four cornerstone parameters you must master are power, speed, DPI, and focus. Understanding the role of each is essential for moving from guesswork to predictable, repeatable results. Power determines the intensity of the laser beam, directly impacting the darkness and depth of the burn. Speed controls how quickly the laser head moves across the material. These two settings have an inverse relationship: a slower speed allows the beam to dwell longer on a single spot, creating a darker mark, much like higher power does. Finding the sweet spot between them is key to achieving a wide range of grayscale tones without charring the wood or losing detail.
Dialing in Speed, Power, and Resolution
The resolution of your engraving is set by the DPI (Dots Per Inch), sometimes called LPI (Lines Per Inch). This dictates how many lines or dots the laser will engrave within a single inch. A higher DPI will pack more dots into the same space, which can produce finer detail and smoother gradients. However, this comes with significant trade-offs. Firstly, doubling the DPI can more than double the engraving time. Secondly, on certain woods, a very high DPI can cause the dots to overlap, effectively “overcooking” the area and resulting in a darker, muddier image with less detail than a lower DPI setting might have produced. A good starting point for most woods is between 250 and 300 DPI. To find the optimal combination for your materials, the most effective method is to create a test matrix. On a scrap piece of the same wood as your final project, create a grid of small squares. Assign a different power setting to each column (e.g., 10%, 15%, 20%) and a different speed setting to each row (e.g., 100mm/s, 150mm/s, 200mm/s). Engrave a small, detailed portion of your photo in each square. This physical grid will visually show you which combination produces the best tonal range and sharpest detail, taking all the guesswork out of your main project.
The Critical Importance of Focus
Of all the settings, focus is perhaps the most crucial and least forgiving. An improperly focused laser will produce a soft, blurry engraving, no matter how perfect your other settings are. The laser beam is channeled through a lens that converges it to a tiny, high-energy point at a specific distance—the focal point. For the sharpest photo engraving, the surface of the wood must be positioned precisely at this point.
- Use the Focus Gauge: Most lasers come with a manual focus tool or an auto-focus probe. Use it before every single job, even if you just ran a project on the same material. A slight warp in the wood can be enough to throw off the focus.
- Perform a Ramp Test: For ultimate precision, perform a “ramp test” to find your machine’s true focal point. Place a scrap piece of wood on an incline, draw a straight line in your software, and run the laser at low power. The line will be fuzzy at the high and low ends of the ramp and sharpest at one specific point. This thinnest part of the line indicates the perfect focal distance for your lens, which you can then measure and use for all future projects.
Perfect focus ensures that each dot burned by the laser is as small and crisp as possible, which is the foundation for rendering the fine details that bring an engraved photograph to life.
Conclusions
You now have the knowledge to create breathtaking custom photo engraving projects. By carefully selecting your wood, meticulously preparing your images, and mastering your laser settings, you can consistently produce high-quality results. Start experimenting with your favorite photos and turn them into beautiful wooden art pieces and personalized gifts.
Frequently Asked Questions
Q: What is the absolute best wood for a beginner to use for photo engraving?
A: For beginners, Basswood is an excellent choice. It is very soft, has an extremely light and uniform color, and an almost invisible grain. This makes it very forgiving, as it requires less laser power to achieve dark, consistent marks, allowing for easier calibration and great results.
Q: Why is dithering so important for laser engraving photos?
A: Dithering is the process of converting a grayscale image into a pattern of black and white dots. Since a laser is a binary tool (either on or off), it cannot create true shades of gray. Dithering arranges dots in varying densities to trick the eye into seeing a full tonal range, which is essential for creating a realistic and detailed photo engraving instead of a blotchy, posterized image.
Q: What DPI should I use for photo engraving?
A: A good starting point for most woods is between 250 and 300 DPI. While a higher DPI can mean more detail, it also increases engraving time and can lead to “overcooking” the wood if the dots overlap too much, resulting in a dark, muddy appearance. It’s best to test different DPI settings on a scrap piece of your chosen material.
Q: Why should I avoid using pine for photo engraving?
A: Pine should be avoided for two main reasons. First, its grain has dramatically different densities between the light and dark rings, causing the laser to burn unevenly and create a distracting “banding” effect that ruins the image. Second, its high resin content can cause flare-ups, inconsistent burning, and leaves a sticky residue that is difficult to clean.

Subscribe to Our Newsletter
And enjoy FREE Download Files, SALE Alerts and Inspiring TIPS
Pricing Your Laser Engraving Work for Profitability
A Comprehensive Guide to Pricing Your Laser Engraving Services
A Comprehensive Guide on How to Price Laser Engraving Services
Charcuterie Board Engraving File – Wine & Grapes 3D Illusion…
$4.00Original price was: $4.00.$3.00Current price is: $3.00.(25% off)
Bee and Honey Jar Charcuterie Board Engraving File | PNG Download #007…
$4.00Original price was: $4.00.$3.20Current price is: $3.20.(20% off)
Valentine Love Captions: 6 Charcuterie Board Engraving Files…
$8.00Original price was: $8.00.$5.60Current price is: $5.60.(30% off)
American Eagle Flag Laser Engraving File for Charcuterie & Cutting…
$4.00Original price was: $4.00.$2.80Current price is: $2.80.(30% off)