

 Français
 Deutsch
 Español
 Italiano
A Guide to Laser Engraving on Slate
Jul
Estimated reading time: 7 minutes
Key Takeaways
- Choose honed, dark, smooth, and consistently flat slate to achieve the best high-contrast and professional-looking laser engravings. Avoid riven surfaces and mineral deposits.
- Master laser settings by using low power and high speed (e.g., 15-20% power, 300-400 mm/s for CO2 lasers, 250-350 DPI resolution) to fracture, not melt, the slate surface.
- Always create a detailed test grid on a scrap piece from the same slate batch to find optimal, high-contrast settings unique to your material. Consistent focus and lens cleanliness are also vital.
- After engraving, clean the slate gently with a damp microfiber cloth and optionally isopropyl alcohol (IPA) to remove all fine dust and maximize design contrast.
- Enhance contrast and protect your work by applying food-safe mineral oil to deepen the slate’s color, followed by a suitable food-safe or spray sealant for long-term durability.
Table of Contents
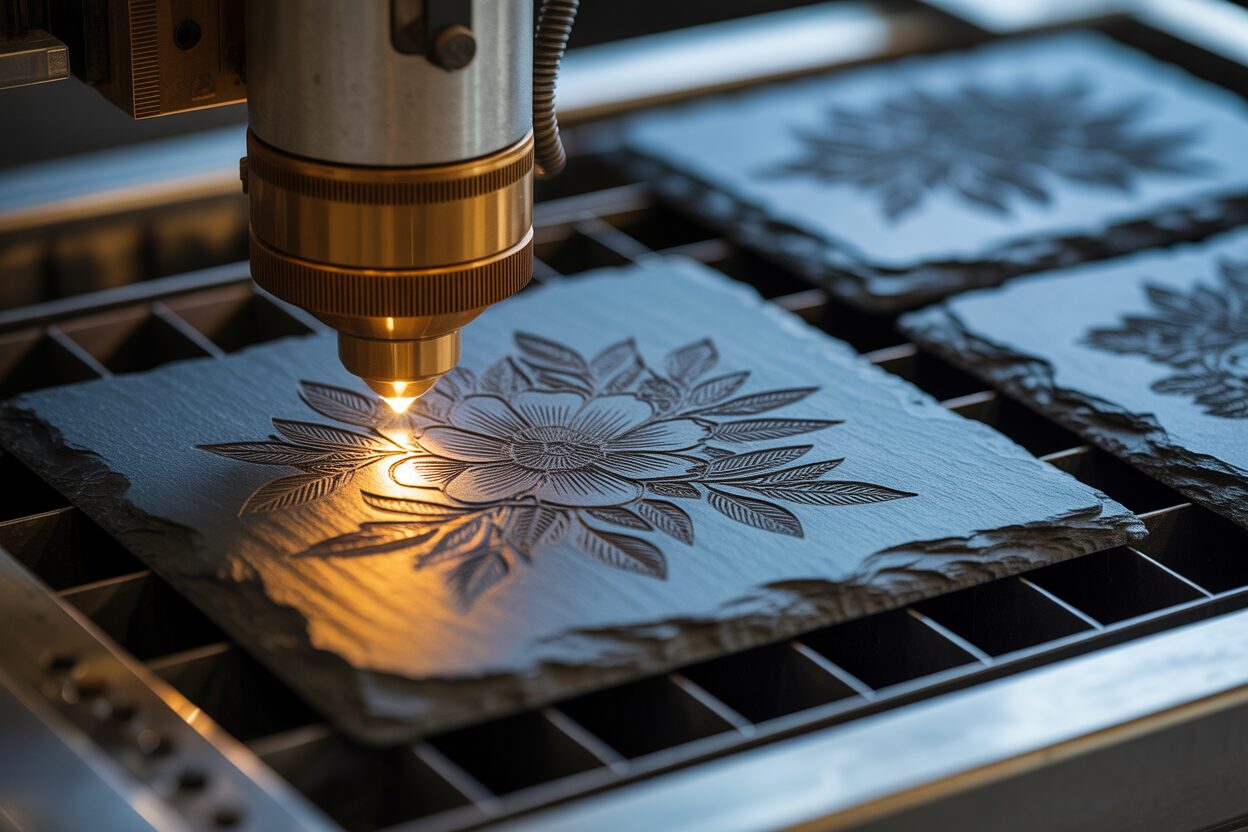
This guide covers everything you need to know about laser engraving on slate. From selecting the right materials to mastering the optimal settings, we’ll walk you through the entire process. Discover how to create beautiful, high-contrast designs on this unique and popular material, perfect for personalized gifts, home décor, and more. Let’s get started on your next creative project.
Selecting the Right Slate for Your Project
Understanding Slate Types
The foundation of a breathtaking laser-engraved piece lies in the material itself. While slate is a beautiful and natural medium, not all slate is created equal, and your choice will have the single greatest impact on the final quality of your work. The goal is to find a material that reacts predictably under the laser, producing a sharp, high-contrast mark. Generally, you are looking for a dark, smooth, and consistently flat piece of slate. The laser doesn’t add color; it works by ablating or fracturing the surface to reveal the lighter grey stone underneath. Therefore, the darker the original slate, the more dramatic the contrast and the more your design will pop.
When sourcing your material, you will encounter two main surface finishes: riven and honed. Riven slate has a natural, textured surface created when the rock is split along its cleavage planes. While this provides a rustic aesthetic, it is challenging for laser engraving. The uneven surface, with its microscopic peaks and valleys, can cause the laser to go in and out of focus, resulting in blurry lines and inconsistent engraving depth. For the best results, you should always opt for honed slate. Honed slate has been ground down to a smooth, flat, and often matte finish. This uniform surface ensures that the laser’s focal point remains constant across the entire design, leading to crisp, clean, and professional-looking engravings.
Key Characteristics and Sourcing
Beyond the surface finish, pay close attention to color and thickness. Look for the darkest grey or black slate you can find. A deep, uniform color provides the perfect canvas for the light grey mark the laser will create. Avoid slates with significant mineral deposits (like pyrite, which looks like gold flecks) or strong color veins, as these areas may react differently to the laser and disrupt the Visiual consistency of your design. Thickness is also crucial, not just for durability but for consistency. If you are working on a batch project like a set of coasters, ensure all pieces are the same thickness. A variance of even a millimeter can require you to refocus your laser for each piece, slowing down your workflow. A good starting thickness is between 4mm and 8mm, which provides a solid feel without being overly heavy.
- Craft and Engraving Suppliers: These are your best bet. Online suppliers specializing in laser materials sell “engraving blanks” like coasters, plaques, and cheese boards that are pre-selected for their smooth finish, dark color, and consistent thickness.
- Home Improvement Stores: Look for honed slate floor or wall tiles. These are often inexpensive and of good quality, but you may need to buy a whole box. Be sure to inspect them for flatness and a smooth finish before purchasing.
- Local Stone Yards: Sometimes you can find off-cuts of honed slate countertops that are perfect for larger projects.
Before you engrave, proper preparation is essential. Clean the slate thoroughly with a damp microfiber cloth and a small amount of mild soap to remove any dust, oils, or residue from the manufacturing process. Ensure the slate is completely dry before placing it in your laser engraver, as moisture can interfere with the engraving and potentially cause the material to crack. Finally, measure the thickness of your specific piece with digital calipers and input that value into your software for a perfectly focused laser beam.
Mastering Laser Engraving Settings for Slate
Dialing in the Settings
Dialing in the perfect laser engraving settings for slate is less about brute force and more about finesse. Unlike wood or acrylic that you burn or melt away, engraving slate is a process of fracturing the surface layer to reveal the lighter colored stone beneath. The key is to find the delicate balance between power and speed that creates a crisp, bright white or light grey mark without overheating and melting the stone, which results in a low-contrast, glassy finish. The three primary settings you will control are power, speed, and resolution (measured in DPI or LPI). For slate, the sweet spot is almost always found in the realm of low power and high speed. Too much power doesn’t create a deeper engraving; it simply melts the silicate minerals in the slate, turning them dark again and diminishing the contrast you want to achieve. Similarly, a speed that is too slow has the same effect as too much power, as it concentrates the laser’s energy on one spot for too long.
A typical starting point for a 40-60W CO2 laser would be around 15-20% power at a speed of 300-400 mm/s. For lower-wattage diode lasers (10-20W), you might start around 25-35% power at a speed of 2000-3000 mm/min. Resolution is also critical. While it’s tempting to use a very high DPI for detailed images, on slate this can be counterproductive. A high resolution causes the laser passes to overlap significantly, effectively re-engraving and overheating the surface. A resolution between 250 and 350 DPI is usually ideal, providing excellent detail without turning your design into a muddy mess.
Creating a Test Grid and Ensuring Consistency
Because every piece of slate has a unique mineral composition and density, you should never trust a generic settings profile. The single most important step before engraving your final project is to create and run a settings test grid on a scrap piece from the same batch. This involves creating a matrix of small squares in your design software, assigning a different power and speed combination to each one. For example, you could create a grid with power increasing from 10% to 30% along the Y-axis and speed increasing from 200 mm/s to 500 mm/s along the X-axis. After running the test, examine the results closely. You are looking for the square that produced the brightest, most consistent light-grey mark with the sharpest edges. The losing squares will look faint, blotchy, or have a melted appearance.
This testing process is especially vital when creating a set of slate coasters for laser engraving or any other batch project where consistency is paramount.
- Test Your Batch: Always use a coaster from the specific batch you are working on for your test grid. Even slates from the same supplier can vary between shipments.
- Focus is Key: As discussed previously, consistent material thickness is vital. However, it’s still good practice to check your laser’s focus for each new piece you place in the machine to account for any minor warping.
- Clean As you Go: Slate engraving produces a fine, gritty dust. This dust can settle on your machine’s optics, particularly the laser lens. On long production runs, pause periodically to check and clean your lens with a proper lens wipe and solution. A dirty lens will reduce the laser’s power, leading to fading and inconsistent engravings across the batch.
By dedicating a few minutes to testing and preparation, you move from guesswork to precision, ensuring every piece you produce meets a professional standard of quality.
Post-Engraving Finishing Touches
Cleaning the Engraving
Once the laser has completed its work, your slate piece will be covered in a fine layer of pulverized stone dust. The steps you take now are crucial for transforming a dusty engraving into a professional, finished product. The first, and most important, step is a thorough cleaning. Knowing how to clean slate after laser engraving properly ensures you don’t damage the delicate, fractured surface of your design. Begin by gently brushing off the loose dust with a very soft brush, like a makeup or watercolor brush. Alternatively, a quick blast of low-pressure compressed air can clear the bulk of the residue. Next, take a microfiber cloth dampened with clean water and gently wipe the entire surface. For more stubborn residue, a small amount of isopropyl alcohol (IPA) on the cloth can be very effective, as it evaporates quickly and won’t leave water spots. Avoid using harsh chemical cleaners or abrasive sponges, which can scratch the raw slate or dull the bright white finish of the engraving. For intricate designs, a cotton swab dipped in water or IPA can help you clean inside the small details without applying too much pressure. The goal is to remove all the grey dust from the dark, un-engraved areas to maximize the design’s contrast.
Enhancing Contrast and Protecting Your Work
With the slate clean and completely dry, you can move on to enhancing its appearance. This step is what separates a good engraving from a great one. The most common and effective technique is to apply food-safe mineral oil. This simple step dramatically enriches the slate, turning it a deep, lustrous black or dark grey, which makes the light-colored engraving pop with incredible contrast. To apply it, pour a small amount of mineral oil onto a clean, lint-free cloth and begin working it into the slate using small, circular motions. Make sure to cover the entire surface, including the edges. You will see the color deepen instantly. Let the oil sit and penetrate the stone for 10-15 minutes, then use a separate clean cloth to buff off all the excess oil. If you wipe it thoroughly, the surface should not feel greasy. For items that will be handled frequently or exposed to moisture, such as coasters or serving platters, applying a sealant is the final step for long-term durability.
- Food-Safe Sealants: For items that will come into contact with food, a specialized food-safe stone or butcher block sealant is necessary. These often come in wipe-on formulations and provide a protective barrier against stains and moisture.
- Spray Sealants: For decorative items like signs or art pieces, a spray-on clear coat is an excellent option. Choose a finish that complements your desired look; a matte finish will preserve the natural look of the slate, while a satin or semi-gloss finish will add a slight sheen and can further deepen the color.
Regardless of the sealant you choose, always test it on a scrap piece or the back of your project first. Some sealants can alter the color or appearance of the slate, and you want to ensure you are happy with the result before committing it to your finished piece. These finishing touches not only protect your work but also elevate it to a professional level of quality and durability.
Conclusions
Now you have the knowledge to confidently take on laser engraving slate projects. By following these guidelines, you can create stunning, high-quality engravings. Remember to experiment with different settings and designs to find your unique style. With practice, you’ll be producing professional-level work that stands out and impresses. Happy engraving!
FAQ Section
Q: Why is honed slate preferred over riven slate for laser engraving?
A: Honed slate has a smooth, flat surface that ensures consistent laser focus across the entire design, resulting in crisp, clean, and professional-looking engravings. Riven slate’s uneven surface can cause the laser to go in and out of focus, leading to blurry lines and inconsistent engraving depth.
Q: What are the ideal laser settings for slate engraving?
A: For slate, the sweet spot is typically found in the realm of low power and high speed to fracture the surface layer rather than melting it. A common starting point for a 40-60W CO2 laser is 15-20% power at 300-400 mm/s, with a resolution between 250 and 350 DPI. Always perform a test grid on your specific material.
Q: How do I clean and protect laser-engraved slate after the process?
A: After engraving, gently brush off loose dust, then wipe the surface with a damp microfiber cloth (isopropyl alcohol can be used for stubborn residue). Once dry, apply food-safe mineral oil to dramatically enrich the slate’s color and enhance contrast. For long-term durability and protection, especially for items exposed to moisture, finish with a suitable food-safe or spray sealant.

Subscribe to Our Newsletter
And enjoy FREE Download Files, SALE Alerts and Inspiring TIPS
Pricing Your Laser Engraving Work for Profitability
A Comprehensive Guide to Pricing Your Laser Engraving Services
A Comprehensive Guide on How to Price Laser Engraving Services
Charcuterie Board Engraving File – Wine & Grapes 3D Illusion…
$4.00Original price was: $4.00.$3.00Current price is: $3.00.(25% off)
Bee and Honey Jar Charcuterie Board Engraving File | PNG Download #007…
$4.00Original price was: $4.00.$3.20Current price is: $3.20.(20% off)
Valentine Love Captions: 6 Charcuterie Board Engraving Files…
$8.00Original price was: $8.00.$5.60Current price is: $5.60.(30% off)
American Eagle Flag Laser Engraving File for Charcuterie & Cutting…
$4.00Original price was: $4.00.$2.80Current price is: $2.80.(30% off)