

 Français
 Deutsch
 Español
 Italiano
A Guide to Designing and Making a Laser Cut Box
Mar
Estimated reading time: 9 minutes
Key Takeaways
- Measure Your Material First: Always use digital calipers to measure the exact thickness of your material before designing. This measurement is critical for creating joints that fit perfectly.
- Compensate for Kerf: Understand that the laser vaporizes a small amount of material (the kerf). You must adjust your design by offsetting cut paths to ensure a snug, press-fit assembly.
- Start with a Generator: For beginners, online box generators like MakerCase are invaluable tools for creating a perfect, customizable vector file quickly and easily.
- Finish Like a Pro: The final quality of your box depends on proper assembly and finishing. Always clean the laser-cut edges, do a dry fit before gluing, and take the time to sand and apply a protective finish like stain, paint, or sealant.
Table of Contents
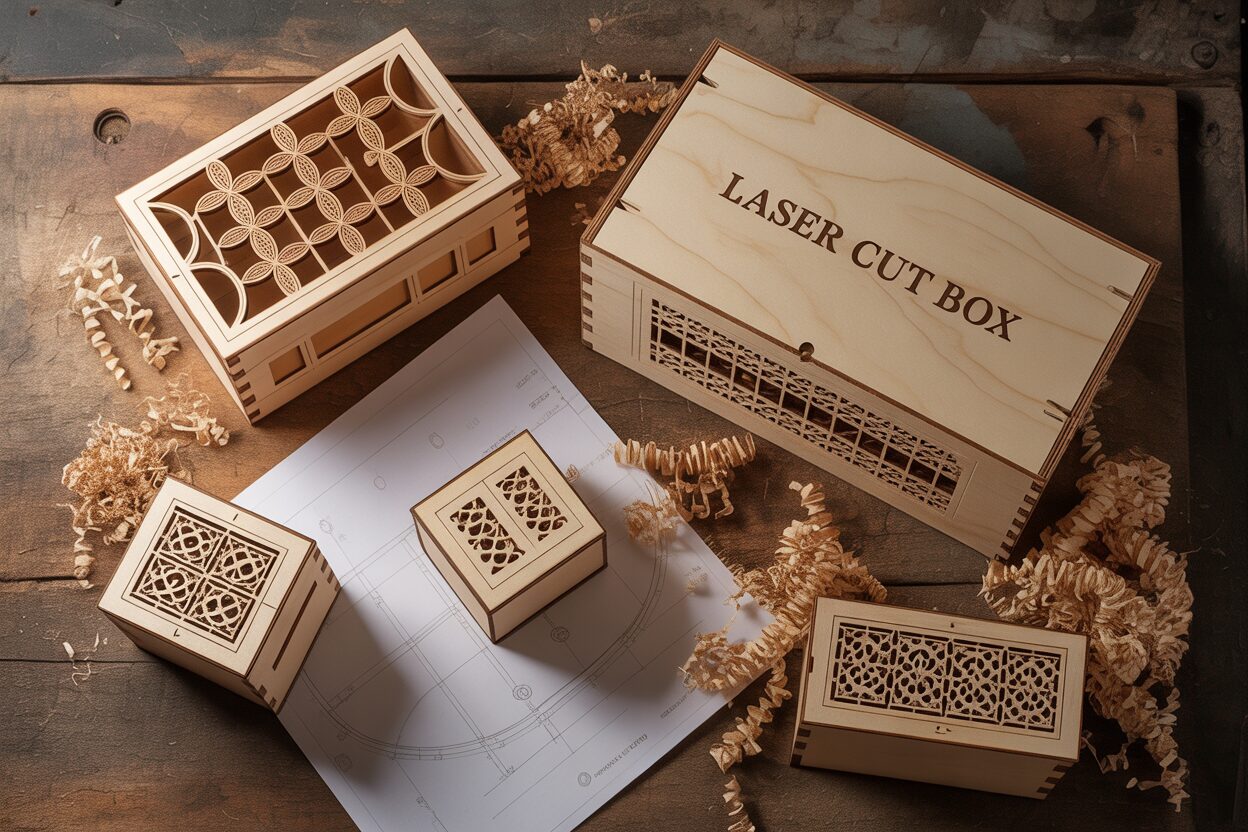
Discover the versatility and precision of creating a laser cut box. This guide offers everything you need to know, from selecting the right materials and design principles to assembling your final piece. Whether for storage, gifts, or product packaging, mastering this skill will elevate your craft and open up new creative possibilities for your laser cutting projects.
Fundamentals of Laser Cut Box Design
The foundation of any successful laser cut box is the material you choose. While laser cutters can handle materials like acrylic and cardboard, wood remains a favorite for its warmth, durability, and classic aesthetic. For a laser cut wood box, the two most common choices are plywood and MDF. Plywood, particularly Baltic Birch, is prized for its strength, stability, and attractive grain, which adds a natural, rustic charm to the final product. Its layered construction makes it resistant to warping. On the other hand, Medium-Density Fiberboard (MDF) is an engineered wood product made from compressed wood fibers. It has no grain, providing a perfectly uniform and smooth surface that is ideal for painting or engraving fine details. MDF cuts very cleanly but can be more brittle than plywood and is susceptible to moisture. Your choice will depend on the intended use and desired finish of your box; a decorative gift box might benefit from the beauty of plywood, while a functional organizer you plan to paint might be better suited for MDF.
Material thickness is not a passive property but an active design constraint that you must build your entire file around. The joints that hold your box together are entirely dependent on it. If you are designing a box using 3mm plywood, every slot that a tab fits into must be precisely 3mm wide in your digital design. This is why it is absolutely critical to measure your material with digital calipers before you start designing. Never trust the nominal thickness stated by the supplier. A sheet sold as “3mm plywood” can easily measure 2.8mm or 3.2mm. This small variance is the difference between joints that press-fit together perfectly and joints that are either too loose to hold or too tight to assemble without breaking. Every time you start a project with a new sheet of material, your first step should be to measure its thickness in several places and average the result. You will then use this exact measurement to define the length of your tabs and the width of your slots in your design software.
Understanding and Compensating for Kerf
One of the most important concepts in designing for a laser cutter is ‘kerf’. Kerf refers to the width of the material that is vaporized by the laser beam during the cutting process. While it may seem minuscule, typically ranging from 0.1mm to 0.2mm, ignoring it will result in loose, ill-fitting joints. Imagine a tab designed to be exactly 3mm wide fitting into a 3mm slot. The laser cuts along the center of your design lines. This means it removes material from both the tab and the slot. The tab will end up slightly smaller than 3mm, and the slot slightly larger, creating a significant gap. To ensure a snug fit, you must compensate for the kerf in your design software. This is typically done by offsetting your cut paths. For an external shape like a tab, you would offset the path inward by half the kerf value. For an internal shape like a slot, you would offset the path outward by half the kerf value. The best way to determine your machine’s specific kerf for a given material and power setting is to cut a small test square, measure the piece and the hole it came from, and calculate the difference.
Choosing the Right Joints for Laser Cutting
Laser cutting excels at creating precise, interlocking parts, making certain types of joinery ideal for box making. The most common and effective joints are:
- Finger Joints: Also known as box joints, these consist of a series of interlocking rectangular ‘fingers’ along the edge of two panels. They create a very strong corner with a large surface area for glue, making them perfect for sturdy, simple boxes. The interlocking pattern is also visually appealing and a hallmark of laser-cut designs.
- Tab and Slot Joints: This is a highly versatile method where one piece has one or more tabs (tenons) that fit snugly into corresponding slots (mortises) on an adjoining piece. Unlike finger joints which are primarily for 90-degree corners, tab and slot joints can be used to connect panels at any point, making them essential for creating internal dividers, lids, or more complex geometric shapes.
Both of these joint types leverage the laser’s precision. When combined with accurate material thickness measurements and proper kerf compensation, you can achieve a ‘press-fit’ construction that holds together securely even before glue is applied.
Creating Your First Laser Cut Box File
Transforming your concept into a physical object begins with creating a precise digital blueprint. A well-prepared laser cut box file is the single most critical element for a successful outcome, acting as the direct instruction set for the laser cutter. For those new to the process, a fantastic starting point is an online box generator. Websites like MakerCase or the extensive library at Boxes.py are invaluable tools. You simply input your desired dimensions (length, width, height), the exact material thickness you measured with calipers, and your estimated kerf value. The application then automatically generates a downloadable vector file (typically an SVG or DXF) with all six sides and perfectly calculated finger joints. Using a generator is an excellent way to deconstruct a working design, understand how the parts interact, and produce your first successful box with minimal frustration. You can then open this file in your design software to customize it with engravings or cutouts.
Interested in more Boxes? Check out our Boxes laser file designs: Click here!
Manually Drafting Your Box Design
For complete creative control, you will want to draft your box from scratch in vector design software like Adobe Illustrator, Inkscape, or LightBurn. The process is methodical and relies on precision. Let’s walk through creating a simple box with finger joints:
- Establish Parameters: Begin by drawing the six faces of your box as simple rectangles. You will have a bottom and a top panel (Length x Width), two long side panels (Length x Height), and two short side panels (Width x Height). It is crucial that the “Height” dimension for all four side panels is identical.
- Create the First Joint: Focus on one edge where two panels will meet, for example, where a long side panel meets the bottom panel. The length of the fingers in your joint will always be equal to your material thickness. Decide on a width for the fingers—a width similar to the thickness is often a good starting point. Draw a small rectangle representing your first finger (e.g., 5mm wide x 3mm high for 3mm material).
- Pattern and Distribute: Position this finger at one corner of the panel’s edge. Now, duplicate it and create a gap of the same width next to it. Continue this alternating pattern of finger-and-gap across the entire edge. Use your software’s alignment and distribution tools to ensure perfect, even spacing. The final pattern must be symmetrical, often ending with a half-finger or half-gap at each end for a clean look.
- Create the Mating Part: This is the most important step. The adjoining panel needs an inverse pattern. The easiest way to achieve this is to copy the entire finger pattern you just created, position it on the edge of the mating panel, and use a boolean operation (like “Subtract” or “Trim” in the pathfinder tool) to cut the slots where the fingers were. Where the first panel has a finger, the second must have a slot, and vice-versa.
- Propagate the Design: Once you have one perfect corner joint, you can replicate this logic for the rest of the box. The bottom panel’s finger pattern will be identical on its opposite edge. The top panel will match the bottom. The vertical joints where the side walls meet each other are created using the same finger-and-slot method, ensuring the patterns interlock perfectly at all corners.
As you work, lay out the six pieces flat in your file as if the box has been unfolded. This allows you to visually check that every tab has a corresponding slot. Before sending the file to the laser, ensure all cut lines are set to the required format, typically a hairline stroke (e.g., 0.01mm) in a specific color (like pure red). This single, meticulously crafted laser cut box file becomes a powerful template, easily adaptable for future projects by simply scaling the panels or adding new decorative elements.
Advanced Techniques and Project Inspiration
Once you have mastered the construction of a basic six-sided box, a world of creative possibilities opens up. The fundamental skills of accounting for material thickness and kerf are the building blocks for far more intricate and personalized projects. Moving beyond simple storage, you can start thinking of your box as a canvas. A custom laser cut gift box is an excellent next step. The key here is integrating decorative elements directly into your vector file. Using your design software, you can place text, logos, or intricate patterns onto the surfaces of your box panels. These designs are typically added on a separate layer and assigned a different color (like blue or black) to distinguish them from the red cut lines. In your laser software, you will assign this layer a “Raster Engrave” setting, which moves the laser head back and forth like an inkjet printer to burn the image onto the wood’s surface. For fine line-work, you can use a “Vector Score” setting, which follows a path just like a cut but at a lower power, etching a clean line into the material without going all the way through.
Crafting a Bespoke Laser Cut Wine Box
Designing a functional and elegant laser cut wine box requires more forethought than a simple gift box, as it must protect its valuable contents. Start with a sturdier material, such as 5mm or 6mm plywood, to provide structural integrity. The most critical step is accurately measuring the specific wine bottle you intend to house, as sizes can vary. Design your box’s internal dimensions to be at least 10mm larger than the bottle in both height and diameter to allow for clearance and padding. To secure the bottle, design custom internal cradles. These are typically two or more support pieces with semi-circular cutouts matching the bottle’s curvature. These cradles can be slotted into the box’s inner walls using simple tab and slot joints. A classic design feature for a wine box is a sliding lid. To create this, make one of the box’s end panels shorter than the others. Then, on the inner faces of the two long side panels, score or engrave a shallow channel or groove for the lid to slide into. This creates a sophisticated and secure closure mechanism that elevates the entire presentation.
Beyond single-purpose designs, the real artistry of a laser cut box design comes from experimentation and combining techniques. Consider how different materials can complement each other. For example, create a beautiful laser cut wood box but replace the top panel with a piece of clear or colored acrylic. This creates a stunning display case effect, perfect for jewelry or collectibles. To make the acrylic lid sit flush, you can design and cut a thin interior frame that gets glued just inside the top rim of the box, creating a ledge for the lid to rest on. Another advanced technique is the “living hinge,” a pattern of cuts that allows a rigid material like wood to bend. By incorporating a living hinge into your file, you can create a box with a smoothly curved, wrap-around lid from a single piece of wood. Don’t be afraid to mix in non-laser-cut components, such as small brass hinges and clasps, leather straps, or felt linings. Your digital file is only the starting point; the final product can be as simple or as complex as your imagination allows.
Assembly and Finishing Touches
Once your design has been transformed into a set of perfectly cut pieces by the laser, the final and most hands-on stage begins. This assembly and finishing phase is where the flat components become a three-dimensional object, and where care and attention to detail can elevate your project from a simple assembly to a professional-quality product. The first step, before any assembly, is cleaning. The laser cutting process, especially with a laser cut wood box, leaves a residue of smoke and vaporized resin along the cut edges. While sometimes desirable for a rustic look, this residue can interfere with glue adhesion and soil your hands and the wood surfaces during handling. A simple and effective way to clean the edges is to wipe them down with a cloth lightly dampened with isopropyl alcohol. For more stubborn residue, gently scrubbing with a small brush or a piece of fine-grit sandpaper can be effective. A pro-tip for future projects is to apply a layer of low-tack masking tape over the wood surface before cutting; the tape protects the surface from smoke stains and can be easily peeled off afterward, taking the residue with it.
Assembling and Gluing Your Box
With your pieces clean, the next step is a “dry fit.” Assemble the entire laser cut box without any glue to ensure all the joints fit as expected. This is your last chance to identify any design errors or tight spots that may need a light sanding before final assembly. Once you’ve confirmed everything aligns correctly, you can proceed with gluing. For wood, a standard PVA wood glue is the best choice. The key is to apply a thin, even layer of glue to the contact surfaces of the joints. An excess of glue will squeeze out and create a mess that is difficult to clean up, especially in tight corners. Use a small brush or a cotton swab to spread the glue neatly inside the slots or along the faces of the finger joints. Assemble the pieces firmly, ensuring all corners are square. While traditional woodworking clamps can be used, they are often too bulky for smaller boxes. An excellent alternative is to use painter’s tape or masking tape stretched tightly across the corners to act as clamps. The tape provides ample pressure to hold the joints together while the glue sets and is easily removed without damaging the wood surface. For a perfectly square result, consider using 90-degree corner clamping jigs.
After the glue has fully cured according to the manufacturer’s instructions, you can begin the final finishing touches that truly distinguish your work. Start by sanding the entire box. Use a medium-grit sandpaper (around 220-grit) to gently round over the sharp corners and level any slight misalignments at the joints. Pay special attention to the interlocking finger joints, as sanding them flush creates a seamless, professional appearance. After the initial sanding, wipe away the dust and move to a finer grit for an ultra-smooth finish. Now, you can apply your chosen finish.
- Stain: To enhance the natural grain of plywood, apply a wood stain. Always test the stain on a scrap piece of the same material first to see the final color. Apply it evenly with a rag or foam brush and wipe off the excess.
- Paint: For materials like MDF or if you desire an opaque color, painting is an excellent option. Apply a coat of primer first, as this will seal the porous material and prevent the paint from being absorbed unevenly, especially on the cut edges.
- Sealant: Whether you stain, paint, or leave the wood natural, applying a protective topcoat like polyurethane, lacquer, or wax will protect the box from moisture and wear, giving it a durable and polished sheen.
These finishing steps are not an afterthought; they are an integral part of the creation process that transforms a collection of cut parts into a finished piece you can be proud of.
Conclusions
You now have the fundamental knowledge to create a beautiful and functional laser cut box. By applying these design principles and assembly techniques, you can confidently tackle any project, from a simple laser cut wood box to a more complex laser cut wine box. Start experimenting with your own designs and bring your creative visions to life.
Frequently Asked Questions
Q: What is the single most important step to take before designing a laser cut box?
A: The most critical first step is to accurately measure your material’s thickness with digital calipers. Never rely on the supplier’s stated thickness, as even small variations will prevent your joints from fitting together correctly. Your entire digital design is based on this precise measurement.
Q: What is “kerf” and why does it matter for laser cutting?
A: Kerf is the width of material that is vaporized by the laser beam during a cut. It’s a tiny amount (often 0.1mm-0.2mm), but failing to account for it will result in loose, wobbly joints. You must compensate for kerf in your design software to ensure parts have a snug, press-fit connection.
Q: I’m a beginner. What’s the easiest way to create my first laser cut box file?
A: The easiest way is to use a free online box generator like MakerCase or Boxes.py. You simply enter your desired dimensions and measured material thickness, and the tool automatically generates a perfect, ready-to-cut vector file with all the joints calculated for you.
Q: What is the best glue to use for assembling a laser cut wood box?
A: Standard PVA wood glue is the best choice for assembling boxes made from plywood or MDF. Apply a thin, even layer to the joints and use masking tape or corner clamps to hold the pieces together securely while the glue cures.

Subscribe to Our Newsletter
And enjoy FREE Download Files, SALE Alerts and Inspiring TIPS
How to Price Your Laser Engraving and Cutting Services
The Ultimate Guide to Crafting a Laser Cut Box
How to Make a Stunning Laser Cut Box: A Step-by-Step Guide
Charcuterie Board Engraving File – Wine & Grapes 3D Illusion…
$4.00Original price was: $4.00.$3.00Current price is: $3.00.(25% off)
Bee and Honey Jar Charcuterie Board Engraving File | PNG Download #007…
$4.00Original price was: $4.00.$3.20Current price is: $3.20.(20% off)
Valentine Love Captions: 6 Charcuterie Board Engraving Files…
$8.00Original price was: $8.00.$5.60Current price is: $5.60.(30% off)
American Eagle Flag Laser Engraving File for Charcuterie & Cutting…
$4.00Original price was: $4.00.$2.80Current price is: $2.80.(30% off)