

 Français
 Deutsch
 Español
 Italiano
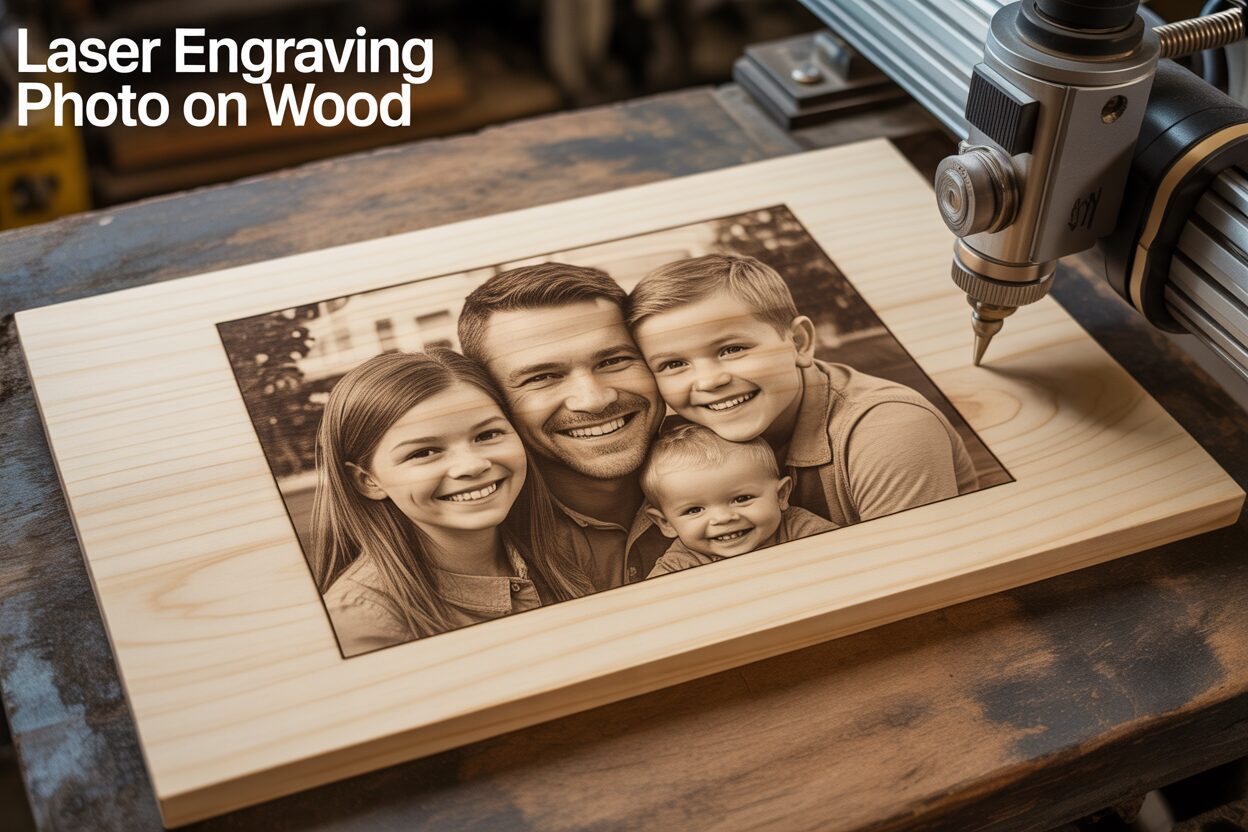
A Guide to Creating Stunning Laser Engraved Photos on Wood
Nov
Estimated reading time: 8 minutes
Key Takeaways
- Wood Selection is Crucial: The best results come from light-colored woods with a minimal, uniform grain, such as Alder, Basswood, and Maple. These woods provide the highest contrast for the laser burn.
- Image Preparation is Non-Negotiable: A photo must be properly prepared by converting it to grayscale, increasing contrast, sharpening details, and applying a dither pattern to translate it into a format the laser can understand.
- Use Lossless File Formats: Always save your prepared images as PNG or BMP. Avoid JPEG, as its compression creates artifacts that will degrade the quality of your engraving.
- Calibrate Settings with a Test Grid: There are no universal settings. Always run a material test grid on a scrap piece of your project wood to find the optimal balance of Power, Speed, and DPI for your specific machine and material.
Table of Contents
- Selecting the Best Wood for Photo Engraving
- How to Prepare a Photo for Laser Engraving
- Mastering Laser Photo Engraving Settings
- Conclusions
- Frequently Asked Questions
Discover the art of laser engraving photo on wood, a unique way to preserve memories or create personalized gifts. This article offers a comprehensive walkthrough, from selecting the ideal wood and preparing your image to mastering your laser settings. We will guide you through each step to ensure you can achieve professional-quality results right from your own workshop.
Selecting the Best Wood for Photo Engraving
The foundation of any breathtaking laser engraved photo is the canvas you choose. Just as a painter wouldn’t use a rough, uneven surface for a detailed portrait, a laser artist must select their material with care. The wood you choose is not just a backdrop; it is an active participant in the engraving process. Its color, grain, density, and chemical composition will directly influence the final contrast, clarity, and overall quality of your image. A poor choice of wood can obscure details, create unwanted patterns, and turn a perfectly prepared photo into a muddled disappointment. Therefore, understanding the properties of different woods is the first and most critical step in transforming a digital image into a tangible, high-quality keepsake.
Ideal Woods for High-Detail Engraving
When searching for the best wood for photo engraving, the goal is to find a material that offers a blank, consistent canvas for the laser to paint on. Light-colored woods with a minimal, uniform grain structure are consistently the top performers. They provide the highest contrast against the dark burn of the laser, allowing the subtle grays and rich blacks of your photograph to stand out vividly. Three of the most popular and reliable choices in this category are Alder, Basswood, and Maple.
- Alder: Often considered the gold standard for photo engraving, Alder is a light-colored hardwood with a very fine, straight grain. It has a uniform density and low resin content, which allows the laser to create a consistent, rich dark brown burn without splotches or flare-ups. The subtle grain pattern doesn’t compete with the details of the photograph, making it an exceptional choice for portraits and complex images.
- Basswood: This is an incredibly soft and light-colored wood, making it a favorite for beginners and those seeking fine detail. Its grain is so faint it’s almost invisible, providing a perfectly uniform surface. Because it’s soft, Basswood engraves quickly and deeply even at lower power settings, producing excellent contrast. Its only drawback is its softness, which makes it more susceptible to dings and dents.
- Maple: A harder and more durable option, Maple boasts a light, creamy color and a very fine, closed grain. While its density sometimes results in a slightly lighter engraving compared to Alder, it excels at capturing incredibly sharp, high-resolution details. The smooth surface and minimal grain make it a premium choice for high-end photo gifts that require both beauty and durability.
Woods to Approach with Caution
In contrast, woods with prominent, high-contrast grain patterns can be problematic for photo engraving. While beautiful in their own right for furniture or decorative pieces, their natural patterns can interfere with the engraved image. Woods like Oak, with its deep, porous grain, will engrave unevenly. The laser will burn the softer wood between the grain lines much darker than the hard grain lines themselves, creating a distracting “striped” effect that breaks up the continuous tones of the photograph. Similarly, woods with high resin content, like Pine, are challenging. Pine has drastic differences in density between its earlywood and latewood rings, leading to an inconsistent, blotchy engraving. The resin can also heat up and pool, creating dark, sticky spots and requiring significant post-engraving cleanup. While not impossible to use, these woods are generally unsuitable for achieving the crisp, clean results desired when you learn how to laser engrave a photo.
When selecting your material, prioritize these key characteristics for the best outcome:
- Light Color: A pale surface maximizes the contrast of the burn, making the image pop.
- Minimal Grain: Look for a tight, straight, and uniform grain that won’t compete with the photo’s details.
- Low Resin Content: This ensures a clean, even burn without sticky residue or flare-ups.
- Consistent Density: A uniform surface free of knots and blemishes will allow the laser to engrave evenly, producing smooth gradients and clear details.
How to Prepare a Photo for Laser Engraving
A digital photograph is rich with millions of colors and subtle tones, but a laser engraver operates in a much simpler, binary world: it’s either burning (on) or not burning (off). The key to a successful engraving is to effectively translate your photo’s complex visual data into a clear set of instructions for the laser. This preparation process, done in an image editor like Adobe Photoshop or the free alternative GIMP, is not about making the photo look good on your screen, but about making it engrave beautifully on wood. Properly done, this is how you prepare a photo for laser engraving to achieve stunning, high-fidelity results.
The first step is to set the foundation. Open your image and immediately crop it to the exact aspect ratio of the wooden blank you plan to use. This prevents any unwanted stretching or squashing of the image later. Next, convert the image to grayscale (also known as desaturation or black and white). Color data is useless to the laser, and removing it allows you to see the image in terms of the light and shadow that the laser will actually reproduce. Once in grayscale, it’s time to enhance the image for engraving. A photo that looks perfectly balanced on a backlit screen will often appear flat and washed out when engraved. Go to your software’s brightness and contrast adjustment tools (e.g., ‘Levels’ or ‘Curves’). Your goal is to increase the dynamic range. Gently brighten the highlights (the lighter areas) and significantly darken the shadows and blacks. Don’t be afraid to push the contrast further than you normally would; this exaggeration is crucial for creating depth and definition in the final wooden piece. Following this, apply a sharpening filter, such as an ‘Unsharp Mask’. This enhances the edges between light and dark areas, which helps the laser define details like hair, fabric textures, and facial features more crisply, preventing a soft or blurry appearance in the finished product.
Understanding and Applying Dithering
With the core adjustments made, the most critical step for a laser engraving photo on wood project is applying a dither. Since a laser cannot vary its power to create true shades of gray, it simulates them by arranging black dots in specific patterns. This process is called dithering. A dense cluster of dots is perceived by the eye as a dark area, while sparsely spaced dots are perceived as a light gray. Most laser engraving software and many image editors have built-in dithering functions. You will often see several algorithm options, with common ones being:
- Jarvis: This algorithm tends to produce a softer, highly detailed result and is often a great starting point for portraits.
- Stucki: Similar to Jarvis, Stucki often yields clean results with good contrast and is another excellent all-around choice.
- Floyd-Steinberg: A classic algorithm that diffuses error efficiently, creating a smooth-looking dither.
The choice of dithering algorithm can subtly change the texture and feel of the final engraving, so it’s worth experimenting with different types on scrap wood to see which you prefer for your images. Applying the dither is the final image manipulation step, converting your grayscale image into a purely black-and-white bitmap that the laser can perfectly interpret.
Finally, saving your file correctly preserves all your hard work. Never save your prepared image as a JPEG. The JPEG format uses lossy compression, which creates small, blocky imperfections (artifacts) around details to reduce file size. When engraved, these artifacts can show up as unwanted noise and patterns. Instead, save your fully prepared, dithered image in a lossless format. The best choices are PNG (Portable Network Graphics) or BMP (Bitmap). These formats store the pixel data precisely, ensuring that the clean, dithered pattern you created is sent to the laser software exactly as intended, providing the machine with the highest quality map for a perfect engraving.
Mastering Laser Photo Engraving Settings
Once your image is perfectly prepared, the next stage is to translate it into physical reality by dialing in the correct laser photo engraving settings. This is where you command the laser, telling it precisely how to burn your image onto the wood. The three fundamental pillars of this process are Power, Speed, and DPI (Dots Per Inch) or LPI (Lines Per Inch). Mastering the interplay between these variables is the secret to moving from novice results to professional-quality engravings. Power dictates the intensity of the laser beam; higher power results in a darker, deeper burn. Speed controls how fast the laser head moves across the wood; higher speeds mean less time in one spot and a lighter burn. DPI determines the resolution, or how many dots the laser will burn per inch. These settings are not independent; they work in a delicate balance. A high power setting might scorch the wood at a low speed, but could produce a perfect dark brown at a high speed.
Finding the Sweet Spot with a Test Grid
There is no universal “magic number” for settings, as they vary dramatically between different laser machines, wattage levels, and types of wood. The single most effective method for determining the ideal parameters for your specific project is to run a material test grid. This is a small file, often built into your laser software or easily created, that engraves a matrix of squares on a scrap piece of your project wood. Each square is engraved with a different combination of power and speed. For example, the grid might test power levels from 10% to 50% in 5% increments, against speeds from 100 mm/s to 300 mm/s in 25 mm/s increments. After running the test, you will have a physical catalog of results. Examine the grid closely. You are not simply looking for the darkest square; you are looking for the square that shows the richest, deepest brown color without becoming a crumbling, ashy piece of charcoal. This is your “100% black” setting. You also want to identify the square that produces the faintest, most delicate burn, which will represent the lightest grays in your photo. A good test grid will show a wide, smooth gradient of tones between these two points. This simple, five-minute test removes all guesswork and is the most crucial step in learning how to laser engrave a photo successfully.
Once you have identified your optimal power and speed settings from the test grid, you can confidently proceed with the main event. Import your prepared, dithered image file (the PNG or BMP from the previous step) into your laser control software. Input the power and speed settings you just determined. Next, set your DPI or LPI. For photo engraving, a higher resolution is generally better for capturing fine detail. A setting between 250 and 300 DPI is a great starting point for most woods. Be aware that on very soft woods, an extremely high DPI can sometimes over-burn the material because the laser dots are placed so close together. After inputting all your settings, ensure your laser is properly focused on the surface of the wood—an unfocused laser will produce a blurry, weak engraving. These calibrated settings give you precise control, allowing you to replicate the subtle tones and sharp details of your photograph, turning a simple piece of wood into a stunning and personalized keepsake. This level of precision is especially important when creating custom laser engraved gifts, where quality and detail are paramount.
Conclusions
You now have the foundational knowledge for laser engraving photo on wood. By carefully choosing your materials, meticulously preparing your images, and fine-tuning your machine’s settings, you can produce breathtaking results. This skill opens up a world of possibilities for creating beautiful art, home decor, and unforgettable laser engraved gifts that will be treasured for years to come.
Frequently Asked Questions
Q: What is the best wood for laser engraving a photo?
A: The best woods are light-colored with a fine, minimal grain to maximize contrast and detail. Top choices include Alder, Basswood, and Maple. Avoid woods with heavy grain patterns like Oak or high resin content like Pine.
Q: Why do I need to dither a photo before laser engraving?
A: A laser engraver can only fire at full power (on) or be off; it cannot create true shades of gray. Dithering converts your grayscale image into a pattern of black and white dots that simulates different tones, allowing the laser to accurately reproduce the photograph’s appearance.
Q: What image file format should I use for laser engraving?
A: Always save your final, dithered image in a lossless format like PNG or BMP. Do not use JPEG, as its compression introduces artifacts that can show up as unwanted noise and imperfections in the final engraving.
Q: How do I find the correct laser settings for my wood?
A: The most reliable method is to run a material test grid on a scrap piece of the same wood you’ll be using for your project. This engraves a series of squares with different power and speed combinations, allowing you to visually identify the settings that produce the best range of tones from light to dark.

Subscribe to Our Newsletter
And enjoy FREE Download Files, SALE Alerts and Inspiring TIPS
Pricing Your Laser Engraving Work for Profitability
A Comprehensive Guide to Pricing Your Laser Engraving Services
A Comprehensive Guide on How to Price Laser Engraving Services
Charcuterie Board Engraving File – Wine & Grapes 3D Illusion…
$4.00Original price was: $4.00.$3.00Current price is: $3.00.(25% off)
Bee and Honey Jar Charcuterie Board Engraving File | PNG Download #007…
$4.00Original price was: $4.00.$3.20Current price is: $3.20.(20% off)
Valentine Love Captions: 6 Charcuterie Board Engraving Files…
$8.00Original price was: $8.00.$5.60Current price is: $5.60.(30% off)
American Eagle Flag Laser Engraving File for Charcuterie & Cutting…
$4.00Original price was: $4.00.$2.80Current price is: $2.80.(30% off)