

 Français
 Deutsch
 Español
 Italiano
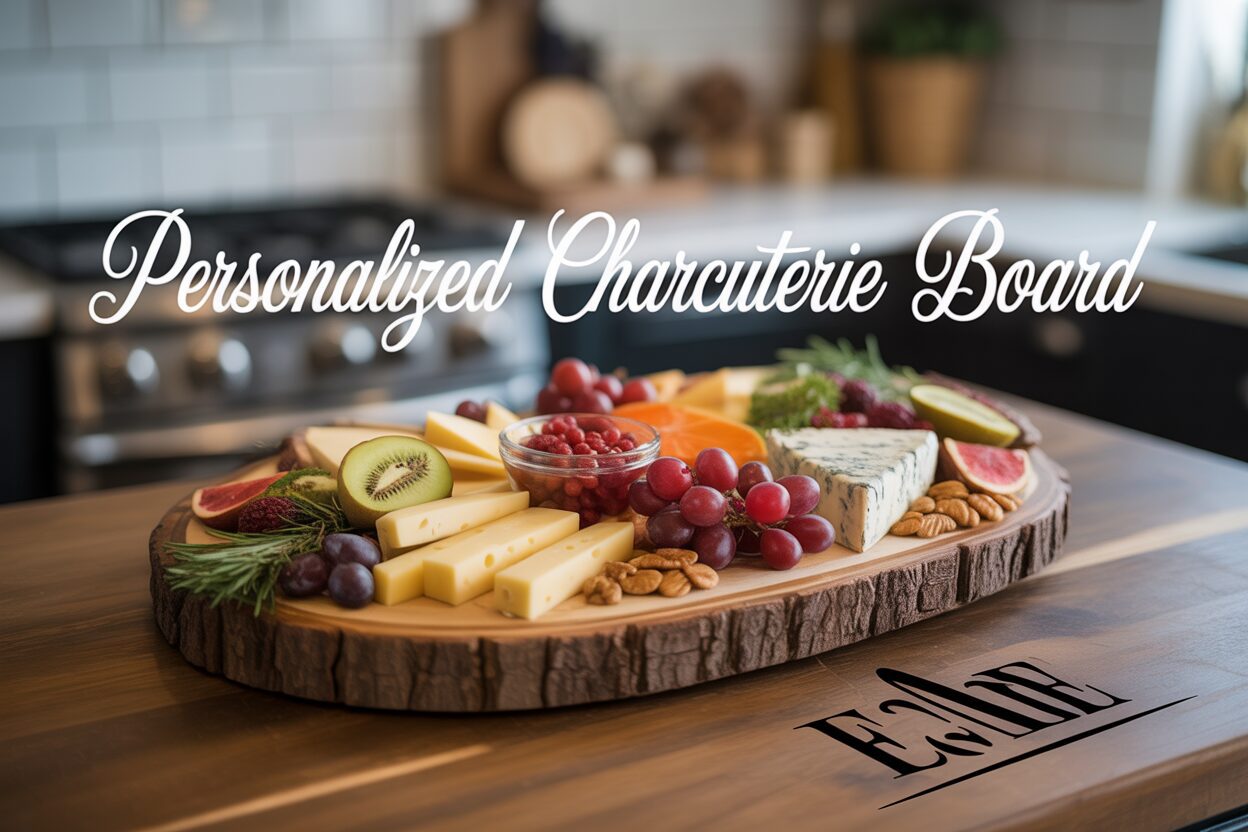
A Guide to Crafting a Personalized Charcuterie Board
Jan
Estimated reading time: 8 minutes
Key Takeaways
- Select the Right Wood: For crisp, clean engravings and food safety, choose hardwoods with a tight grain like Maple, Cherry, or Walnut. Avoid open-pored woods like Oak.
- Use Vector Graphics (SVG): Always use a Scalable Vector Graphic (SVG) file for your design. This ensures your engraving lines are sharp and clear, unlike pixel-based formats like JPEG which can become blurry.
- Test and Mask Before Engraving: Always perform a small test engrave on a scrap piece to perfect your laser’s power and speed settings. Applying masking tape over the engraving area prevents smoke stains for a cleaner result.
- Finish with Food-Safe Oil: After engraving and cleaning, it is crucial to apply a food-grade finish like mineral oil or a beeswax blend. This protects the wood and makes it safe for serving food. Never use cooking oils.
Table of Contents
- Selecting the Perfect Board and Design
- The Laser Engraving Process
- Finishing and Caring for Your Engraved Board
- Conclusions
- Frequently Asked Questions
Discover the art of creating a personalized charcuterie board that is both beautiful and functional. This guide will walk you through every step of the laser engraving process, helping you craft a one-of-a-kind piece for your home or as a thoughtful gift. Let’s explore the techniques and tips to make your charcuterie board a true masterpiece.
Selecting the Perfect Board and Design
The foundation of a stunning personalized charcuterie board is, quite literally, the board itself. Your choice of wood and design will dictate the final look, feel, and durability of your creation. This decision is a blend of aesthetic preference and practical consideration for the laser engraving process.
Choosing Your Canvas: The Best Woods for Engraving
Not all woods are created equal when it comes to laser engraving. The ideal choice is a hardwood with a closed, tight grain. This ensures the laser can create crisp, clean lines without splintering and that the board remains non-porous and food-safe. Here are the top contenders:
- Maple: A favorite for its hardness and light, creamy color. Maple’s dense, fine grain provides a smooth, consistent surface, allowing for incredibly detailed engravings. The light wood creates a striking, high-contrast effect with the darker, laser-charred design, making your artwork pop.
- Cherry: Known for its rich, warm reddish hue that deepens beautifully with age. Cherry has a smooth, closed-grain texture that is excellent for engraving. The resulting design is often a few shades darker than the wood, offering a more subtle and elegant “tone-on-tone” appearance compared to maple.
- Walnut: For a luxurious and dramatic look, walnut is an exceptional choice. Its deep, dark brown color provides a sophisticated canvas. Engravings on walnut are typically dark and subtle, creating a premium, low-contrast finish that whispers quality rather than shouts.
While woods like oak have a beautiful grain, their large, open pores can trap food particles and cause the engraving to look fuzzy or uneven. Sticking with maple, cherry, or walnut will give you the best combination of beauty, durability, and engraving quality.
Form and Function: Board Styles to Consider
Beyond the wood type, the board’s shape and style play a significant role. Classic rectangular or paddle-shaped boards offer a straightforward canvas, making design placement simple. However, for a unique, rustic statement piece, the live edge charcuterie board is an increasingly popular choice. A live edge board retains the natural, uncut edge of the tree, meaning each piece is one-of-a-kind. Pros of a live edge board include its organic beauty and standout appearance. The main con is complexity; its irregular shape requires careful measurement and design placement. You must also ensure the surface is perfectly level for the laser to maintain focus and produce a consistent engraving.
From Idea to Engraving-Ready File
Your design transforms a simple board into a personal treasure. Inspiration is everywhere, from family names and monograms to special dates and intricate patterns. For specific occasions, searching online for a wedding gift charcuterie board svg can yield countless professional templates on sites like Etsy or Creative Market that you can customize. Using a charcuterie board svg (Scalable Vector Graphic) file is paramount. Unlike pixel-based images (like JPEGs), vector files are made of mathematical paths, allowing them to be scaled to any size without losing sharpness—a crucial feature for achieving clean laser lines. You can create your own vector designs using software like Adobe Illustrator or the free alternative, Inkscape.
Preparing Your Design for the Laser
Once you have your design, a few preparation steps are essential. First, precisely measure the engravable area on your board. In your design software, scale your SVG to fit these dimensions. The most critical step is to convert any text elements to paths or outlines. This turns the letters into shapes, so you don’t have to worry about the laser cutter’s computer having the correct font installed. Finally, check your laser software’s requirements. Typically, you will set the areas to be engraved as a black fill and ensure there are no unintended cut lines. With your file properly prepared, you are ready to move from the digital canvas to the wooden one.
The Laser Engraving Process
With your design finalized and your board selected, you are ready for the most transformative step: the laser engraving process. This is where your digital creation becomes a physical, tactile reality on your custom charcuterie board. Precision and safety are paramount, so follow these steps carefully to achieve a flawless result.
Preparation and Machine Setup
Before placing your board in the laser cutter, ensure its surface is clean and free of dust or debris. A simple wipe with a soft, dry cloth is sufficient. For an extra clean result and to minimize smoke staining (or “haloing”) around the engraved area, a highly recommended technique is to apply a layer of low-tack paper masking tape over the entire engraving surface. The laser will cut through the tape and engrave the wood beneath, and when you peel the tape away, any residual smoke or resin stains will come off with it. Once prepared, place the board inside the laser cutter. The next critical step is setting the focus. The laser’s beam is cone-shaped, and it is most powerful at its finest point. Your machine will have either an auto-focus feature or a manual focusing tool. An incorrect focal distance will result in a wide, blurry line and an inconsistent engraving, so ensure it is set precisely to the surface of the wood.
Dialing in Your Settings and Alignment
Every laser cutter and piece of wood is different, so you should always perform a small test engrave on a scrap piece of the same wood or an inconspicuous area on the back of the board. This allows you to dial in your power and speed settings. As a general starting point for a CO2 laser:
- Maple: Being a hard, dense wood, it typically requires higher power (e.g., 40-50%) and moderate speed (e.g., 300-400 mm/s) for a deep, dark mark.
- Cherry: This wood is softer and can scorch easily. Start with lower power (e.g., 25-35%) and a slightly faster speed to achieve a clean, rich tone without excessive burning.
- Walnut: Since walnut is already dark, the goal is often a subtle, tonal engraving. Moderate power (e.g., 30-40%) and speed usually work well.
Once your settings are dialed in, aligning the design is crucial. Use your laser software’s “frame” or “trace” function. This will move the laser head around the perimeter of your design with the beam off (or with a low-power red dot pointer), showing you exactly where it will engrave. Adjust the position of your board or the design in the software until the framed area is perfectly centered or placed where you want it.
Running the Job and Troubleshooting
Before you begin, double-check that your ventilation system or exhaust fan is running. Engraving wood produces smoke and particulates that must be safely extracted. Adhere to all safety guidelines for your machine, which always includes wearing the appropriate safety glasses and never, ever leaving the laser cutter unattended while it is in operation. Once you press start, watch the process begin. If you notice issues, you can pause the job.
Common problems include:
- Uneven or Faded Engraving: This is often caused by a warped or unlevel board. If parts of the surface are closer or farther from the laser head, the focus will be off. Ensure your board lies perfectly flat.
- Excessive Burn Marks: If you see significant charring or smoke stains despite using masking tape, your power may be too high or your speed too slow. Proper air assist (a jet of compressed air directed at the engraving point) can also significantly reduce flaming and scorching.
After the job is complete, let the exhaust fan run for a minute to clear any remaining smoke before opening the lid. Your engraving is now complete, and you’re ready for the final finishing touches.
Finishing and Caring for Your Engraved Board
The laser has completed its work, leaving behind a beautifully etched design, but the journey of your engraved charcuterie board isn’t quite finished. The final steps of cleaning, finishing, and understanding long-term care are what will transform it from a freshly cut piece into a durable, food-safe work of art ready for your kitchen.
Post-Engraving Cleanup and Preparation
Your first task is to clean up the residue left by the laser. If you used paper masking tape, carefully peel it away; this will remove the majority of the surface smoke and resin staining. The engraved area itself will contain fine wood dust and char. The best way to clean this is with a soft-bristled brush, like an old toothbrush. Gently scrub inside the engraved lines to dislodge any loose particles. After brushing, wipe the entire board with a clean, lint-free cloth lightly dampened with isopropyl alcohol or water. Be careful not to saturate the wood, as excess water can raise the grain. The goal is to remove any remaining haze, leaving a clean, smooth surface that is completely dry and ready for sealing. For an exceptionally smooth finish, you can lightly sand the non-engraved surfaces with very fine-grit sandpaper (220 grit or higher) before wiping it down, always sanding with the direction of the wood grain.
Applying a Food-Safe Finish
Applying a finish is the most crucial step for protecting the wood and making it safe for contact with food. Never use industrial varnishes, lacquers, or cooking oils like olive oil, which can go rancid. Your only choice should be a 100% food-safe, non-drying finish designed for cutting boards and butcher blocks.
- Food-Grade Mineral Oil: This is the gold standard. It is an inert, non-toxic oil that penetrates deep into the wood fibers, preventing them from drying out and cracking. It also brings out the natural color and grain of the wood, making the contrast of your engraving stand out beautifully.
- Beeswax and Oil Conditioners: Often sold as a blend of mineral oil and beeswax (sometimes called “board butter” or “wood cream”), these products offer the deep conditioning of mineral oil plus the surface protection of beeswax. The wax helps to seal the wood’s pores and provides a water-resistant barrier with a subtle, satin sheen.
To apply the finish, start by pouring a generous amount of mineral oil directly onto the board. Using a clean cloth, work the oil into every part of the board—the top, bottom, all sides, and especially into the engraved design. Be liberal with the application; the wood is thirsty. Let the board sit for at least four hours, or preferably overnight, to allow the oil to fully absorb. The next day, use another clean cloth to wipe off any excess oil that hasn’t soaked in. If you are using a beeswax conditioner, apply it now by rubbing a thin layer into the wood and buffing it to a gentle shine with a clean cloth.
Long-Term Care for Your Personalized Charcuterie Board
Proper care will ensure your personalized charcuterie board lasts for years. The two most important rules are: never submerge it in water and never put it in the dishwasher. The extreme heat and moisture will cause the wood to warp, split, and ruin the engraving. After each use, scrape off any food remnants and wash the board by hand with a soft cloth, warm water, and a small amount of mild soap. Rinse it briefly, then immediately hand dry it with a towel. Allow it to air dry completely by standing it on its edge. Over time and with repeated washing, the board will need to be reconditioned. When the wood starts to look pale or dry, simply repeat the finishing process: apply a coat of food-grade mineral oil, let it soak in, and wipe away the excess. Regular oiling, typically once a month with frequent use, will keep the wood hydrated, protect the integrity of the engraving, and ensure your board is always ready to be the centerpiece of your next gathering.
Conclusions
You now have the knowledge and skills to create a stunning personalized charcuterie board. By following these steps, you can confidently select the right materials, prepare your design, and execute a flawless laser engraving. The result is a beautiful and functional piece of art that will be cherished for years to come, whether for personal use or as a heartfelt gift.
Frequently Asked Questions
Q: What’s the best wood for a beginner to laser engrave?
A: Maple is an excellent choice for beginners. Its light color and tight grain create high-contrast, detailed engravings and it’s very forgiving during the laser process, making it easier to achieve a clean result.
Q: Can I use a regular JPEG or PNG for my design?
A: It is strongly recommended to use a vector file (like an SVG) for the best results. JPEGs and PNGs are pixel-based and can result in blurry or jagged edges when engraved. Vector files ensure crisp, clean lines at any size.
Q: Is it really necessary to use masking tape?
A: While not strictly mandatory, using low-tack paper masking tape is a highly recommended pro-tip. It significantly reduces smoke staining and resin residue on the wood’s surface, resulting in a much cleaner finish with less post-engraving cleanup.
Q: Can I use olive oil to finish my board?
A: No. You should never use cooking oils like olive or vegetable oil to finish a charcuterie board. They can become rancid over time, imparting a bad taste and smell to your food. Always stick to food-grade mineral oil or a specialized cutting board conditioner.

Subscribe to Our Newsletter
And enjoy FREE Download Files, SALE Alerts and Inspiring TIPS
A Comprehensive Guide on How to Price Laser Engraving Services
How to Price Your Laser Engraving and Cutting Services
The Ultimate Guide to Crafting a Laser Cut Box
Charcuterie Board Engraving File – Wine & Grapes 3D Illusion…
$4.00Original price was: $4.00.$3.00Current price is: $3.00.(25% off)
Bee and Honey Jar Charcuterie Board Engraving File | PNG Download #007…
$4.00Original price was: $4.00.$3.20Current price is: $3.20.(20% off)
Valentine Love Captions: 6 Charcuterie Board Engraving Files…
$8.00Original price was: $8.00.$5.60Current price is: $5.60.(30% off)
American Eagle Flag Laser Engraving File for Charcuterie & Cutting…
$4.00Original price was: $4.00.$2.80Current price is: $2.80.(30% off)