
-
×
 Christmas Charcuterie Board File | Baby Jesus in Manger #035 1 × Original price was: $4.00.$3.00Current price is: $3.00.
(25% off)
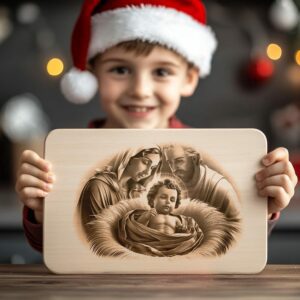 Christmas Charcuterie Board File | Baby Jesus in Manger #035
 Français
 Deutsch
 Español
 Italiano
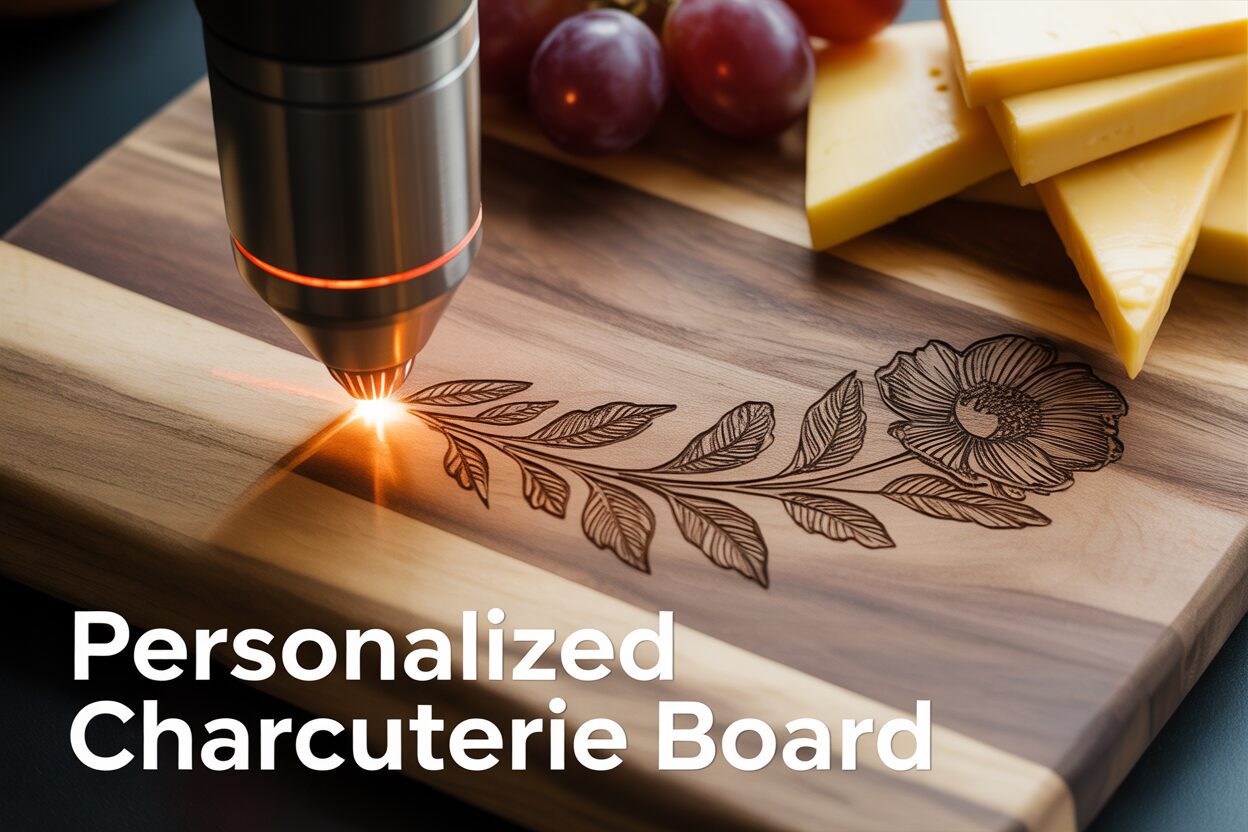
A Guide to Crafting a Personalized Charcuterie Board
01
Jan
Jan
Estimated reading time: 9 minutes
Key Takeaways
- Material Matters: The choice between woods like Acacia, Walnut, and Bamboo or a modern material like Slate significantly impacts the engraving’s final look, contrast, and durability. Always start with a smooth, unfinished surface for the best results.
- Vector is Victor: For sharp, scalable, and professional-quality engravings, always use vector file formats like SVG. They ensure clean lines regardless of the design’s size.
- Test, Don’t Guess: Laser power and speed settings are not universal. Always perform a test on a scrap piece of the same material to dial in the perfect settings for a crisp, clean engraving without damaging the board.
- Finish Strong and Safe: Proper post-engraving cleanup to remove residue, followed by the application of a food-safe mineral oil, is crucial for protecting the board, enhancing the design, and ensuring it is safe for serving food.
Table of Contents
- Choosing the Right Board and Materials
- Finding and Preparing Your Design
- The Laser Engraving Process Step-by-Step
- Finishing and Caring for Your Engraved Board
- Conclusions
- Frequently Asked Questions
Discover the art of creating a personalized charcuterie board using a laser engraver. This tutorial covers everything from selecting the right materials and design files to the final finishing touches. A custom engraved charcuterie board is not only a beautiful kitchen accessory but also a thoughtful, high-demand product for any laser engraving business.
Interested in more Charcuterie Board? Check out our Charcuterie Board laser file designs: Click here!
Choosing the Right Board and Materials
The foundation of any stunning engraved piece is the canvas itself. Before you even think about designs or laser settings, selecting the right board is the most critical decision you’ll make. The material not only dictates the aesthetic and feel of the final product but also significantly influences the ease and quality of the engraving process. Your choice will determine whether you create a simple cutting board or a treasured heirloom.
Wood vs. Slate: A Material Breakdown
The classic choice for a charcuterie board is wood, and for good reason. It’s warm, traditional, and food-safe. However, not all woods are created equal when placed under a laser. The key factors to consider are hardness, grain pattern, and resin content, as these will affect the color and sharpness of the engraving.
- Acacia: This is a highly popular and excellent choice. Acacia wood is known for its remarkable durability and natural water resistance. Its main draw is the rich, varied grain patterns and color tones, which can range from light honey to deep brown within a single piece. Pros: It engraves with beautiful contrast, creating a dark burn that stands out. It’s a very durable hardwood, making it practical for use. Cons: The inconsistent density of its grain can sometimes result in slightly uneven engraving depth, though this often adds to its rustic charm.
- Walnut: For a premium, high-contrast look, nothing beats walnut. Its deep, rich chocolate color provides a luxurious backdrop for laser engraving. The laser burns away the dark wood to reveal the lighter wood underneath, creating a striking and sophisticated effect that looks professionally crafted. Pros: Produces exceptionally crisp, clean lines due to its fine, consistent grain. It offers a naturally elegant and high-end finish. Cons: Walnut is a softer hardwood, making it more susceptible to knife marks if used heavily for cutting. It is also typically more expensive.
- Bamboo: Technically a grass, bamboo is an eco-friendly and highly sustainable option. It’s harder than many traditional woods, making it extremely durable and resistant to scarring. When engraved, bamboo produces a very dark, high-contrast mark, making text and logos pop. Pros: Very affordable, durable, and provides excellent engraving contrast. Cons: Bamboo boards are constructed from laminated strips, and the seams between these strips can sometimes be visible within the engraved area, interrupting the design. It can also be prone to more resin bleed or charring if laser settings aren’t precise.
For a more modern and dramatic aesthetic, consider slate. This natural stone offers a completely different look and feel. The laser doesn’t burn slate; instead, it ablates or fractures the surface, creating a permanent, light-gray mark.
- Slate: Pros: The contrast between the dark gray slate and the light engraving is incredibly sharp and clean. It’s non-porous, making it easy to clean and hygienic for serving food. Cons: Slate is brittle and can chip or break if dropped. The engraving process is less forgiving than with wood and requires very specific laser settings to avoid shattering the material.
The Critical Importance of a Smooth, Unfinished Surface
Regardless of the material you choose, the surface condition is paramount. For the best results, you must start with a board that is as smooth and, crucially, unfinished as possible. A smooth, sanded surface ensures that the laser’s focal point remains consistent across the entire design, leading to sharp, uniform lines. Any bumps, divots, or rough patches will cause the laser to go in and out of focus, resulting in blurry or inconsistent engraving depth. Furthermore, avoid boards that have a pre-applied finish like oil, lacquer, or varnish. When heated by the laser, these chemicals can release toxic fumes and will often melt, bubble, or burn unevenly, creating a sticky mess and ruining the fine details of your design. The goal is to engrave the raw material first. You will apply your own food-safe finish later in the process to protect both the wood and the engraving. By carefully selecting your material and ensuring its surface is properly prepared, you set the stage for transforming a simple laser engraved cutting board into a truly personalized and cherished engraved charcuterie board.
Finding and Preparing Your Design
With your ideal board selected, the next step is to choose or create the artwork that will bring it to life. The design is the soul of your project, transforming a simple piece of wood or slate into a personal statement or a heartfelt gift. Your approach can range from using professional, pre-made files to crafting a completely unique design from scratch.
The Advantage of Vector Files for Engraving
Before diving into design sources, it’s crucial to understand the best file format for laser engraving: the SVG (Scalable Vector Graphic). Unlike pixel-based images like JPEGs or PNGs, which lose quality when resized, vector files are based on mathematical equations. This means you can scale a charcuterie board svg to any size, from a tiny coaster to a massive serving platter, without any loss of sharpness or detail. The laser software reads these vector paths as direct instructions, resulting in exceptionally clean, crisp lines that are impossible to achieve with pixelated images. When searching for files, always prioritize vector formats like SVG, AI, DXF, or EPS to ensure a professional-quality engraving.
Sourcing and Customizing Your Design
The internet is a treasure trove of inspiration and ready-to-use cutting board engraving files. Knowing where to look can save you hours of design work while still providing a beautiful, personalized result.
- Online Marketplaces: Websites like Etsy, Creative Fabrica, and Design Bundles are goldmines. Many sellers on these platforms are laser owners themselves and create files specifically optimized for engraving. You can find everything from intricate floral borders and kitchen conversion charts to bundles of witty quotes. These are often inexpensive and provide an excellent starting point.
- Creating Your Own: For a truly one-of-a-kind piece, creating your own design is the ultimate personalization. Software like Adobe Illustrator, CorelDRAW, or the free alternative Inkscape allows you to combine elements, create custom text, and draw unique shapes. This is the perfect route for creating a wedding gift charcuterie board svg, where you can design a custom monogram featuring the couple’s initials and wedding date. When choosing fonts, opt for styles that are not overly thin or delicate, as these can get lost in the wood grain. A bold serif or a clean sans-serif font often engraves more clearly than a wispy script.
- Personalization Elements: Even if you start with a pre-made design, adding a personal touch is key. Consider incorporating a family name, an “Established” date, GPS coordinates of a special place, or even a handwritten recipe scanned and converted into a vector file for a deeply personal and sentimental gift.
Preparing and Positioning Your Artwork
Once you have your design file, the final step is to prepare it within your laser software. This stage is critical for ensuring the final engraving looks balanced and professional on your personalized charcuterie board. First, precisely measure the engravable area of your board. It’s wise to leave at least a half-inch to a full-inch margin from all edges to avoid a crowded look. Resize your vector design in the software to fit these dimensions.
Next, consider the placement. The position of the engraving affects both the aesthetic and the functionality of the board. A large, centered monogram makes a bold statement, ideal for a decorative piece. For a board intended for heavy use, placing a smaller design in a corner or along the bottom edge preserves the main surface area for cutting and serving. Always double-check your design in an “outline” or “wireframe” view to spot any unwanted overlapping lines. Finally, before sending the job to the laser, make sure all text has been converted to paths or curves. This turns the letters into shapes, ensuring the laser machine interprets them correctly, regardless of whether it has the specific font installed.
The Laser Engraving Process Step-by-Step
This is where the magic happens. With your design perfected and your board ready, it’s time to bring your vision to life using the laser. This stage requires precision, patience, and a steadfast commitment to safety. Following these steps carefully will ensure you create a beautiful, professional-quality laser engraved cutting board without any costly mistakes.
First, prepare your machine and material. Begin by wiping the surface of your charcuterie board with a clean, dry cloth to remove any dust or debris. Place the board flat on the laser bed. If the board is slightly warped, use honeycomb pins or small, heavy weights on the corners (outside of the engraving area) to ensure it is perfectly level. An uneven surface will lead to an out-of-focus engraving. Next, and most critically, set your laser’s focus. Whether your machine has an auto-focus feature or requires a manual focusing tool, this step is non-negotiable. A perfectly focused laser beam is tiny and concentrated, creating sharp, fine lines. An out-of-focus beam is wider, resulting in a blurry, less defined, and weaker engraving.
Dialing in Your Power and Speed Settings
The success of your engraving hinges on finding the perfect balance between laser power and speed. These settings vary drastically depending on the material you chose in the previous chapter. There is no single universal setting; testing is essential. Before running your main design, always perform a test grid or a small test of your design on a scrap piece of the exact same material, or on the back of the board itself if it won’t be seen.
- For Woods (Acacia, Walnut, Bamboo): You are aiming for a rich, dark burn without creating excessive char or deep gouging. A good starting point for a diode laser is often around 80-90% power at a speed of 1500-3000 mm/min. For a CO2 laser, you might start at 25-40% power at a speed of 150-200 mm/s. Slower speeds and higher power will result in a darker, deeper mark. Faster speeds and lower power will produce a lighter etch.
- For Slate: Engraving slate is a different process; you are fracturing the surface, not burning it. This typically requires much higher speed and lower power than wood. Too much power will melt or shatter the slate. Start with a very fast speed (e.g., 5000-8000 mm/min on a diode) and low power (30-40%). The goal is a clean, light-gray mark with minimal chipping.
Running the Job and Immediate Aftercare
With your settings dialed in from your test, it’s time to engrave. Perform one final check: ensure your ventilation system or air filter is turned on and functioning correctly. Wood and slate can produce smoke and fine particulates that should not be inhaled. Frame the job one last time in your software to confirm the design is positioned exactly where you want it. Close the laser’s protective lid, put on your safety glasses, and send the job. Crucially, never leave a laser engraver unattended while it is running, especially with wood, as there is always a risk of fire. Watch for any excessive flare-ups.
Once the machine completes the job and the laser head returns to its home position, resist the urge to open the lid immediately. Wait at least 30-60 seconds to allow the ventilation system to clear any remaining smoke and fumes from the enclosure. When you open the lid, you will see your design covered in a layer of soot and residue. This is perfectly normal. Your next step, which we will cover in the following chapter, is to clean this residue away to reveal the crisp, clean engraving beneath before moving on to finishing and sealing.
Finishing and Caring for Your Engraved Board
The laser has done its work, but your project isn’t finished yet. The steps you take now will clean, protect, and transform your freshly etched piece into a durable, food-safe, and visually stunning engraved charcuterie board. This final stage is what elevates a simple project into a professional-quality gift or kitchen showpiece.
Cleaning Up the Post-Engraving Residue
Once you remove your board from the laser, you’ll notice a layer of soot and resin residue covering the engraved area. Cleaning this off properly is crucial for a crisp, clean finish. The method varies slightly depending on your material. For wood boards, it’s essential to avoid smearing this residue into the raw, porous grain surrounding your design. Start by using a soft-bristled brush (like a new, clean toothbrush) to gently sweep away the loose debris from the engraved lines. After brushing, dampen a clean, lint-free cloth or a paper towel with isopropyl alcohol. Gently wipe the engraved area, moving with the grain of the wood. The alcohol will effectively dissolve and lift the remaining sticky residue without raising the wood’s grain like water would. You may need to use a few clean sections of the cloth to get it completely clean. For slate, the process is simpler. The residue is a fine stone dust, not soot. A quick wipe with a damp cloth is all that’s needed to completely clear the surface and reveal the sharp, light-gray engraving beneath.
Applying a Food-Safe Finish
This is the most rewarding step, where the colors of the wood deepen and the engraved design truly comes to life. It is absolutely vital to use a 100% food-safe finish. The best and most common choice is a high-quality, food-grade mineral oil. You can also use a specialized board conditioner, which is typically a blend of mineral oil and beeswax for added water resistance. Never use cooking oils like olive or vegetable oil, as they will go rancid over time.
- Ensure the Board is Clean and Dry: After cleaning, let the board air dry completely before applying any finish.
- Apply Generously: Pour a liberal amount of mineral oil directly onto the surface of the board. Using a clean, lint-free cloth, spread the oil evenly over the entire board—top, bottom, and all the edges. Pay special attention to the engraved areas, ensuring the oil soaks into every detail.
- Let it Soak In: This is a game of patience. Let the board sit with the oil on it for at least a few hours, or ideally, overnight. The dry wood will drink up the oil, which moisturizes it from the inside out, preventing cracking and warping.
- Wipe Away the Excess: After the board has absorbed all the oil it can, use a new, clean cloth to buff off any excess from the surface. You’ll be left with a smooth, semi-gloss finish that makes the engraving pop with rich contrast. For a brand-new board, you may want to repeat this process a couple of times over the first week.
Long-Term Care for Your Creation
A well-made personalized charcuterie board can last a lifetime with proper care. Provide these instructions if you’re giving the board as a gift.
- Hand Wash Only: Never, ever put a wooden charcuterie board in the dishwasher. The intense heat and prolonged exposure to water will cause it to warp, split, and ruin the engraving.
- Wash and Dry Promptly: After use, wash the board with a little mild soap and warm water. Do not let it soak. Immediately dry it thoroughly with a towel and let it air dry standing on its edge.
- Re-Oil Regularly: To keep the wood hydrated and protected, re-apply a coat of food-safe mineral oil every month, or whenever the wood starts to look dry or faded. This simple maintenance will keep it looking as beautiful as the day you made it.
Conclusions
You now have the knowledge to create a beautiful and personalized charcuterie board. By following these steps, you can produce professional-quality engraved items for personal use, as heartfelt gifts, or to sell. Experiment with different designs and wood types to expand your skills and create truly unique pieces that are sure to impress your guests and customers.
Frequently Asked Questions
Q: What is the best type of wood for a laser engraved charcuterie board?
A: The best wood depends on the desired look. Acacia offers great contrast and durability with rustic charm. Walnut provides a premium, high-contrast look with crisp lines. Bamboo is a durable, eco-friendly, and affordable option with very dark engraving.
Q: Why is it important to use an unfinished board for laser engraving?
A: Pre-applied finishes like oil or varnish can release toxic fumes when lasered. They also tend to melt or burn unevenly, which can ruin the detail of your design and create a sticky mess. It’s best to engrave the raw material and apply a food-safe finish afterward.
Q: What file type is best for charcuterie board designs?
A: Vector files, such as SVG (Scalable Vector Graphic), are the best choice. Unlike pixel-based images (JPEG, PNG), vectors can be resized to any dimension without losing sharpness, ensuring clean, crisp lines for a professional-quality engraving.
Q: How do I care for my engraved wooden board?
A: Always hand wash with mild soap and warm water; never put it in a dishwasher. Dry it immediately and thoroughly. To prevent the wood from drying out and cracking, re-apply a coat of food-safe mineral oil every month or whenever it looks dry.

Subscribe to Our Newsletter
And enjoy FREE Download Files, SALE Alerts and Inspiring TIPS
A Comprehensive Guide to Pricing Your Laser Engraving Services
A Comprehensive Guide on How to Price Laser Engraving Services
How to Price Your Laser Engraving and Cutting Services
Charcuterie Board Engraving File – Wine & Grapes 3D Illusion…
$4.00Original price was: $4.00.$3.00Current price is: $3.00.(25% off)
Bee and Honey Jar Charcuterie Board Engraving File | PNG Download #007…
$4.00Original price was: $4.00.$3.20Current price is: $3.20.(20% off)
Valentine Love Captions: 6 Charcuterie Board Engraving Files…
$8.00Original price was: $8.00.$5.60Current price is: $5.60.(30% off)
American Eagle Flag Laser Engraving File for Charcuterie & Cutting…
$4.00Original price was: $4.00.$2.80Current price is: $2.80.(30% off)