

 Français
 Deutsch
 Español
 Italiano
A Guide to Crafting a Personalized Charcuterie Board
Dec
Estimated reading time: 10 minutes
Key Takeaways
- Material Matters: The choice between hardwoods like maple (high-contrast engraving), cherry (warm tones), and walnut (luxurious, subtle engraving) or modern slate significantly impacts the board’s final look, durability, and food safety.
- Design and Placement are Crucial: Use high-quality vector files (like SVGs) for your design. Thoughtful placement in a corner or on the handle preserves the board’s functionality and creates a more professional, aesthetically pleasing result.
- Preparation and Testing are Non-Negotiable: Proper surface preparation, such as using masking tape on wood to prevent smoke stains, and always running a test engrave on scrap material to perfect your laser’s power and speed settings are key to a flawless finish.
- Finish for Food Safety and Beauty: Applying a food-safe, non-rancid finish like mineral oil or a beeswax blend is essential. It protects the wood, makes it safe for serving, and enhances the natural grain, making your engraving pop.
- Proper Care Ensures Longevity: To ensure your custom board lasts a lifetime, always hand-wash it (never in a dishwasher) and re-oil it monthly to keep the wood hydrated and protected.
Table of Contents
- Selecting the Right Material for Your Board
- Creating or Choosing Your Engraving Design
- The Laser Engraving Process Step-by-Step
- Applying a Food-Safe Finish and Long-Term Care
- Conclusions
- Frequently Asked Questions
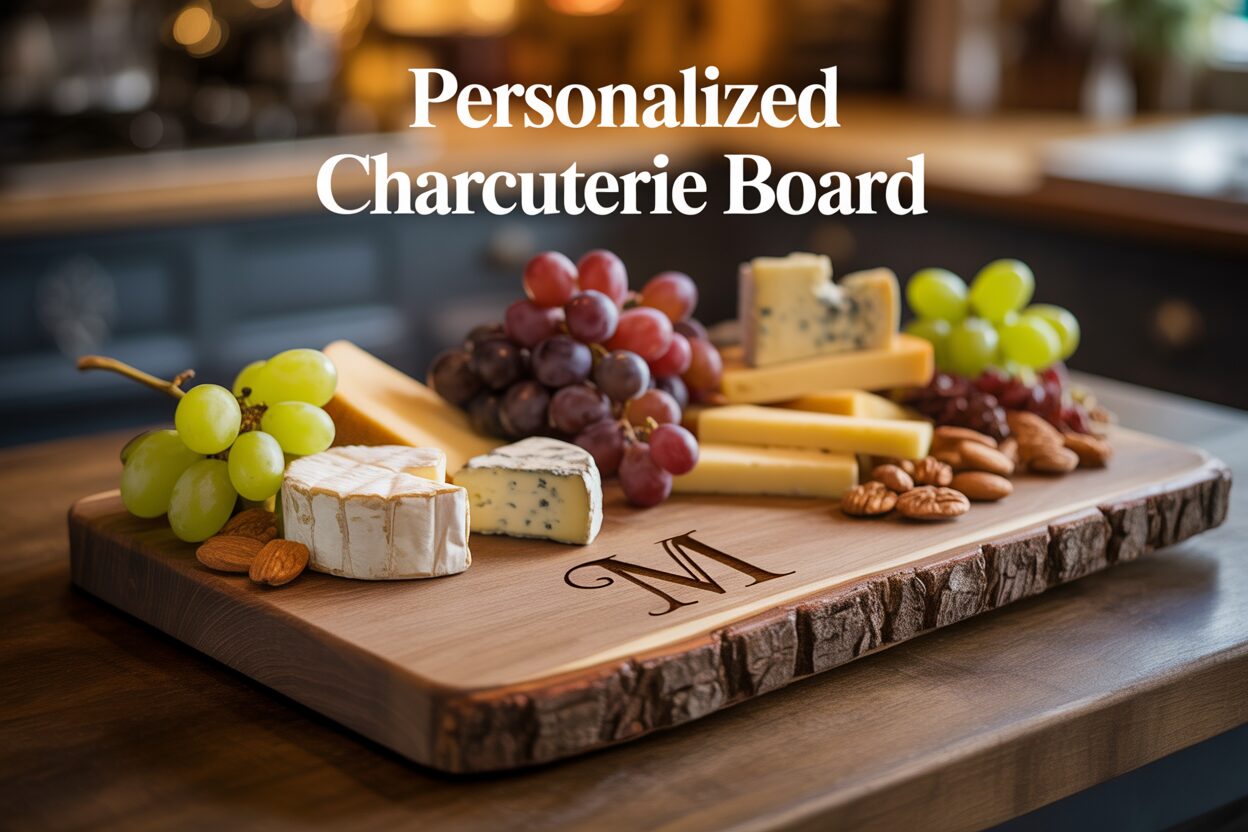
Discover the art of creating a beautiful and unique personalized charcuterie board. This guide will walk you through every step of the process, from selecting the ideal wood or slate to applying the final food-safe finish. It’s a perfect project for creating a memorable gift or a custom piece for your own home entertaining.
Interested in more Charcuterie Board? Check out our Charcuterie Board laser file designs: Click here!
Selecting the Right Material for Your Board
The foundation of any stunning personalized charcuterie board is the material you choose. This decision influences not only the board’s appearance and longevity but also its food safety and how well it accepts your custom engraving. The ideal material must strike a balance between durability, aesthetic appeal, and practicality. Hardwoods are the traditional and most popular choice, prized for their tight, closed-grain structure. This means they have smaller pores, making them less likely to absorb moisture, bacteria, or odors from food, which is a crucial consideration for any surface that will come into direct contact with what you eat.
Choosing the Right Wood
When selecting wood, three top contenders consistently emerge for crafting a high-quality laser engraved cutting board: maple, cherry, and walnut. Each offers a unique set of characteristics that will define your final product.
- Maple: Often considered the industry standard, maple is a very hard and durable wood with a fine, uniform grain. Its light, creamy color provides the perfect canvas for laser engraving, producing a sharp, high-contrast dark burn that makes intricate designs pop. Pros: Exceptionally durable, food-safe closed grain, and offers the best contrast for engravings. Cons: Its hardness can be tough on knife blades, and its light color can be more prone to showing stains from foods like berries or red wine if not sealed and maintained properly.
- Cherry: Known for its beautiful, warm reddish-brown hue that deepens and richens over time, cherry is a slightly softer hardwood than maple. This makes it a bit more forgiving on knives. The smooth, straight grain lends itself to elegant engravings that have a sophisticated, tone-on-tone appearance. Pros: Gorgeous color that ages beautifully, gentle on knives, and still provides good engraving contrast. Cons: Being softer, it is more susceptible to scratches and dents from heavy use.
- Walnut: For a luxurious and dramatic look, walnut is an unparalleled choice. Its rich, dark chocolate color immediately conveys a sense of quality. Engravings on walnut are more subtle and understated, creating a sophisticated branded effect rather than a stark contrast. The dark wood is also excellent at camouflaging potential stains. Pros: Premium aesthetic, durable yet knife-friendly, and excellent at hiding stains. Cons: It is typically the most expensive option, and the low-contrast engravings may not be suitable for very fine or detailed designs.
Slate: A Modern and Elegant Alternative
If you’re seeking a departure from traditional wood, slate offers a modern and chic alternative. This natural stone is non-porous, making it inherently hygienic and incredibly easy to clean. Its dark, matte finish creates a dramatic backdrop that makes the colors of cheeses, fruits, and cured meats vibrant and appealing. When it comes to personalization, laser engraving on slate yields a striking, permanent result. The laser etches away the top layer to reveal a light gray or white color underneath, creating a crisp, high-contrast design that is both elegant and durable. However, slate does have its drawbacks. It is heavier and more brittle than wood, meaning it can chip or break if dropped. It will also severely dull knives, so it should be considered a serving platter rather than a cutting surface. Ultimately, your choice of material dictates the final character of your board. Consider whether you prefer the high-contrast pop of an engraving on maple, the warm subtlety on cherry or walnut, or the sleek, modern precision of an engraving on slate.
Creating or Choosing Your Engraving Design
The design you choose is the heart of your project; it transforms a simple piece of wood or slate into a meaningful keepsake. Whether you’re crafting a personal statement piece or a heartfelt gift, the engraving design brings your vision to life. You can either create a completely original design or adapt a pre-made template to suit your needs. For those with a creative flair, designing from scratch offers unlimited possibilities. Software like Adobe Illustrator, Inkscape (a free alternative), or even user-friendly platforms like Canva can be used to create vector files suitable for engraving. Popular custom designs include:
- Monograms: A classic choice for personalization. You can opt for a single, elegant initial, interlocking initials for a couple, or a three-letter monogram representing a full name. The font choice here is critical; a flowing script can evoke romance, while a bold, modern sans-serif feels contemporary.
- Custom Text: Engraving a family name and an “Established” date is a timeless option for housewarming or wedding gifts. Other ideas include a favorite quote about food or family, the coordinates of a special place, or a treasured family recipe handwritten and converted into a digital file.
- Logos or Artwork: If you’re creating a board for a business or a personal brand, a clean, high-resolution logo is perfect. For personal projects, simple line art of a significant landmark, a beloved pet, or a floral motif can add a deeply personal touch. Remember, laser engravers work best with clean lines and solid fills, so avoid complex shading or photographic detail.
Finding the Perfect Pre-Made Design
If creating a design from the ground up seems daunting, there is a vast world of pre-made templates available online. The key is to search for vector files, specifically SVG (Scalable Vector Graphics). An SVG file can be resized to any dimension without losing quality, ensuring your final engraving is crisp and clean. Marketplaces like Etsy are treasure troves for these files; searching for terms like “charcuterie board svg” will yield thousands of options, from kitchen-themed puns and intricate floral borders to family name templates that you can easily customize with your own text. For special occasions, you can find highly specific designs. For example, a “wedding gift charcuterie board svg” might feature elegant laurels, “Mr. & Mrs.” typography, and a space to add the couple’s wedding date, creating a thoughtful and beautiful present in minutes.
Mastering Design Placement and Composition
Where you place your design is just as important as the design itself. The composition should complement the board’s shape and intended use. Avoid placing a large design directly in the center of the primary cutting area, as it will be covered by food and may show wear more quickly from knife use. Instead, consider these aesthetic principles:
- Corner Placement: Placing the design in the bottom-right or top-left corner is a popular and practical choice. It brands the board elegantly without interfering with its primary function.
- Edge or Handle Engraving: For a more subtle touch, consider placing a name, date, or small symbol along the edge or on the handle of the board.
- The Rule of Thirds: Imagine your board is divided by a 3×3 grid. Placing your design along one of these lines or at an intersection can create a more dynamic and visually appealing composition than a simple dead-center placement.
Before you commit to the final engraving, always create a mock-up. Print your design to scale on a piece of paper, cut it out, and place it on your board. This allows you to visualize the size and placement accurately and make any necessary adjustments for a perfectly balanced and beautiful custom charcuterie board.
The Laser Engraving Process Step-by-Step
With your material selected and your design finalized, you are ready for the most exciting step: bringing your vision to life through laser engraving. This process requires precision and a methodical approach, but the results are incredibly rewarding. Following these steps will help you achieve a clean, professional-looking engraved charcuterie board.
Step 1: Prepare the Board Surface
Proper preparation is key to a flawless finish. For wooden boards, the best practice is to cover the entire surface with a single, smooth layer of medium-tack transfer tape or wide masking tape. Make sure there are no bubbles or wrinkles. This mask serves two critical purposes: it protects the wood surrounding your design from smoke stains and char residue, and it drastically simplifies cleanup. The laser will cut through the tape and engrave the wood beneath, leaving the protected areas pristine. For slate, preparation is simpler; just ensure the surface is clean and free of dust or oils by wiping it down with a soft, lint-free cloth, perhaps dampened with isopropyl alcohol.
Step 2: Set Up the Design in the Laser Software
Import your design file (such as a charcuterie board svg) into your laser cutter’s software. Next, carefully measure your board and place it securely inside the laser bed. Using the software’s interface, position your design exactly where you want it to be engraved on the board. Many laser systems have a camera that provides a live view of the bed, making alignment easier. If not, use a jig or carefully measure from the edges to ensure perfect placement. This is the time to make final size adjustments; double-check that the proportions look right on your specific board.
Dialing in Your Settings and Running the Job
Step 3: Determine the Optimal Laser Settings
This is the most critical technical step. The three main settings you will control are Power, Speed, and Focus.
- Power: Determines the intensity of the laser beam. Higher power results in a deeper, darker burn on wood.
- Speed: Controls how quickly the laser head moves across the material. Slower speeds allow for more burn time, also resulting in a deeper, darker engrave.
- Focus: The laser must be correctly focused on the material’s surface for a crisp, clean line. An out-of-focus laser will produce a blurry, weak mark.
These settings vary drastically between materials. Wood, for example, requires a balance of power and speed to achieve a nice char without excessive burning, while slate requires less power to simply ablate the top surface for a contrasting white mark. Always run a test engrave on a scrap piece of the same material first. This allows you to dial in the perfect settings for a rich, sharp result without risking your final workpiece.
Step 4: Engrave and Clean Up
With your settings confirmed, send the job to the laser. Stay nearby and monitor the process—never leave a laser cutter running unattended. Once the engraving is complete, remove the board. If you used masking tape on wood, simply peel it off to reveal your clean, sharp design. If you didn’t use a mask, use a soft brush to remove loose debris, then gently wipe the engraved area with a cloth lightly dampened with isopropyl alcohol to remove any remaining soot. For slate, a quick wipe with a damp cloth is all that’s needed to remove the engraving dust. This final cleanup is what distinguishes a good engraving from a great one, leaving you with a beautifully finished personalized charcuterie board ready for the final sealing stage.
Applying a Food-Safe Finish and Long-Term Care
After the laser has cooled and the residue has been cleared away, you are left with a beautifully engraved piece. However, the process is not yet complete. The final, crucial step is to apply a finish that not only enhances the wood’s natural beauty and makes your design pop but, most importantly, seals and protects it, rendering it food-safe. Unfinished wood is porous and can absorb moisture, oils, and bacteria from food, making it unhygienic over time. A proper finish creates a protective barrier, ensuring your board is safe for serving and easy to clean. The best choices are non-toxic, penetrating oils that nourish the wood from within. Never use vegetable oils like olive or canola oil, as they can go rancid. Instead, stick to proven, safe options like food-grade mineral oil or a specialized wood conditioner, which is typically a blend of mineral oil and beeswax or carnauba wax.
Applying the Initial Finish: Step-by-Step
The first oiling is the most important, as it establishes the board’s protective foundation. This initial saturation will make the wood grain appear richer and deeper, providing a stunning contrast that makes your engraving stand out. For this process, you will need your chosen finish and a clean, lint-free cloth.
- Step 1: Start Clean. Ensure your laser engraved cutting board is completely free of any dust or debris from the engraving and cleanup process.
- Step 2: Apply the Finish Liberally. Pour a generous amount of mineral oil or board conditioner directly onto the surface of the board. Don’t be shy; the wood will be very thirsty.
- Step 3: Work it In. Using your cloth, spread the finish evenly across the entire board—top, bottom, and all sides. Use a circular motion to work the oil deep into the wood fibers. Pay special attention to the engraved areas, ensuring the oil fully penetrates the newly exposed wood.
- Step 4: Let it Soak. This is a test of patience. Let the board sit and absorb the oil for at least 4-6 hours, or ideally, overnight. You will see the oil slowly soak into the wood.
- Step 5: Remove the Excess. After the board has absorbed as much oil as it can, use a clean, dry cloth to wipe away any excess from the surface. Then, buff the board to a smooth, satin sheen.
Long-Term Care for Lasting Beauty
Your custom charcuterie board is a functional piece of art, and with proper care, it can last a lifetime. Maintaining its beauty and food safety is simple. First, the golden rule of cleaning: never place your wooden board in a dishwasher or submerge it in a sink full of water. The intense heat and prolonged exposure to water will cause the wood to warp, split, and crack. Instead, after each use, wash it by hand with a soft sponge, mild dish soap, and warm water. Immediately towel dry the board thoroughly and then stand it on its edge to allow air to circulate around all sides, ensuring it dries completely. Periodically, your board will need to be re-oiled. A good rule of thumb is to re-apply a coat of mineral oil or wood conditioner once a month, or whenever the wood starts to look dull or dry. This simple maintenance routine will keep the wood hydrated, prevent it from drying out, and maintain that beautiful, protective finish that highlights your personalized engraving for years to come.
Conclusions
You now have the knowledge to create a stunning engraved charcuterie board that is both personal and professional. By following these steps, you can confidently turn a simple piece of wood or slate into a cherished item. This project is a fantastic way to explore your creativity and produce a high-quality, memorable custom charcuterie board.
Frequently Asked Questions
Q: What is the best wood for an engraved charcuterie board?
A: The best wood depends on your preference. Maple offers the highest contrast for engravings and is very durable. Cherry provides a warm, rich color that deepens over time and is gentler on knives. Walnut offers a premium, dark look for a more subtle, sophisticated engraving.
Q: Can I cut on an engraved slate charcuterie board?
A: No, it is not recommended. Slate is very hard and will severely dull your knives. It is also more brittle than wood and can chip. Slate boards should be used for serving and presentation, not as a cutting surface.
Q: How do I clean and maintain my wooden charcuterie board?
A: Always wash your board by hand with mild soap and warm water. Never put it in the dishwasher or soak it in water. Towel dry it immediately and let it air dry completely on its edge. Re-apply a food-safe mineral oil or board conditioner about once a month, or whenever the wood looks dry, to keep it hydrated and protected.

Subscribe to Our Newsletter
And enjoy FREE Download Files, SALE Alerts and Inspiring TIPS
A Comprehensive Guide to Pricing Your Laser Engraving Services
A Comprehensive Guide on How to Price Laser Engraving Services
How to Price Your Laser Engraving and Cutting Services
Charcuterie Board Engraving File – Wine & Grapes 3D Illusion…
$4.00Original price was: $4.00.$3.00Current price is: $3.00.(25% off)
Bee and Honey Jar Charcuterie Board Engraving File | PNG Download #007…
$4.00Original price was: $4.00.$3.20Current price is: $3.20.(20% off)
Valentine Love Captions: 6 Charcuterie Board Engraving Files…
$8.00Original price was: $8.00.$5.60Current price is: $5.60.(30% off)
American Eagle Flag Laser Engraving File for Charcuterie & Cutting…
$4.00Original price was: $4.00.$2.80Current price is: $2.80.(30% off)