

 Français
 Deutsch
 Español
 Italiano
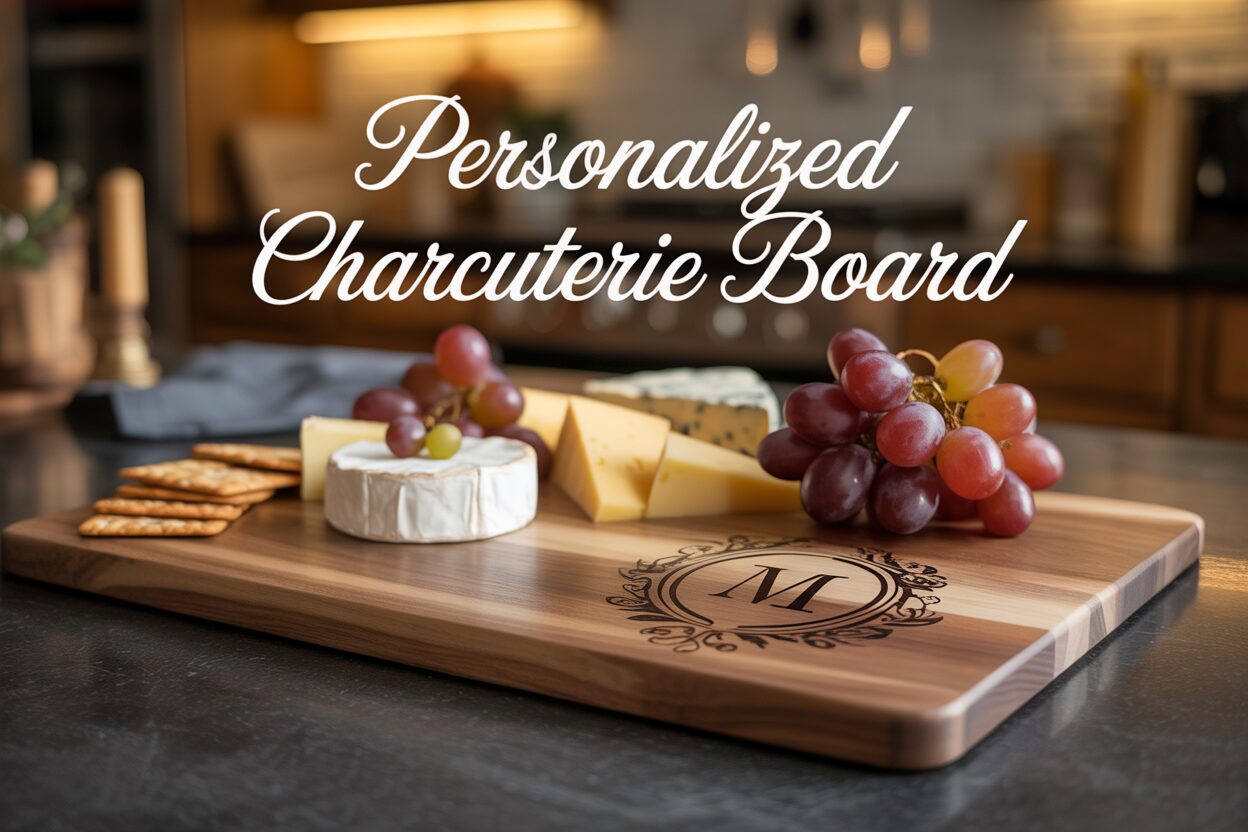
A Guide to Crafting a Personalized Charcuterie Board
Nov
Estimated reading time: 9 minutes
Key Takeaways
- Choose the Right Wood: For food safety and engraving quality, always select a non-porous, closed-grain hardwood like Maple, Cherry, or Walnut. Avoid open-grain woods like Oak or Ash.
- Use Vector Graphics (SVG): For a sharp, clean engraving, use a scalable vector graphic (SVG) file. This ensures your design remains crisp at any size, unlike pixel-based formats like JPG or PNG.
- Test Your Laser Settings: Before engraving your final piece, always run a test on a scrap piece of the same wood to perfectly calibrate the laser’s power and speed for the desired depth and color.
- Apply a Food-Safe Finish: After engraving and cleaning, seal the board with a food-grade mineral oil or a beeswax blend to protect the wood, prevent cracking, and make it safe for direct contact with food.
Table of Contents
- Selecting the Ideal Wood for Your Project
- Creating or Choosing Your Custom Design
- The Laser Engraving Process Step-by-Step
- Applying a Food-Safe Finish and Proper Care
- Conclusions
- Frequently Asked Questions
A personalized charcuterie board is more than just a serving platter; it’s a statement piece that blends functionality with personal expression. Whether for a wedding gift, a housewarming present, or your own gatherings, learning to craft an engraved charcuterie board allows you to create a lasting and cherished item. This guide will walk you through the entire process.
Selecting the Ideal Wood for Your Project
The foundation of any exceptional custom charcuterie board is, without a doubt, the wood itself. Before you even think about designs and laser settings, choosing the right material is the most critical decision you will make. This choice impacts not only the final aesthetic and the quality of the engraving but, more importantly, the safety and longevity of the board. A high-quality wood charcuterie board is an investment, whether for your own home or as a gift, and starting with the right slab of timber ensures your project is built to last and safe for serving your favorite culinary creations. The ideal wood must be a non-porous, closed-grain hardwood, which provides a dense surface that resists moisture and bacteria, and is also hard enough to withstand regular use.
Understanding Food Safety and Wood Grain
The most important characteristic of a food-safe wood is its porosity. Woods are categorized as either closed-grain or open-grain. Open-grain woods, like Red Oak and Ash, have large, visible pores on their surface. These tiny crevices are perfect breeding grounds for bacteria, as they trap moisture and food particles, making the board incredibly difficult to sanitize properly. For this reason, you must avoid porous, open-grain woods at all costs. Instead, you will want to select a closed-grain hardwood. These woods have much smaller, finer pores that are not visible to the naked eye, creating a smooth, dense surface that is far more resistant to bacteria and easier to clean and maintain. This non-porous nature is non-negotiable for any surface intended for direct contact with food.
Our Top Wood Recommendations for Engraving
While many closed-grain hardwoods are suitable, three stand out as top contenders for their beauty, durability, and excellent performance with laser engravers: Maple, Cherry, and Walnut. Each offers a unique look and feel, and your choice will largely depend on your personal aesthetic and the style of engraving you envision.
- Maple: Often considered the gold standard, Maple is a very hard, durable, and creamy light-colored wood. Its density and fine, closed grain make it exceptionally food-safe. For laser engraving, Maple is a dream to work with. The light surface provides a high-contrast canvas, allowing the laser to create a rich, dark brown burn that makes intricate designs and text pop. If you want your custom design to be the star of the show with crisp, clear lines, Maple is an unbeatable choice.
- Cherry: Known for its warm, reddish-brown hues that beautifully darken and richen over time, Cherry offers a touch of elegance. It is slightly softer than Maple but remains a durable and food-safe closed-grain hardwood. When laser engraved, Cherry produces a deep, clean mark. The contrast is less stark than on Maple, resulting in a more subtle, sophisticated, tone-on-tone effect that many find very appealing. It’s an excellent middle-ground for those who want a warmer wood tone without sacrificing design clarity.
- Walnut: For a luxurious and dramatic look, Walnut is the premium choice. Its deep, chocolate-brown color and striking grain patterns create an immediate sense of quality. As a very durable hardwood, it stands up well to use. However, its dark color significantly changes the engraving dynamic. The laser burn is also dark, creating a very subtle, low-contrast effect. This “branded” look is incredibly elegant and understated, perfect for a monogram or a minimalist logo. If you want a bold, highly visible design, Walnut may not be the best option, but for a piece of refined, subtle personalization, it is unmatched.
Ultimately, selecting between these three fantastic options comes down to a matter of taste. Consider the color palette of the kitchen where it will be used and the desired visual impact of your engraving. Whether you choose the bright contrast of Maple, the warm elegance of Cherry, or the deep luxury of Walnut, you will be starting your project with a safe, durable, and beautiful material worthy of becoming a custom laser engraved cutting board.
Creating or Choosing Your Custom Design
With the perfect slab of hardwood selected, you can now move on to the most personal and creative step: designing the artwork that will transform your project into a one-of-a-kind piece. The design is the soul of your custom charcuterie board; it’s what tells a story, commemorates an event, or simply adds a touch of personal flair. Whether you’re aiming for understated elegance or a bold statement, a well-thought-out design is key to a professional-looking result. Popular design choices often revolve around personalization, making the board a meaningful gift or a treasured family heirloom. Monograms are a timeless classic, from a single ornate initial to a traditional three-letter arrangement. Family names, often paired with an established date (e.g., “The Andersons, Est. 2021”), are perfect for housewarming or wedding gifts. Important dates, such as an anniversary or the coordinates of a special place, offer a subtle yet deeply personal touch. For businesses or special events, a custom logo can turn the board into a sophisticated branding tool or a memorable piece of event swag.
The Importance of Vector Graphics: Why an SVG is King
Once you have an idea, the next step is translating it into a digital format that the laser engraver can understand. This is where the file type becomes critically important. For sharp, clean, and infinitely scalable results, you must use a vector file format. The gold standard for this is the charcuterie board svg (Scalable Vector Graphic) file. Unlike raster images (like JPEGs or PNGs) which are made of pixels and become blurry when enlarged, vector files are created using mathematical paths and lines. This means they can be scaled to any size without any loss of quality, ensuring your engraving has crisp, perfect edges no matter how large or small the design is. You can create your own SVG files using software like Adobe Illustrator or the free alternative Inkscape. If you aren’t a designer, don’t worry. Websites like Etsy are a treasure trove of pre-made, customizable SVG files, from beautiful monogram wreaths to kitchen-themed quotes. Simply searching for “charcuterie board svg” or “cutting board laser file” will yield thousands of high-quality, ready-to-use options.
Strategic Design Placement for a Balanced Look
Where you place your design is just as important as the design itself. A poorly placed engraving can make a beautiful board look cluttered or unbalanced. Your primary consideration should be the board’s intended use. Since the central area will be covered with food, many people prefer to place the design in a location that will remain visible.
- The Corner: Placing a design in the bottom right or left corner is a classic, unobtrusive choice. It adds a personal touch without dominating the piece, allowing the beauty of both the food and the wood to shine.
- The Handle: If your board has a distinct handle, this can be the perfect spot for an engraving. It keeps the main serving surface completely clear and adds a unique, thoughtful detail.
- Centered on an Edge: A name or a line of text centered along the bottom or top edge provides a clean, symmetrical look that frames the serving area nicely.
- The Center: A large, central design can be stunning, but it is best reserved for boards that might be used more for display or for serving arrangements where the design can peek through.
Before you commit to engraving, always consider the wood’s grain. Avoid placing fine, detailed text over a particularly busy or dark patch of grain, as it can become difficult to read. A great pro tip is to print your design to scale on a piece of paper, cut it out, and place it on the board. This allows you to physically see how it looks and move it around to find the perfect spot before a single beam of light touches the wood.
The Laser Engraving Process Step-by-Step
Now that you have your beautiful hardwood board and a perfected digital design, it is time to bring them together in the laser cutter. This is where precision and preparation pay off, transforming a simple piece of wood into a deeply personal work of art. The laser engraving process can seem intimidating, but by following a methodical, step-by-step approach, you can achieve a flawless, professional-quality result. The key is to take your time, test your settings, and respect the machine. Before you even turn the laser on, your first step is to prepare the wood’s surface. Ensure it is clean, dry, and free of any dust or debris. Some makers like to apply a thin layer of masking tape over the engraving area. This can help reduce scorching or “haloing” around the edges of the engraved lines, resulting in a cleaner finish, especially on lighter woods like Maple.
Setting Up for Success: From Software to Machine Bed
The first technical step is to import your charcuterie board svg file into your laser cutter’s control software. This software acts as the bridge between your digital design and the physical machine. Once imported, you will position the design on the software’s virtual workspace exactly where you want it to be engraved on the physical board. Use the software’s rulers and guides to ensure perfect alignment. Next, carefully place your charcuterie board inside the laser cutter. It must be perfectly flat and secure. Any movement during the engraving process will ruin the result. Use a corner jig or heavy, flat objects to brace the board against two edges of the machine bed, ensuring it cannot shift. Once secured, use your laser’s focus tool to set the correct height between the laser lens and the surface of the wood. An improper focus is one of the most common causes of a poor-quality engraving.
Dialing In Your Settings and The All-Important Test Run
This is the most critical stage for achieving a professional finish on your engraved charcuterie board. Laser settings are a delicate balance between power and speed.
- Power: This determines the intensity of the laser beam. Higher power results in a deeper, darker burn.
- Speed: This controls how quickly the laser head moves over the wood. Slower speeds allow the laser to burn for longer in one spot, also creating a deeper, darker mark.
These settings are not one-size-fits-all; they vary dramatically depending on the wood. A hard, dense wood like Maple requires more power or a slower speed to get a nice dark burn compared to a softer wood like Cherry. For dark Walnut, you might want slightly lower power to achieve a subtle, tonal engraving rather than a deep, charred one. This is why you must perform a test run. Never engrave your final piece without testing your settings first. Use a scrap piece of the exact same wood or, if you don’t have one, find an inconspicuous spot on the back of the board. Engrave a small part of your design or a simple shape using your intended settings. Is the burn too light? Increase the power slightly or decrease the speed. Is it too deep and charred? Decrease the power or increase the speed. Make small adjustments and test again until you achieve the perfect depth and color.
Once you are confident in your settings, double-check that your design is correctly positioned in the software and that the board is secure. Start your machine’s ventilation system, as engraving wood produces smoke and fumes. Then, with your safety glasses on, you can execute the final engraving. Stay near the machine and watch as the laser meticulously traces your design onto the wood. The process is mesmerizing, and the end result is a stunning, perfectly crafted personalized charcuterie board ready for the final finishing touches.
Applying a Food-Safe Finish and Proper Care
Your design is now permanently etched into the wood, and the smoky aroma of the laser is still in the air. This final stage is all about protection and preservation, ensuring your beautiful creation is safe for serving food and will last for years to come. The first step after removing the board from the laser cutter is a gentle cleaning. The engraving process leaves behind a fine layer of soot and resin residue. Using a soft-bristled brush or a cloth lightly dampened with isopropyl alcohol, carefully clean the engraved area to remove any debris. Be gentle to avoid scratching the wood. Once clean and completely dry, the board is ready for the most important protective step: applying a food-safe finish. This is not merely an aesthetic choice; an unfinished board is porous, susceptible to drying out, cracking, and absorbing moisture and bacteria from food. A proper finish penetrates the wood, sealing it from within and creating a protective barrier that enhances both its safety and its natural beauty.
Choosing and Applying a Food-Safe Finish
When selecting a finish, it is imperative that you choose one that is 100% non-toxic and food-safe. Never use finishes like polyurethane or lacquer that are meant for furniture. The two best and most popular options are food-grade mineral oil and a specialized wood conditioner, often a blend of mineral oil and beeswax. Food-grade mineral oil is an inert, clear, and odorless liquid that soaks deep into the wood fibers, hydrating them and preventing cracking. A beeswax blend offers all the benefits of mineral oil, with the added advantage of the wax creating a more robust, water-resistant seal on the surface. Avoid using common cooking oils like olive or vegetable oil, as they can become rancid over time, imparting unpleasant odors and flavors to your board.
Applying the finish is a simple but satisfying process:
- Apply Generously: Using a clean, lint-free cloth, apply a liberal amount of your chosen oil or conditioner to all surfaces of the board—front, back, and all edges. Don’t be shy; the wood will be very thirsty.
- Let it Soak: This is the most important part. You want the oil to penetrate as deeply as possible. Let the board sit for at least a few hours, or even better, overnight. You will literally see the wood absorb the oil.
- Buff to a Sheen: After the board has had plenty of time to soak, take another clean, dry cloth and wipe away all the excess oil from the surface. Buff the wood in a circular motion until it feels smooth to the touch and has a rich, satin sheen. Your laser engraved cutting board will now have a deeper, more vibrant color.
Long-Term Care and Maintenance
Your work doesn’t end after the first oiling. A wood charcuterie board is like a cast-iron skillet; it requires a little ongoing care to perform its best. Proper cleaning is non-negotiable. After each use, wash the board by hand with a soft sponge, warm water, and a small amount of mild dish soap. Never, under any circumstances, place it in a dishwasher or submerge it in a sink full of water. The intense heat and prolonged exposure to water will cause the wood to warp, split, and crack, completely ruining your hard work. After washing, immediately towel dry the board and let it air dry completely by standing it on its edge. This allows for even air circulation on all sides, preventing warping. Over time, with repeated washing, the board’s finish will begin to fade. To maintain its protective seal, you should re-oil your board every month or so, or whenever it starts to look dull or dry. Simply repeat the same application process you used for the initial finish to keep it nourished, safe, and looking as beautiful as the day you made it.
Conclusions
Creating a custom charcuterie board is a rewarding project that combines craftsmanship with creativity. By choosing the right materials, design, and finishing techniques, you can produce a beautiful and food-safe piece. This unique item not only enhances your culinary presentations but also serves as a memorable, heartfelt gift that will be treasured for years to come.
Frequently Asked Questions
Q: What is the absolute best wood for an engraved charcuterie board?
Interested in more Charcuterie Board? Check out our Charcuterie Board laser file designs: Click here!
A: While it depends on your desired look, Maple is often considered the “gold standard.” Its light color provides high contrast for engravings, and its hard, dense, closed-grain structure makes it exceptionally durable and food-safe.
Q: Can I use a regular JPG or PNG file for laser engraving?
A: It’s highly discouraged. JPGs and PNGs are raster files made of pixels and can result in blurry or jagged edges when engraved. For a professional, clean result, you should always use a vector file, like an SVG, which can be scaled to any size without losing quality.
Q: How do I properly clean my engraved charcuterie board?
A: Always wash it by hand with mild soap and warm water. Never put it in the dishwasher or let it soak in water. After washing, dry it immediately with a towel and let it air dry standing on its edge to prevent warping.
Q: Why does my engraving look scorched or too light?
A: This is an issue with your laser settings. A scorched or overly deep burn means your power is too high or your speed is too slow. A burn that is too light means the power is too low or the speed is too high. This is why testing on a scrap piece of wood is a critical step to dial in the perfect settings.

Subscribe to Our Newsletter
And enjoy FREE Download Files, SALE Alerts and Inspiring TIPS
Pricing Your Laser Engraving Work for Profitability
A Comprehensive Guide to Pricing Your Laser Engraving Services
A Comprehensive Guide on How to Price Laser Engraving Services
Charcuterie Board Engraving File – Wine & Grapes 3D Illusion…
$4.00Original price was: $4.00.$3.00Current price is: $3.00.(25% off)
Bee and Honey Jar Charcuterie Board Engraving File | PNG Download #007…
$4.00Original price was: $4.00.$3.20Current price is: $3.20.(20% off)
Valentine Love Captions: 6 Charcuterie Board Engraving Files…
$8.00Original price was: $8.00.$5.60Current price is: $5.60.(30% off)
American Eagle Flag Laser Engraving File for Charcuterie & Cutting…
$4.00Original price was: $4.00.$2.80Current price is: $2.80.(30% off)