

 Français
 Deutsch
 Español
 Italiano
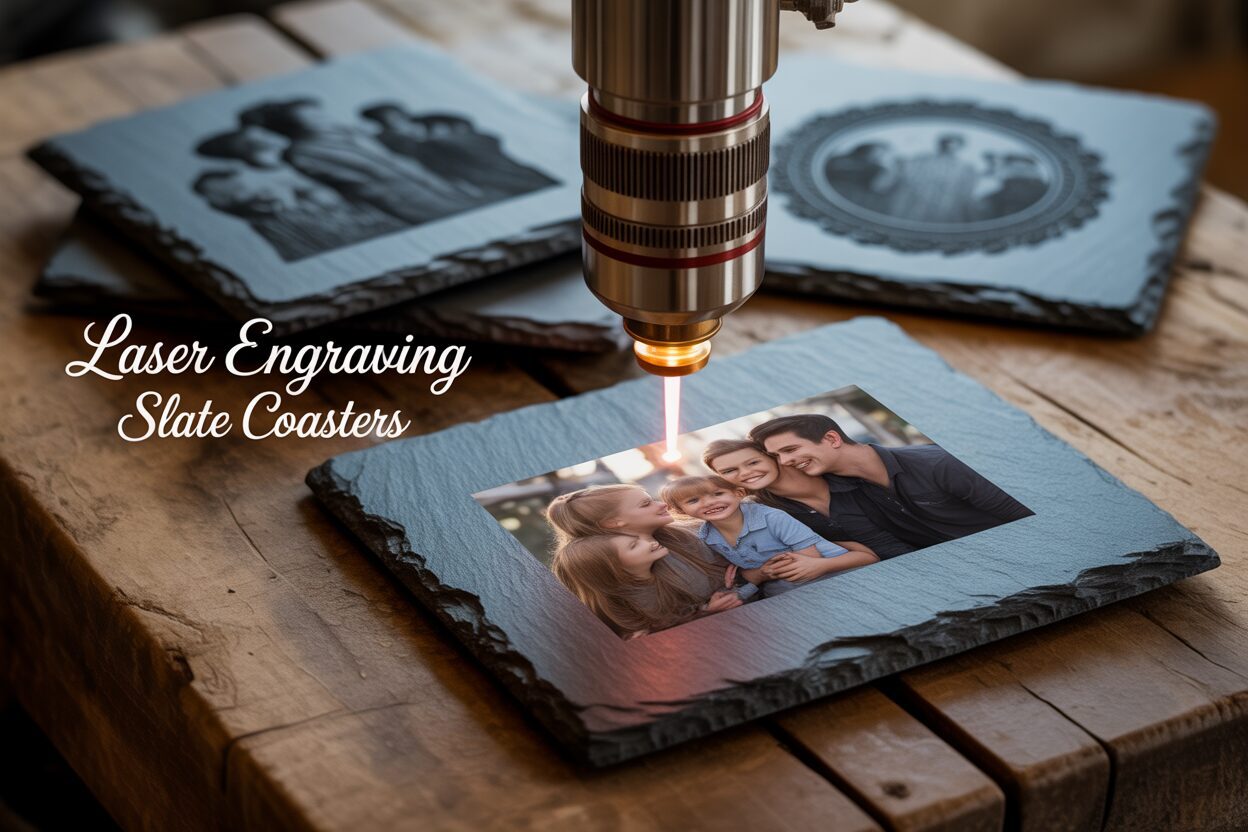
A Comprehensive Guide to Laser Engraving Slate Coasters
Dec
Estimated reading time: 8 minutes
Key Takeaways
- Proper Preparation is Crucial: Always clean your slate coasters with high-percentage isopropyl alcohol before engraving to remove dust and oils, ensuring a crisp, high-contrast mark.
- Test Your Settings: Never use default settings. Run a material test grid with varying power and speed to find the “sweet spot” for your specific laser and batch of slate to achieve a bright white result without “cooking” the material.
- Master Photo Engraving: To engrave detailed photos, first edit the image to be grayscale, increase brightness and contrast, and apply a sharpen filter. Then, use an appropriate dithering algorithm like Jarvis, Stucki, or the Norton White Tile method to simulate tones.
- Finish for a Professional Look: After engraving, clean off the dust and apply a finish. Food-safe mineral oil dramatically darkens the slate and makes the engraving pop, while a clear matte spray provides a permanent, protective seal.
Table of Contents
- Preparing Slate for Flawless Engraving
- Optimal Laser Settings for Engraving Slate
- Advanced Techniques for Engraving Photos on Slate
- Post-Engraving Cleanup and Finishing Touches
- Conclusions
- Frequently Asked Questions
Slate is a beautiful, natural material that produces stunning results with laser engraving. This guide provides a step-by-step tutorial on creating your own custom slate coasters. We will explore everything from preparing the material and dialing in your laser settings to advanced techniques for engraving detailed photos, helping you achieve professional-quality results on every project.
Preparing Slate for Flawless Engraving
The journey to a stunning, high-contrast engraved slate coaster begins long before the laser fires. Just like a painter primes a canvas, preparing your slate is a non-negotiable step that dictates the quality of your final product. Skipping this stage can lead to inconsistent results, fuzzy details, and frustration. By establishing a perfect foundation, you ensure the laser can do its job effectively, transforming a simple stone disc into a work of art.
Selecting the Perfect Slate Canvas
Not all slate coasters are created equal. While slate is a natural material with inherent variations that add to its charm, certain characteristics are crucial for successful laser engraving. Your primary goal is to find coasters with a surface that is as flat and uniform as possible. Run your fingers over the surface; it should feel relatively smooth, without significant peaks, valleys, or flaky layers that could easily chip off. Place the coaster on a flat table and press on the edges to check for any wobble, as a warped coaster will cause focus issues, resulting in some parts of your design being sharp while others are blurry. While the rustic, hand-chipped edges are a desirable aesthetic, inspect them for major cracks that could propagate through the entire piece under the stress of the laser’s heat. A little variation in thickness from one coaster to another is normal, but try to select pieces that are internally consistent to avoid drastic changes in laser focus across a single coaster.
The Critical Cleaning Step
This is arguably the most important part of the preparation process. The surface of your slate coaster, even if it looks clean, is likely covered in a thin layer of slate dust, oils from handling, and other residues from the manufacturing and shipping process. These invisible contaminants can act as a barrier, deflecting or absorbing the laser’s energy and leading to a weak, blotchy, or inconsistent engraving. Achieving that crisp, bright white mark is dependent on the laser interacting directly with the slate itself. The cleaning procedure is simple but must be done correctly.
- First, acquire a high-percentage isopropyl alcohol (IPA), preferably 90% or higher, and a clean, lint-free cloth, such as a microfiber towel.
- Lightly dampen a section of the cloth with the IPA. You do not want it to be dripping wet, just moist enough to clean effectively.
- Wipe the entire surface of the slate coaster firmly. Pay attention to the entire area you plan to engrave. You will likely see a fine grey residue come off on the cloth; this is the dust you are removing.
- Let the coaster air dry completely. Since IPA evaporates quickly, this should only take a minute or two. Once dry, handle the coaster only by its edges to avoid transferring fingerprints back onto the clean surface.
To Coat or Not to Coat? The Pre-Treatment Question
A frequent question among new users is whether slate requires a special coating or pre-treatment before engraving. The simple answer is no. One of the best qualities of slate is that it engraves beautifully in its natural state. The laser works by ablating—or fracturing—the surface of the dark grey stone, which reveals the lighter grey material beneath. This physical change is what creates the permanent, high-contrast mark. Unlike wood, which can have varying resin content, or glass, which can micro-fracture unevenly, slate is remarkably consistent. Some advanced users experiment with masking the slate using paper transfer tape before engraving. The theoretical benefit is that it can help keep the surrounding, un-engraved area perfectly free of dust and potentially create infinitesimally sharper edges. However, for slate, this is an unnecessary step that often creates more problems than it solves. The natural, slightly uneven texture of slate makes it difficult to apply a mask without trapping tiny air bubbles, which will interfere with the laser and cause flaws in your design. For flawless results, stick to the basics: a high-quality, clean, and completely dry slate coaster is the only canvas you need.
Optimal Laser Settings for Engraving Slate
With your slate coaster perfectly clean and positioned in your laser engraver, you’ve arrived at the most critical technical step: dialing in the settings. Laser engraving is a delicate dance between power, speed, and resolution. Finding the perfect balance is key to achieving that coveted bright, high-contrast mark without overheating or damaging the slate. Remember, slate doesn’t burn like wood; the laser creates a permanent mark by fracturing the surface material, revealing the lighter-colored stone underneath. Your goal is to find the settings that create the cleanest fracture with the least amount of thermal energy. Too much power or too little speed will “cook” the slate, resulting in a muted, yellowish, or even brownish mark instead of a brilliant white.
The Power, Speed, and Resolution Triangle
These three core settings work in tandem. Changing one will almost always require you to adjust another.
- Power: This controls the intensity of the laser beam. For slate, you are not trying to vaporize material, so you will use relatively low power settings compared to cutting wood. The goal is to apply just enough energy to fracture the surface.
- Speed: This dictates how quickly the laser head moves across the slate. A faster speed means the laser’s energy is applied to any given spot for a shorter duration. Speed is your primary tool for controlling heat and preventing the slate from overheating.
- Resolution (DPI/LPI): This setting, measured in Dots Per Inch or Lines Per Inch, determines the spacing between the lines the laser engraves. A higher DPI means the lines are closer together, creating more detail but also concentrating more heat in the area. For slate, an excessively high DPI can be counterproductive, causing the fine fractures to overlap and result in a muddy, less-defined image. A resolution between 250-300 DPI is often a great starting point.
Finding Your Sweet Spot: The Material Test Grid
Before you ever engrave your final design, you must run a material test. Every laser is slightly different, and even the composition of slate can vary from one batch to the next. The best way to do this is by creating a test grid on a spare coaster or on the back of one of your project pieces. Most laser software (like LightBurn) has a built-in feature to create an array of shapes, each with a different combination of power and speed. Run this test and then examine the results closely. You are looking for the square that produced the brightest white mark with the sharpest details and no signs of yellowing. This square represents the ideal settings for your specific machine and your specific batch of slate.
Starting Point Settings (Always Test First!)
Use these as a baseline for your material test grid, not as final settings.
- For CO2 Lasers (40W-60W):
- Power: 15-25%
- Speed: 300-500 mm/s (or 18,000-30,000 mm/min)
- Resolution (LPI): 250-300
- For Diode Lasers (5W-10W optical output):
- Power: 70-90%
- Speed: 1000-3000 mm/min
- Resolution (DPI): 254-280
- For High-Power Diode Lasers (20W+ optical output):
- Power: 20-40%
- Speed: 4000-8000 mm/min
- Resolution (DPI): 254-300
Notice how diode lasers use a much higher power percentage but at a significantly slower speed (mm/min vs mm/s). This is because they have a lower overall power output than CO2 lasers and need more “dwell time” to effectively fracture the slate. Performing a diligent test will save you from wasting materials and is the single most important habit to develop for consistently flawless engravings.
Advanced Techniques for Engraving Photos on Slate
Engraving a detailed photograph onto slate is a true mark of skill, transforming a simple coaster into a cherished keepsake. Unlike engraving text or logos, which use vector lines, photos are raster images made of pixels. The process requires a specific digital preparation workflow to translate the continuous tones of a photograph into a format the laser can understand and render beautifully on a dark, textured surface. Simply loading a color photo and hitting ‘start’ will almost certainly lead to a dark, muddy, and unrecognizable result. The artistry lies in preparing the image to work with the slate, not against it.
Image Preparation: The Digital Darkroom
Before you even send the image to your laser software, you need to edit it in a program like Adobe Photoshop, GIMP (a free alternative), or even the robust image editing tools within LightBurn. The goal is to exaggerate the image data to compensate for slate’s limited dynamic range.
- Convert to Grayscale: Your laser engraver doesn’t see color; it only interprets shades of gray as instructions for power output or dot density. The first step is always to convert your image to an 8-bit grayscale format. This removes all color data, letting you focus on the light and shadow.
- Adjust Brightness and Contrast: Slate is a dark canvas. Details in the darker areas of your photo will be completely lost if not adjusted. Increase the overall brightness of the image, paying special attention to lifting the shadows and mid-tones. Then, increase the contrast to make the subject pop. You want a clear separation between the light and dark areas. The image on your screen should look slightly washed out and overly contrasted compared to a normal print photo.
- Apply a Sharpening Filter: Slate’s natural texture can soften an engraved image. To counteract this, apply a sharpening filter, like an “Unsharp Mask.” This enhances the edges and fine details within the photo—like the strands of hair or the texture of fabric—which helps them remain crisp and clear after engraving. Don’t overdo it, but a noticeable increase in sharpness is beneficial.
Dithering: Creating Tones with Dots
This is the most critical step in photo engraving. Since your laser can only do two things on slate—fire (creating a white mark) or not fire (leaving the dark slate)—dithering is the process that simulates shades of gray. It does this by arranging black and white dots in specific patterns. A dense pattern of dots appears as a lighter gray, while a sparse pattern appears as a darker gray. Your laser software will offer several dithering algorithms, and the one you choose has a dramatic impact on the final look.
- Jarvis and Stucki: These are “error-diffusion” algorithms that produce a very fine, organic, and seemingly random dot pattern. They are excellent for creating smooth tonal gradients and are a fantastic all-around choice for many types of photos, especially portraits. They excel at rendering realistic textures and avoiding the grid-like patterns of simpler dithers.
- Norton White Tile Method / Inverted Image: This is an advanced technique that often yields superior results on dark materials like slate. Instead of figuring out where to place black dots on a white background, these methods are optimized for placing white dots on a black background. If your software has an algorithm specifically for “tile” or “dark material,” use it. A powerful alternative is to manually create an inverted version of your grayscale image (a negative) in your photo editor. Then, in your laser software, apply a standard Jarvis or Stucki dither to this negative. The result is an engraving file where the laser works to create the highlights, often leading to a brighter and more detailed final product on slate.
As with your power and speed settings, the only way to know which dithering algorithm works best for a specific photo is to test. Try processing the same prepared image with two or three different dithers and run a small test engrave. This extra step is what separates good results from breathtaking ones.
Post-Engraving Cleanup and Finishing Touches
Once the laser has finished its work, the coaster is engraved, but it is not yet complete. A fine layer of pulverized slate dust will cover the surface, obscuring the detail and dulling the contrast of your design. The final steps of cleaning and finishing are what elevate your project from a simple engraved stone to a professional, retail-quality product. This stage is quick and easy, but the visual impact is immense, turning a good result into a spectacular one.
The Essential Post-Engrave Cleanup
The first order of business is to remove all the fine dust created during the engraving process. This residue can get lodged in the tiny crevices of the design and will prevent any finishing oil or sealant from adhering properly.
- Start by using a soft-bristled brush, like an old toothbrush or a small paintbrush, to gently whisk away the loose dust from the engraved area. This will remove the bulk of the debris without scratching the slate.
- Next, take a clean, lint-free cloth and dampen it slightly with water. Wring it out thoroughly so it is just damp, not wet.
- Gently wipe the entire surface of the coaster. This will pick up any remaining fine dust particles. You may need to rinse and wring out your cloth and repeat the process if the coaster was particularly dusty.
- Allow the coaster to air dry completely. This is a crucial step; applying any finish to a wet coaster will result in a blotchy, uneven appearance.
Finishing for Maximum Contrast and Protection
With the coaster clean and dry, you have two primary options for finishing. The choice depends on the desired final look and intended use.
Option 1: Food-Safe Mineral Oil for Dramatic Pop
This is the most popular and often most stunning finishing method for slate coasters. Applying a thin coat of food-safe mineral oil (the same kind used for wooden cutting boards) performs a bit of magic. It dramatically darkens the raw grey slate to a deep, rich, near-black color, while the engraved portions, which are fractured stone, do not absorb the oil. This creates a breathtaking contrast, making the white or light-grey engraving appear to leap off the surface. To apply, simply put a few drops of mineral oil on a clean cloth and rub it evenly across the entire coaster surface. Let it sit for a minute to soak in, then take a different clean, dry cloth and buff off all the excess oil. If you don’t buff it properly, the coaster can feel greasy. The main advantages are the incredible contrast, the food-safe nature, and the enhancement of the slate’s natural beauty. The only downside is that it’s not a permanent sealant and may need to be reapplied very occasionally to maintain the deep, dark look.
Option 2: Clear Coat Spray for a Permanent Seal
For a more permanent, durable finish that seals the slate from moisture and stains, a clear coat spray is an excellent choice. These are available in various sheens, typically matte, satin, and gloss. A matte finish is often preferred as it provides protection while preserving the natural, non-reflective look of the stone. A gloss finish will give the coaster a permanent “wet” look, which can also be very appealing. To apply, work in a well-ventilated area. Hold the can at the recommended distance and apply a very light, even coat across the coaster. It is far better to apply two or three very thin coats, allowing each to dry completely, than one thick coat which can run or pool. The primary benefit is durability and a permanent seal. The main con is that you must ensure you are using a spray that is food-safe if the coasters will have direct contact with food, and some sprays can slightly alter the natural feel of the stone.
Conclusions
With the right preparation, settings, and finishing touches, laser engraving slate coasters is a rewarding project that yields beautiful products. From simple logos to detailed photos, the techniques covered in this guide will help you master the process. Now it’s your turn to apply these tips and start creating your own stunning custom slate coasters for personal use or for sale.
Frequently Asked Questions
Q: Do I need to apply a special coating to slate before laser engraving?
A: No. One of the best qualities of slate is that it engraves beautifully in its natural state. The only preparation needed is a thorough cleaning with isopropyl alcohol to remove any dust or oils from the surface.
Q: Why did my engraving come out yellowish or brown instead of bright white?
A: A yellowish or brownish mark is a sign of “cooking” the slate, which happens when the laser settings have too much power or the speed is too slow. The goal is to fracture the surface, not burn it. Always run a material test grid to find the optimal balance of low power and high speed for a crisp, white result.
Q: What is the best way to make the engraving stand out after it’s done?
A: For the highest contrast, apply a thin layer of food-safe mineral oil after cleaning the engraved coaster. The oil dramatically darkens the raw slate to a rich, near-black color, while the engraved area remains light gray, making your design pop.
Interested in more Coaster? Check out our Coaster laser file designs: Click here!
Q: I’m engraving a photo and it looks muddy. What am I doing wrong?
A: Photo engraving on slate requires careful image preparation. Before sending it to the laser, you must convert the image to grayscale, increase brightness and contrast significantly, and apply a sharpening filter. Most importantly, use a dithering algorithm (like Jarvis, Stucki, or an inverted image method) in your laser software to simulate shades of gray effectively on the dark surface.

Subscribe to Our Newsletter
And enjoy FREE Download Files, SALE Alerts and Inspiring TIPS
Pricing Your Laser Engraving Work for Profitability
A Comprehensive Guide to Pricing Your Laser Engraving Services
A Comprehensive Guide on How to Price Laser Engraving Services
Charcuterie Board Engraving File – Wine & Grapes 3D Illusion…
$4.00Original price was: $4.00.$3.00Current price is: $3.00.(25% off)
Bee and Honey Jar Charcuterie Board Engraving File | PNG Download #007…
$4.00Original price was: $4.00.$3.20Current price is: $3.20.(20% off)
Valentine Love Captions: 6 Charcuterie Board Engraving Files…
$8.00Original price was: $8.00.$5.60Current price is: $5.60.(30% off)
American Eagle Flag Laser Engraving File for Charcuterie & Cutting…
$4.00Original price was: $4.00.$2.80Current price is: $2.80.(30% off)