

 Français
 Deutsch
 Español
 Italiano
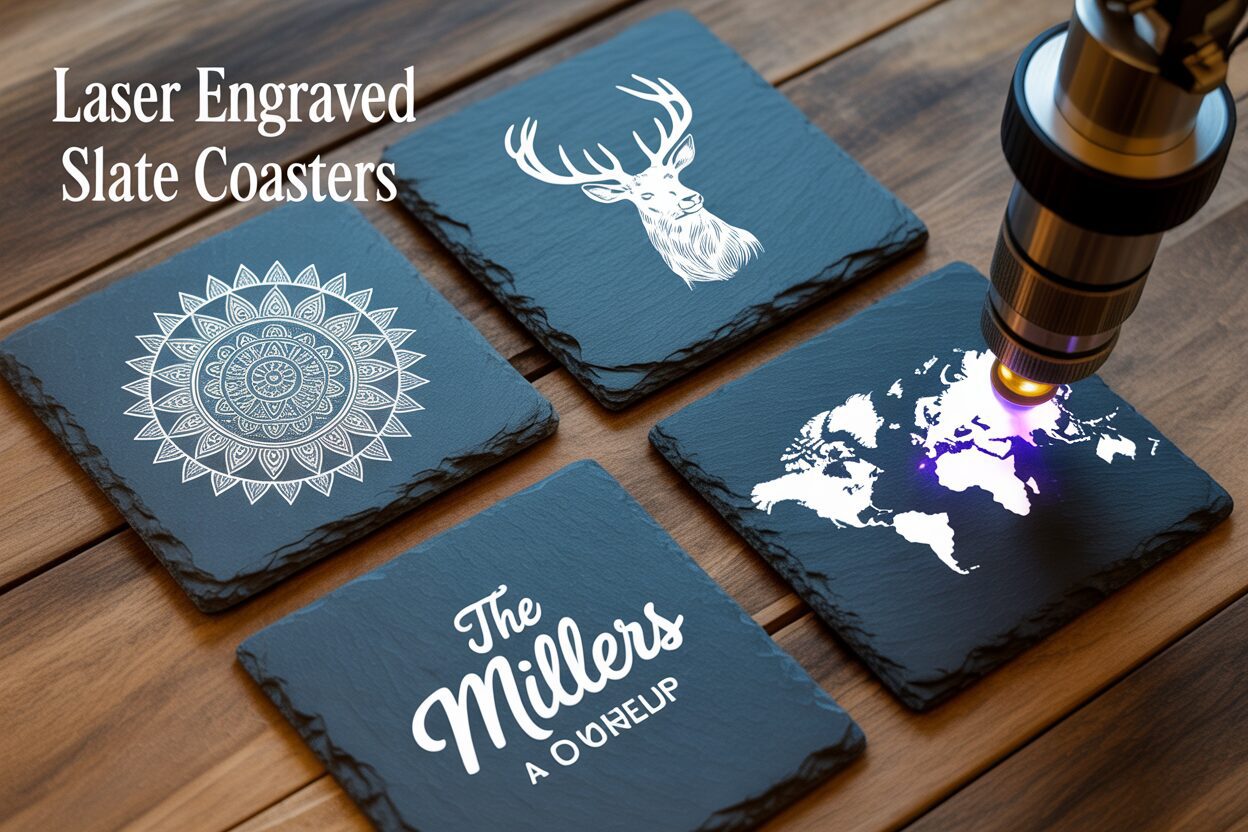
A Comprehensive Guide to Crafting Laser Engraved Slate Coasters
Dec
Estimated reading time: 8 minutes
Key Takeaways
- Material is Key: Success starts with selecting flat, uniform, and uncoated slate. Proper cleaning with isopropyl alcohol before engraving is a non-negotiable step for achieving crisp, high-contrast results.
- Optimize Design & Settings: Use bold, high-contrast, black-and-white designs. Vector graphics are ideal, and photos must be dithered. Always perform a test grid to find the perfect balance of power, speed, and resolution for your specific laser and slate.
- Finishing is Crucial: After engraving and thoroughly cleaning off the dust, applying a finish like food-safe mineral oil or a clear matte sealant dramatically enhances contrast, protects the design, and gives the coasters a professional, high-end look.
Dive into the world of slate laser engraving and discover how to create beautiful, custom coasters. This guide offers everything you need to know, from selecting the right materials to mastering the art of engraving with a diode laser on slate. Perfect for hobbyists and small business owners alike, you’ll soon be producing professional-quality personalized slate coasters.
Selecting and Preparing Slate for Engraving
The foundation of any stunning laser engraved coaster is the slate itself. Before you even think about firing up your laser, selecting and preparing your material is the most critical step. The quality of your slate directly impacts the clarity, contrast, and overall professional finish of your personalized slate coasters. Skipping or rushing this stage is the number one reason for inconsistent or disappointing results, so investing time here will pay dividends later.
Interested in more Coaster? Check out our Coaster laser file designs: Click here!
Choosing the Right Slate
Not all slate is created equal. When sourcing your coasters, your primary goal is to find pieces that are as flat and uniform in thickness as possible. A laser has a very precise focal point; if the slate surface is warped or uneven, some parts of your design will be in focus while others will be blurry and less defined. Run your fingers over the surface and visually inspect each piece from the side. While natural slate will always have some texture, you should reject any pieces with significant dips, bows, or cracks. The color should be a consistent dark gray or black, as this provides the best canvas for the light gray, high-contrast mark the laser will create. Some slates contain mineral deposits like pyrite (fool’s gold), which can look interesting but may interfere with the laser and cause unpredictable results. For a successful slate coasters diy project, simple, uniform slate is best. You can find blank slate coasters at craft supply stores, online marketplaces, and even some home improvement stores. Be aware that some pre-packaged coasters come with a sealant or oil finish, which is best to avoid as it can create fumes and inconsistent engraving. Look for raw, uncoated slate whenever possible.
Preparing Your Slate for Engraving
Proper preparation ensures the laser beam interacts directly and cleanly with the stone, resulting in a sharp, bright engraving. Any dust, finger oils, or residues on the surface can block the laser’s energy, leading to faint or patchy areas in your final design. This preparation process is simple but non-negotiable.
- Inspection and Initial Cleaning: Before you do anything else, give each coaster a thorough inspection under good light. Check again for any hairline cracks or significant chips that you might have missed. Use a soft brush to remove any loose dust or grit from the surface and chipped edges.
- Degreasing the Surface: The most important step is removing any oils from the surface. The oils from your hands are enough to affect the engraving quality. The best tool for this job is Isopropyl Alcohol (IPA), preferably 90% or higher. Lightly dampen a lint-free microfiber cloth with the alcohol and wipe down the entire surface of the coaster you plan to engrave. Don’t saturate the slate; a light, even wipe is all that’s needed. This will remove oils and residues without leaving any streaks.
- Final Drying: The slate must be completely dry before it enters the laser machine. Fortunately, isopropyl alcohol evaporates very quickly. Give the coasters a few minutes to air dry completely after wiping them down. Placing them in a laser while still damp can affect the engraving and potentially cause moisture issues within your machine. Once dry, handle them only by the edges to avoid re-contaminating the surface.
By meticulously selecting flat, high-quality slate and ensuring it is perfectly clean and dry, you are setting the stage for a flawless engraving. This pristine canvas allows the laser to do its job effectively, creating the crisp, high-contrast results that make engraved slate so appealing.
Mastering Design and Laser Engraving Settings
With your slate cleaned and ready, the focus shifts from the physical material to the digital design. The success of your laser engraved slate coasters depends just as much on the quality of your artwork and the precision of your machine settings as it does on the slate itself. Slate is a unique material that doesn’t engrave like wood or acrylic; it ablates, fracturing the surface to reveal a lighter gray layer underneath. This means your design and settings must be optimized to create sharp contrast rather than depth.
Optimizing Your Artwork for Slate
The best designs for slate are high-contrast and bold. Think in terms of black and white. Grayscale images and subtle shading do not translate well, as the laser either marks the slate or it doesn’t—there is very little middle ground. Vector files (like SVG, AI, DXF) containing text, logos, and clear line art produce exceptionally crisp results. When working with text, choose bold, sans-serif fonts, as very thin lines or intricate serifs can get lost in the slate’s natural texture. If you want to engrave a photograph, you must first process it for the laser. This involves converting the image to a black-and-white pattern through a process called dithering. Dithering uses dots or patterns to simulate grayscale tones. Most laser software, like LightBurn, has built-in dithering options; algorithms like Jarvis or Stucki are excellent starting points for photos on slate. For any design, ensure it is a pure black-and-white image file (PNG, BMP) for the clearest output.
Essential Laser Settings for Flawless Engraving
Finding the perfect slate laser engraving settings is a balance between three key parameters: Power, Speed, and Resolution (DPI/LPI). Power determines the intensity of the laser beam. Too little power results in a faint, barely-there mark, while too much power can overheat the slate, causing it to flake or produce a less desirable yellowish tone instead of a bright white/gray. Speed is how fast the laser head moves across the material. A slower speed allows more energy to be applied to a single spot, creating a brighter mark. Resolution, measured in Dots Per Inch (DPI) or Lines Per Inch (LPI), dictates the spacing between engraved lines. For slate, a resolution between 250-300 DPI is often the sweet spot, providing solid coverage without overlapping lines excessively, which can overheat the material.
The ideal settings vary between machines, especially between CO2 and diode lasers. A diode laser on slate is particularly effective, often producing a brighter white mark than many CO2 lasers. Since diode lasers are typically lower in power, they require slower speeds to achieve this effect. Before engraving your final coaster, it is essential to run a test grid on a scrap piece of slate to dial in the perfect settings for your specific machine and slate batch.
Here are some recommended starting points to adapt for your tests:
- For a 5-10W Diode Laser:
- Speed: 1000-3000 mm/min
- Power: 80-100%
- LPI/DPI: 254-300
- For a 40-60W CO2 Laser:
- Speed: 150-300 mm/s
- Power: 10-20%
- LPI/DPI: 270-340
Start in the middle of these ranges and observe the results. Look for the setting combination that produces the brightest, cleanest mark with no flaking. This small investment in testing will guarantee consistently beautiful results on all your projects.
The Engraving Process and Finishing Touches
With your design finalized and your laser settings dialed in, you are ready to bring your creation to life. This stage is where precision and patience culminate in a beautifully engraved coaster. The steps from placing the slate in the machine to applying the final finish are what transform a raw material into a polished, professional product.
Executing the Engraving
The physical process of engraving requires careful setup to ensure a perfect result. First, place your clean, dry slate coaster onto the laser bed. The most critical step here is setting the correct focal distance. The laser’s beam is most powerful at a precise focal point, and even a millimeter of error can result in a blurry or weak engraving. Use your machine’s focusing tool to set the height of the laser nozzle perfectly to the top surface of the slate. Once focused, it’s time to position your design. Using your laser software’s framing or tracing function, project a low-power outline of your design onto the coaster. Adjust the coaster’s position until the frame is perfectly centered or placed exactly where you want it. For producing multiple personalized slate coasters, creating a simple cardboard or wood jig to hold the coaster in the same spot every time will save you immense amounts of time. Before you hit start, double-check your safety measures: ensure your ventilation system is running to extract the fine dust produced, and always wear your certified laser safety glasses. Now, run the job and watch as your digital design is permanently etched into the stone.
Cleaning and Revealing the Design
Once the laser has finished its work, the coaster will be covered in a layer of fine, light gray dust. This is the ablated slate material, and it must be cleaned off to reveal the crisp design underneath. Resist the urge to wipe it with your bare hand, as the oils can smudge the dust into the porous surface. The best method is a two-step process. First, use a soft-bristled brush or a gentle puff of compressed air to remove the majority of the loose debris. This clears the surface without grinding the dust into the slate. Next, take a lint-free microfiber cloth lightly dampened with water or isopropyl alcohol and gently wipe down the entire coaster. You will immediately see the contrast pop as the dark slate is revealed against the bright, clean engraving. Be thorough and ensure all residue is gone, then let the coaster air dry completely.
Applying the Finishing Touches
This final step is optional but highly recommended as it elevates your slate coasters diy project from homemade to high-end. Applying a finish not only protects the coaster but also dramatically enhances the contrast of the engraving. You have two excellent options:
- Mineral Oil: For a natural, rich finish, apply a thin coat of food-safe mineral oil. Drip a small amount onto a clean cloth and rub it evenly across the entire surface. The oil will absorb into the dark, un-engraved parts of the slate, deepening them to a near-black color, which makes the light gray engraving stand out brilliantly. It gives the coaster a subtle, elegant sheen and a premium feel. Wipe off any excess oil and let it cure for a few hours.
- Clear Sealant: For maximum durability and a waterproof finish, a matte or satin clear acrylic spray is a great choice. In a well-ventilated area, apply a very light, even coat over the coaster from about 8-10 inches away. A thin coat is all that is needed to seal the slate and protect the engraving from stains and moisture without adding a thick, glossy look. Let it dry completely according to the manufacturer’s instructions.
Either finishing method will turn your carefully engraved coaster into a durable, stunning piece that looks and feels professionally crafted.
Conclusions
You now have the knowledge to create your own stunning laser engraved slate coasters. By following these steps and experimenting with laser engraving settings, you can produce unique, high-quality items for personal use or for sale. This rewarding slate coasters diy project is a fantastic way to expand your skills and add a popular product to your portfolio.
Frequently Asked Questions
Q: What’s the best type of slate for laser engraving?
A: The best slate is as flat and uniform in thickness as possible, with a consistent dark gray or black color. Avoid slate with a pre-applied sealant, significant cracks, or mineral deposits like pyrite, as these can interfere with the laser and produce inconsistent results.
Q: Why are my slate engravings coming out blurry or inconsistent?
A: This is most commonly caused by two issues: an uneven slate surface or incorrect laser focus. Ensure your slate is perfectly flat and use your machine’s focusing tool to set the correct distance between the laser nozzle and the slate surface. A dirty or oily surface can also cause patchy results, so always clean the slate with isopropyl alcohol before engraving.
Q: Can I engrave photos on slate with a diode laser?
A: Yes, you can engrave photos, but they must be processed correctly. Convert the photo to a high-contrast black-and-white image using a dithering algorithm (like Jarvis or Stucki in LightBurn). This process simulates grayscale tones with dots, which is necessary for a material like slate where the laser either marks it or it doesn’t.
Q: What’s the best way to finish engraved slate coasters?
A: After cleaning off all the dust, applying a finish is highly recommended. For a natural, deep black finish that makes the engraving pop, use food-safe mineral oil. For maximum durability and water resistance, apply a light, even coat of a clear matte or satin acrylic spray sealant.
Q: Do I need a powerful laser to engrave slate?
A: No, in fact, lower-power diode lasers (5-10W) are particularly effective on slate. They often produce a brighter white mark than more powerful CO2 lasers. The key is to find the right balance of power and a slower speed to ablate the surface cleanly without overheating it.

Subscribe to Our Newsletter
And enjoy FREE Download Files, SALE Alerts and Inspiring TIPS
A Guide to Designing and Making a Laser Cut Box
How to Make a Custom Laser Cut Wine Box
A Beginner’s Guide to Creating a Laser Cut Box
Charcuterie Board Engraving File – Wine & Grapes 3D Illusion…
$4.00Original price was: $4.00.$3.00Current price is: $3.00.(25% off)
Bee and Honey Jar Charcuterie Board Engraving File | PNG Download #007…
$4.00Original price was: $4.00.$3.20Current price is: $3.20.(20% off)
Valentine Love Captions: 6 Charcuterie Board Engraving Files…
$8.00Original price was: $8.00.$5.60Current price is: $5.60.(30% off)
American Eagle Flag Laser Engraving File for Charcuterie & Cutting…
$4.00Original price was: $4.00.$2.80Current price is: $2.80.(30% off)