

 Français
 Deutsch
 Español
 Italiano
A Comprehensive Guide to Crafting Engraved Slate Coasters
Dec
Estimated reading time: 6 minutes
Key Takeaways
- Material Matters: The quality of your slate is paramount. Opt for honed (smooth) slate for detailed designs and ensure consistent thickness across your blanks to maintain laser focus and achieve professional results.
- Design for Contrast: High-contrast designs like bold text, line art, and simple logos work best. For laser engraving, you often need to invert your design so the laser only marks the intended pattern, saving time and energy.
- Test Your Settings: Laser settings are not one-size-fits-all. Always run a power and speed test grid on a scrap piece of slate to find the perfect combination that produces a bright, white mark without damaging the material.
- Finishing is Essential: After engraving, thoroughly clean the coaster with water and a soft brush. Applying a finish like food-safe mineral oil or a clear matte sealant is crucial for protecting the design and dramatically enhancing the contrast and color of the slate.
Table of Contents
- Choosing the Right Slate and Designs for Your Coasters
- Laser Engraving Slate Coasters Step-by-Step
- Finishing and Protecting Your Engraved Slate Coasters
- Conclusions
- Frequently Asked Questions
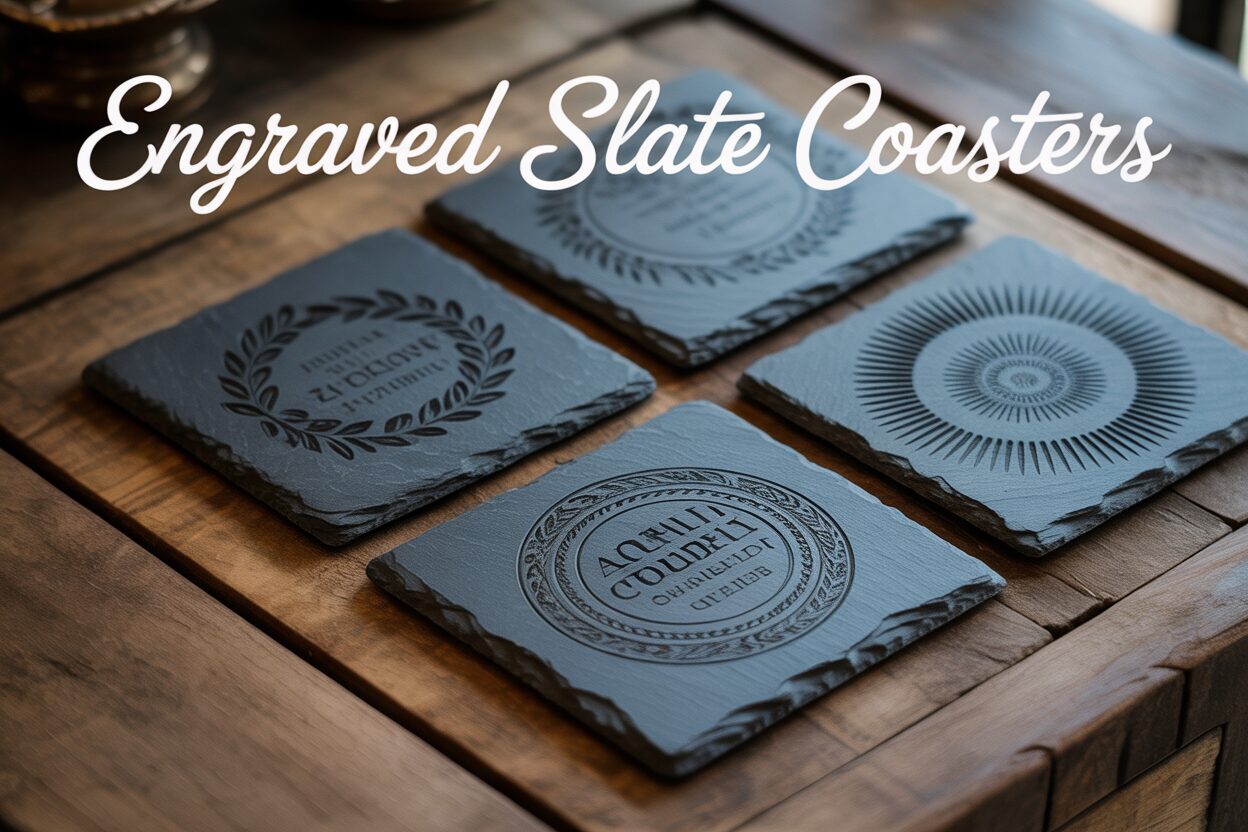
Discover the art of creating stunning engraved slate coasters. This guide will walk you through the entire process, from selecting the best slate and preparing your designs to the final finishing techniques. Perfect for hobbyists and small business owners alike, you’ll learn how to produce professional-quality, personalized slate coasters that are both beautiful and functional, making them ideal for gifts or for selling.
Choosing the Right Slate and Designs for Your Coasters
The foundation of a stunning engraved slate coaster is, unsurprisingly, the slate itself. The quality and type of slate you choose will directly impact the final look and feel of your project. Slate is a natural material, meaning it comes with inherent variations. Most commonly, you will find slate in shades of dark gray and black, which are ideal because they produce a beautiful, high-contrast light gray or white mark when engraved. Some suppliers also offer slate with hints of green or red, which can create unique results but may offer less contrast. The texture is another critical factor. Riven slate has a natural, slightly uneven, cleft surface that provides a rustic charm. However, this texture can pose a challenge for laser focus, potentially leading to inconsistencies in the engraving. For cleaner, more predictable results, especially with detailed designs, look for honed slate, which has a smooth, flat surface. High-quality slate is dense, uniform in color, and free from impurities like pyrite (fool’s gold), which can create undesirable marks or even reflect the laser beam.
Interested in more Coaster? Check out our Coaster laser file designs: Click here!
Key Characteristics to Look for in Slate Blanks
When selecting your blanks, pay close attention to thickness and uniformity. A good standard thickness for slate coasters is between 4mm and 7mm. This provides a satisfying weight and durability without being overly cumbersome. Most importantly, ensure the coasters in your batch are consistent in thickness. A variation of even a millimeter can throw off your laser’s focus, resulting in blurry or incomplete engravings and forcing you to refocus for each coaster. Check for flatness by placing the coaster on a level surface; a warped coaster will be impossible to engrave evenly. Many commercially available slate blanks come with pre-applied foam or cork feet on the bottom. This is a significant time-saver and protects furniture, making them a more finished product right out of the box. Before purchasing a large quantity, it’s always wise to order a small sample batch to test for quality and consistency.
Sourcing Your Slate Coasters and Preparing Your Designs
You can source high-quality slate blanks from several places. Online retailers specializing in laser materials are a reliable option, as their products are typically vetted for laser compatibility. You can also find suitable coasters on major e-commerce sites, but be sure to read reviews carefully to gauge consistency and quality. Sometimes, you can find excellent, affordable options in the kitchen or dining sections of home goods stores. Once you have your slate, the next step is the design. Because engraving on dark slate creates a light mark, high-contrast designs work best. Simple line art, bold text, and graphic logos produce striking results. For laser engraved coasters, vector files (like SVG or AI) are ideal for their clean lines and scalability. For photographic images, you will need a high-resolution raster file (like PNG or TIFF) and will likely use a dithering process in your laser software to simulate grayscale. A crucial tip for slate is to often invert your design; what is black in your file will be engraved. This ensures the laser only marks the design itself, which is faster and more efficient. The natural texture of slate can obscure very fine details, so opt for bold fonts and avoid overly intricate patterns unless you are working with a very smooth, honed surface. The real magic happens with personalization. Creating a custom slate coaster with a family name, a wedding date, or a company logo transforms it from a simple object into a cherished gift or a premium branding tool. These personalized slate coasters are incredibly popular because they blend rustic elegance with a unique, personal touch that is impossible to replicate with mass-produced items.
Laser Engraving Slate Coasters Step-by-Step
With your slate selected and your design finalized, it’s time to bring your creation to life at the laser. The first step is preparation. Begin by thoroughly cleaning the surface of your slate coasters with a cloth lightly dampened with isopropyl alcohol. This removes any oils, fingerprints, or dust that could interfere with the engraving process, ensuring a clean, crisp result. Once clean and completely dry, position the coaster inside your laser engraver. For a single coaster, placing it in a corner of the bed is fine, but for creating a set, a jig is invaluable. A simple jig, made from a piece of scrap wood or cardboard with a corner cut out to the exact dimensions of your coaster, guarantees that each coaster is placed in the identical position. This is the secret to achieving perfectly centered and uniform engravings across an entire set of slate drink coasters. Finally, carefully set the laser’s focus (Z-axis) to the surface of the slate. Since slate can have a slightly uneven, riven texture, focus on the most central or average-height point of your engraving area for the best overall clarity.
Finding the Perfect Laser Settings
Dialing in the correct laser settings is the most critical technical step for engraving slate. Slate doesn’t “burn” like wood; instead, the laser beam ablates or fractures the surface, creating a light gray or white mark. The goal is to achieve this color change without melting the material or creating excessive dust. Your ideal settings will vary based on your specific laser’s power (diode vs. CO2) and wattage. However, a good starting point for a 10W diode laser is around 80-100% power at a speed of 2000-4000 mm/min. For a 40W CO2 laser, you might start at 15-25% power and a much higher speed, perhaps 250-350 mm/s. For resolution, a Lines Per Inch (LPI) setting of 250 to 300 is typically sufficient to produce a high-quality image without overworking the material. Before committing to your final coaster, always run a power/speed test grid on a spare piece of slate or on the back of a test coaster. This allows you to see firsthand how different settings affect the color and depth of the mark, enabling you to choose the combination that yields the brightest, sharpest result for your specific machine and material batch.
Executing the Engraving Safely
Once your settings are dialed in, load your design into your laser control software, such as LightBurn or LaserGRBL. Position the design over the coaster’s template and use the “frame” function to have the laser trace the outer boundary of your design. This is a crucial final check to confirm that your artwork is perfectly centered and sized correctly on the coaster. When you are confident in the placement, it’s time to engrave. But first, ensure all safety precautions are in place.
- Wear your laser safety glasses, which must be rated for your laser’s specific wavelength.
- Confirm your ventilation system or exhaust fan is running at full power to properly extract all the fine dust particles created during engraving.
- Never, under any circumstances, leave the laser engraver unattended while it is operating.
Start the job and watch as your design materializes on the stone. After the engraving is complete, allow the ventilation to run for another minute to clear any residual dust from the machine’s enclosure before opening the lid to retrieve your newly engraved coaster.
Finishing and Protecting Your Engraved Slate Coasters
Once the laser has worked its magic, a few crucial final steps will transform your engraved slate from a finished project into a professional-quality product. The engraving process creates a fine layer of slate dust that settles on the surface and within the engraved lines, often obscuring the design’s true contrast. The first order of business is a thorough cleaning. Take your coaster to a sink and gently wash it under cool running water. Use a soft-bristled brush, like an old toothbrush, to lightly scrub the engraved area. This will dislodge all the residual dust particles, revealing the bright, crisp lines of your design underneath. After rinsing, you can pat the coaster dry with a soft towel or simply let it air dry completely. You will notice that when wet, the slate becomes a deep, rich black, making the engraving pop—this is the effect we aim to capture with a permanent finish.
Choosing and Applying the Right Finish
Applying a finish not only protects your engraved slate coasters from moisture and stains but also dramatically enhances their appearance. The two most popular methods are using mineral oil or a clear sealant.
- Mineral Oil: This is a food-safe option that works by penetrating the stone, giving it that same deep, dark, “wet” look you saw when washing it. This significantly increases the contrast and enriches the natural color of the slate. To apply, pour a small amount of mineral oil onto a clean, lint-free cloth and rub it evenly over the entire surface of the coaster, including the edges. Let the oil sit and absorb for about 15-20 minutes, then use a separate clean cloth to vigorously buff off all the excess. The result is a beautiful, satin finish that feels natural to the touch. The main downside is that the oil finish will fade over time and will need to be reapplied every few months to maintain its appearance.
- Clear Sealant: For a more permanent, maintenance-free option, a clear spray sealant is an excellent choice. Look for a matte or satin finish lacquer or polyurethane to avoid a high-gloss, plastic-like appearance, which can detract from the slate’s natural beauty. In a well-ventilated area, place your clean, dry coaster on a protected surface. Shake the can well and apply a light, even coat from a distance of 8-10 inches. A thin coat is all that’s needed to seal the stone and lock in the contrast. Let it dry completely according to the manufacturer’s instructions. This method provides superior protection against spills and wear, making it ideal for heavily used coasters.
Regardless of the method you choose, the finishing touch elevates your laser engraved coasters from a simple craft to a durable and cherished item. To care for them, simply wipe them clean with a damp cloth. Avoid putting them in the dishwasher or using abrasive cleaners, which can damage the finish and the slate itself. Proper care will ensure your custom coasters remain beautiful and functional for years to come.
Conclusions
You now have the knowledge and skills to create your own beautiful engraved slate coasters. With the right materials, settings, and finishing touches, you can produce professional-quality pieces that are perfect for any occasion. Don’t be afraid to experiment with different designs and techniques to create unique and personalized slate coasters that will impress your friends, family, and customers.
Frequently Asked Questions
Q: What is the best type of slate for detailed engravings?
A: Honed slate, which has a smooth, flat surface, is the best choice for intricate and detailed designs. Its even surface allows for consistent laser focus and produces cleaner, more predictable results compared to the uneven texture of riven slate.
Q: Why do I need to invert my design before engraving on slate?
A: Because engraving on dark slate produces a light-colored mark, you often invert the design (turn black areas to white and vice-versa). This tells the laser to only fire on the parts of the design you want to be marked, which is more efficient and faster than engraving the entire background.
Q: How do I clean slate coasters after they have been engraved?
A: The best method is to gently wash the coaster under cool running water. Use a soft-bristled brush, like a toothbrush, to scrub away the fine dust from the engraved areas. This reveals the true contrast of the design. Let it air dry completely before applying any finish.
Q: What is the difference between finishing with mineral oil versus a clear sealant?
A: Mineral oil is a food-safe option that gives the slate a deep, dark color and high contrast, but it needs to be reapplied periodically. A clear matte or satin sealant provides a permanent, more durable layer of protection against stains and moisture and does not require maintenance, making it ideal for heavy use.

Subscribe to Our Newsletter
And enjoy FREE Download Files, SALE Alerts and Inspiring TIPS
Pricing Your Laser Engraving Work for Profitability
A Comprehensive Guide to Pricing Your Laser Engraving Services
A Comprehensive Guide on How to Price Laser Engraving Services
Charcuterie Board Engraving File – Wine & Grapes 3D Illusion…
$4.00Original price was: $4.00.$3.00Current price is: $3.00.(25% off)
Bee and Honey Jar Charcuterie Board Engraving File | PNG Download #007…
$4.00Original price was: $4.00.$3.20Current price is: $3.20.(20% off)
Valentine Love Captions: 6 Charcuterie Board Engraving Files…
$8.00Original price was: $8.00.$5.60Current price is: $5.60.(30% off)
American Eagle Flag Laser Engraving File for Charcuterie & Cutting…
$4.00Original price was: $4.00.$2.80Current price is: $2.80.(30% off)