

 Français
 Deutsch
 Español
 Italiano
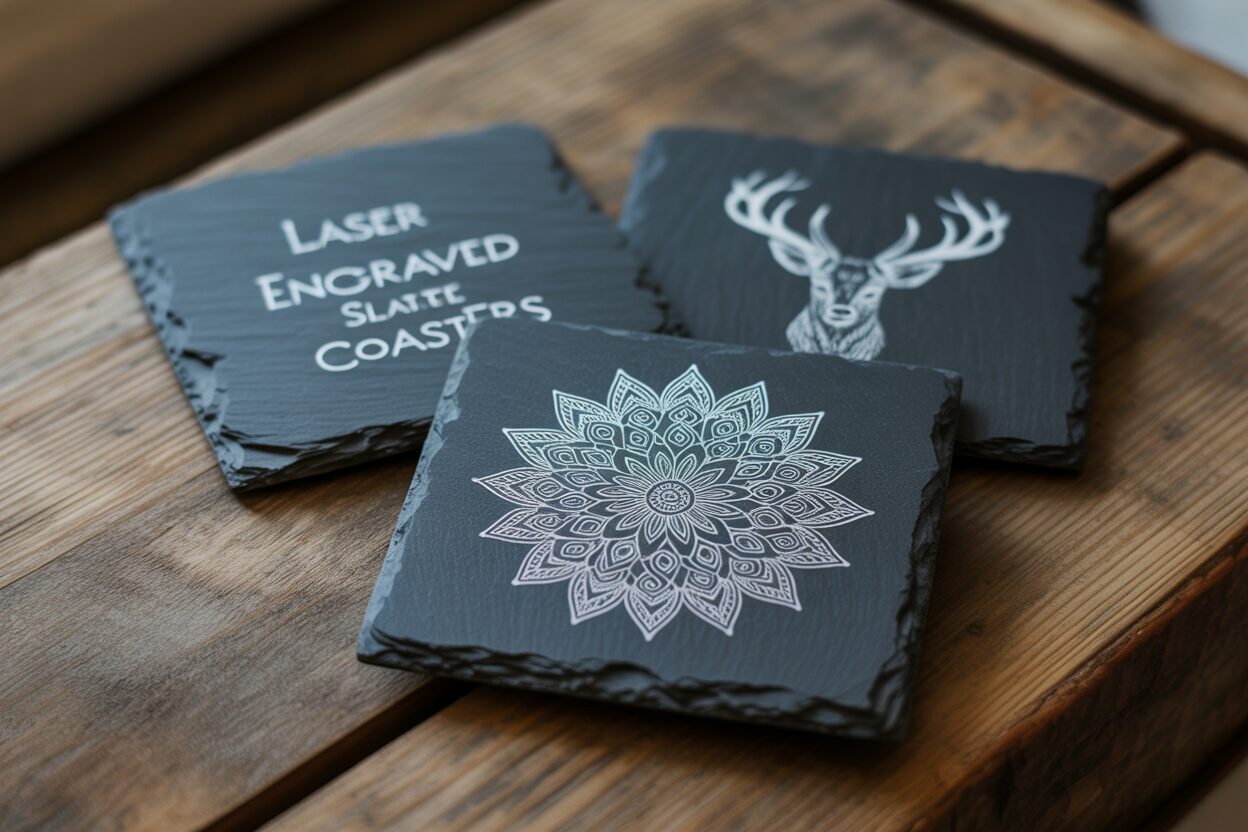
A Complete Guide to Creating Laser Engraved Slate Coasters
Jan
Estimated reading time: 6 minutes
Key Takeaways
- Material Preparation is Crucial: Start with smooth, high-contrast slate and clean it thoroughly with isopropyl alcohol. This removes oils and dust, ensuring the laser makes direct contact with the stone for a crisp, high-contrast engraving.
- Calibrate Settings with a Test Grid: Never use generic settings. Always run a material test grid to find the optimal balance of Power, Speed, and DPI for your specific laser and batch of slate to achieve the brightest, sharpest mark.
- Focus is Non-Negotiable: Use digital calipers to measure the exact thickness of your slate coaster. Accurate focus is the key to achieving sharp lines and clear details in your final design.
- Finishing Makes the Difference: After engraving, clean away all dust residue. Then, apply a quality sealant like food-safe mineral oil or a matte acrylic spray to protect the coaster and dramatically enhance the contrast between the dark slate and the light engraving.
Table of Contents
- Choosing and Preparing Slate for Flawless Engraving
- Mastering Slate Engraving Settings for Perfect Results
- The Engraving Process and Professional Finishing Touches
- Conclusions
- Frequently Asked Questions
Transform ordinary slate tiles into stunning, personalized coasters. This guide provides a comprehensive walkthrough of creating beautiful laser engraved slate coasters. We’ll cover everything from material preparation and perfecting your laser settings to the crucial finishing touches, ensuring you can produce professional-quality pieces for your home, as gifts, or for your business. Let’s start crafting!
Choosing and Preparing Slate for Flawless Engraving
The foundation of a stunning engraved coaster is the slate itself. Not all slate is created equal, and selecting the right piece is the first step toward a professional-quality result. Look for coasters with a relatively smooth, flat surface. While natural slate has a characteristic texture, an overly riven or bumpy surface can cause issues with laser focus, leading to inconsistent engraving depth and blurry details. The ideal piece will have a uniform, dark charcoal or black color. This provides a consistent canvas and maximizes the visual contrast with the light gray or white mark created by the laser. Inspect each piece for imperfections. Avoid slates with large, metallic-looking flakes of pyrite, as these can deflect the laser beam and create un-engraved spots in your design. Also, check for hairline cracks or significant chips on the edges, unless a rustic, chipped look is part of your desired aesthetic. Craft-specific slate blanks are often more reliable than reclaimed slate, as they are typically processed to be more uniform in thickness and quality.
Interested in more Coaster? Check out our Coaster laser file designs: Click here!
The Pre-Engraving Cleaning Ritual
Once you have selected your slate, the next step is arguably the most critical for achieving that crisp, high-contrast finish: the cleaning and preparation process. The importance of preparing slate for engraving cannot be overstated. From the quarry to your workshop, slate picks up a surprising amount of dust, natural oils from handling, and manufacturing residues. These contaminants create an invisible barrier on the surface. When the laser beam hits this layer, its energy is partially absorbed or diffused before it can cleanly ablate the slate, resulting in a dull, blotchy, or low-contrast engraving. To ensure the laser interacts directly with pure stone, a thorough cleaning is essential.
- Materials Needed: You will need Isopropyl Alcohol (IPA), preferably 90% or higher, and a clean, lint-free microfiber cloth.
- The Process: Lightly dampen a section of your microfiber cloth with the isopropyl alcohol. You don’t need to saturate it. Firmly wipe down the entire surface of the slate coaster that you intend to engrave. This action lifts and removes any oils, dust, and grime. Allow the alcohol to evaporate completely—it should only take a minute or two. The slate must be perfectly dry before it goes into the laser machine.
Accurate Measurement for Pinpoint Focus
A sharp engraving is a direct result of a perfectly focused laser beam. Because slate coasters, even high-quality ones, have natural variations in thickness, you cannot rely on a generic material setting. Accurate measurement is mandatory. The most reliable tool for this job is a set of digital calipers. A simple ruler is not precise enough for this task. Open the calipers and measure the thickness of the coaster at several different points, especially if the surface has a noticeable texture. Note the different measurements. If the variation is minimal (less than 0.5mm), using the average of your measurements is usually sufficient. For designs with very fine details, it’s best to measure the thickness directly under the most intricate part of the design and use that specific value. This measurement is then entered into your laser control software, either for an auto-focus sequence or to manually set the Z-axis (the height of the laser head). Getting this number right ensures the laser beam is at its smallest, most powerful point precisely at the slate’s surface, guaranteeing the sharpest lines and clearest details your machine can produce.
Mastering Slate Engraving Settings for Perfect Results
Dialing in the correct slate engraving settings is a process of balancing three critical variables to achieve that coveted, high-contrast mark. These settings are not universal; they vary significantly between machines, wattages, and even different batches of slate. The key is to understand what each setting does and how they interact.
- Power: This setting controls the intensity of the laser beam. For slate, you are not cutting but ablating—or fracturing—the surface layer to expose the lighter gray stone underneath. Too little power results in a faint, barely visible mark. Too much power can overheat the material, causing it to flake off excessively or even create a glassy, melted appearance, which diminishes the crispness of the design.
- Speed: This is how fast the laser head moves across the slate. Speed and power have an inverse relationship. A slower speed allows the laser beam to dwell on one spot for longer, delivering more energy. For slate, a moderate speed is often the sweet spot. Moving too fast won’t give the laser enough time to properly fracture the surface, while moving too slowly can lead to over-burning, similar to using too much power.
- DPI (Dots Per Inch): This determines the resolution, or the number of laser pulses per inch. A higher DPI will create a more detailed image with smoother lines and fills, but it also means more heat is applied to the material as the laser passes are closer together. For most slate designs, a DPI between 250 and 300 is an excellent starting point, offering great detail without overworking the stone.
Finding Your Sweet Spot: The Material Test Grid
Since every laser is unique, blindly using settings found online is a recipe for wasted material. The professional approach is to run a material test grid on a scrap piece of slate from the same batch you plan to use. Most laser software (like LightBurn) has a built-in feature to create these grids easily. You will create a matrix of squares, assigning a different speed value to each column and a different power value to each row. For a mid-range CO2 laser (e.g., 50-80W), you might test power from 10% to 30% and speeds from 200 mm/s to 500 mm/s. After running the test, examine the squares. Your goal is to find the square that produces the brightest, cleanest white or light-gray mark with sharp edges and no signs of melting or excessive chipping. This square represents the ideal starting settings for your custom slate coaster project.
A Note on Diode Laser Slate Engraving
Diode lasers have become incredibly popular and are fully capable of producing beautiful slate engravings, but their settings differ significantly from CO2 lasers. Diodes generally have a lower output power, which means you must compensate by using much slower speeds. For a 10W or 20W output diode laser, you won’t be working in the 300 mm/s range. Instead, a good starting point for your test grid might be a speed range of 1500 to 3000 mm/min (note the change in units from seconds to minutes) at 80-100% power. Because you are running slower, a very fine, focused beam is crucial to avoid a blurry result. The final engraved color from a diode can sometimes be a slightly warmer shade of gray compared to the stark white of a CO2 laser, but the results can be just as impressive once you have precisely calibrated your settings.
The Engraving Process and Professional Finishing Touches
With your design finalized and settings calibrated, it is time to create your laser engraved slate coasters. Secure the coaster in your laser machine, ensuring it is level and correctly positioned under the laser head. Double-check that you have entered the correct material thickness for focusing. Once you begin the job, proper ventilation is crucial, as the process vaporizes small particles of stone. After the laser has finished its work, you will see your design beautifully etched onto the surface, but it will be covered in a fine layer of gray dust and residue. Resist the urge to wipe it with your hand, as the oils on your skin can stain the porous engraved area. Instead, gently remove the coaster and use a soft-bristled brush, like a paintbrush or a clean toothbrush, to whisk away the majority of the loose dust. For a deeper clean, you can lightly rinse the coaster under cool water and gently scrub the surface with the soft brush, then pat it dry immediately with a microfiber cloth. This post-engraving cleaning is vital for removing any lingering debris and maximizing the contrast between the dark, raw slate and the light, engraved design before the final finishing step.
The Art of Sealing Engraved Slate
Sealing is the final touch that transforms a great-looking coaster into a professional, durable product. This step darkens the natural slate, creating a dramatic visual pop for the engraved area, while also providing a protective layer against moisture and stains. The choice of sealant depends on the desired finish and intended use.
- Food-Safe Mineral Oil: This is the ideal choice for a natural, satin finish that is completely food-safe. It enhances the deep, rich color of the slate without creating a glossy film. It is the go-to method for coasters that will be heavily used. To apply, pour a small amount of mineral oil onto the coaster and use a clean microfiber cloth to work it into the entire surface, both engraved and un-engraved areas. Let it sit for 15-20 minutes, allowing the oil to penetrate the porous stone. Afterward, take a new, clean, dry cloth and thoroughly buff the surface to remove all excess oil. The coaster should feel smooth and look rich, not wet or greasy. This finish may need to be reapplied periodically over the life of the coaster.
- Clear Acrylic Spray Sealant: For a more permanent, highly durable finish, an acrylic spray is an excellent option. This is particularly good for coasters that may be used outdoors or are intended to be more decorative. Always choose a matte or satin finish to preserve the natural look of the stone; a gloss finish can look unnatural and cheap. In a well-ventilated area, place the coaster on a protected surface. Shake the can vigorously and apply a very light, even coat from a distance of 10-12 inches. It is far better to apply two or three very thin coats than one thick, heavy coat, which can obscure details and lead to drips. Allow each coat to dry completely according to the manufacturer’s instructions (usually 15-30 minutes) before applying the next. This method provides robust protection against scratches and moisture, effectively locking in the beauty of your engraving.
Conclusions
You now have the knowledge to create exceptional laser engraved slate coasters. By carefully preparing your material, testing your settings, and applying a quality sealant, you can achieve consistently impressive results. This project is a fantastic way to create personalized and profitable items. Experiment with different designs and enjoy the process of making your own custom slate coaster sets.
Frequently Asked Questions
Q: Why is it crucial to clean slate before laser engraving?
A: Oils, dust, and residues on the slate’s surface create an invisible barrier. This barrier diffuses the laser’s energy, which can lead to a dull, blotchy, or low-contrast engraving. Cleaning with isopropyl alcohol removes this layer, ensuring the laser interacts directly with the stone for a crisp, high-quality result.
Q: What are the key laser settings to adjust for slate?
A: The three most important settings are Power (the intensity of the laser beam), Speed (how fast the laser head moves), and DPI (Dots Per Inch, or resolution). These must be carefully balanced to achieve a bright, clean mark without over-burning or melting the material.
Q: How do I find the best settings for my specific laser?
A: The most reliable method is to run a material test grid on a scrap piece of slate from the same batch. This process creates a matrix of small squares, each engraved with a different combination of power and speed, allowing you to visually identify the setting that produces the best result for your machine.
Q: Can I use a diode laser for slate engraving?
A: Absolutely. Diode lasers are very effective for slate but require different settings than CO2 lasers. Due to their typically lower power, you must use much slower speeds (e.g., in the range of 1500-3000 mm/min) combined with high power (80-100%) to achieve a quality engraving.
Q: What is the purpose of sealing engraved slate coasters?
A: Sealing serves two main purposes. First, it darkens the natural slate, which dramatically increases the visual contrast of the light-gray engraved design. Second, it provides a protective layer against moisture, stains, and scratches, transforming your craft into a durable, long-lasting, and professional-quality product.

Subscribe to Our Newsletter
And enjoy FREE Download Files, SALE Alerts and Inspiring TIPS
A Guide to Designing and Making a Laser Cut Box
How to Make a Custom Laser Cut Wine Box
A Beginner’s Guide to Creating a Laser Cut Box
Charcuterie Board Engraving File – Wine & Grapes 3D Illusion…
$4.00Original price was: $4.00.$3.00Current price is: $3.00.(25% off)
Bee and Honey Jar Charcuterie Board Engraving File | PNG Download #007…
$4.00Original price was: $4.00.$3.20Current price is: $3.20.(20% off)
Valentine Love Captions: 6 Charcuterie Board Engraving Files…
$8.00Original price was: $8.00.$5.60Current price is: $5.60.(30% off)
American Eagle Flag Laser Engraving File for Charcuterie & Cutting…
$4.00Original price was: $4.00.$2.80Current price is: $2.80.(30% off)