

 Français
 Deutsch
 Español
 Italiano
A Beginner’s Guide to Laser Engraving Slate Coasters
Jan
Estimated reading time: 8 minutes
Key Takeaways
- Slate is an excellent material for laser engraving because the laser ablates the surface to create a permanent, high-contrast white mark, rather than burning it like wood.
- Success requires proper preparation, including precise measurements with digital calipers, cleaning the slate with alcohol, and creating a high-contrast design file (vector or high-res raster).
- Dialing in the correct laser settings (power, speed, and LPI) is critical. Always perform a test grid on a spare piece to find the sweet spot that balances brightness and sharpness for your specific machine and material.
- Post-engraving cleanup is essential for a professional look. After removing dust, wipe the coaster with isopropyl alcohol. For an enhanced finish, apply a thin coat of food-safe mineral oil to deepen the slate’s color and make the engraving pop.
Table of Contents
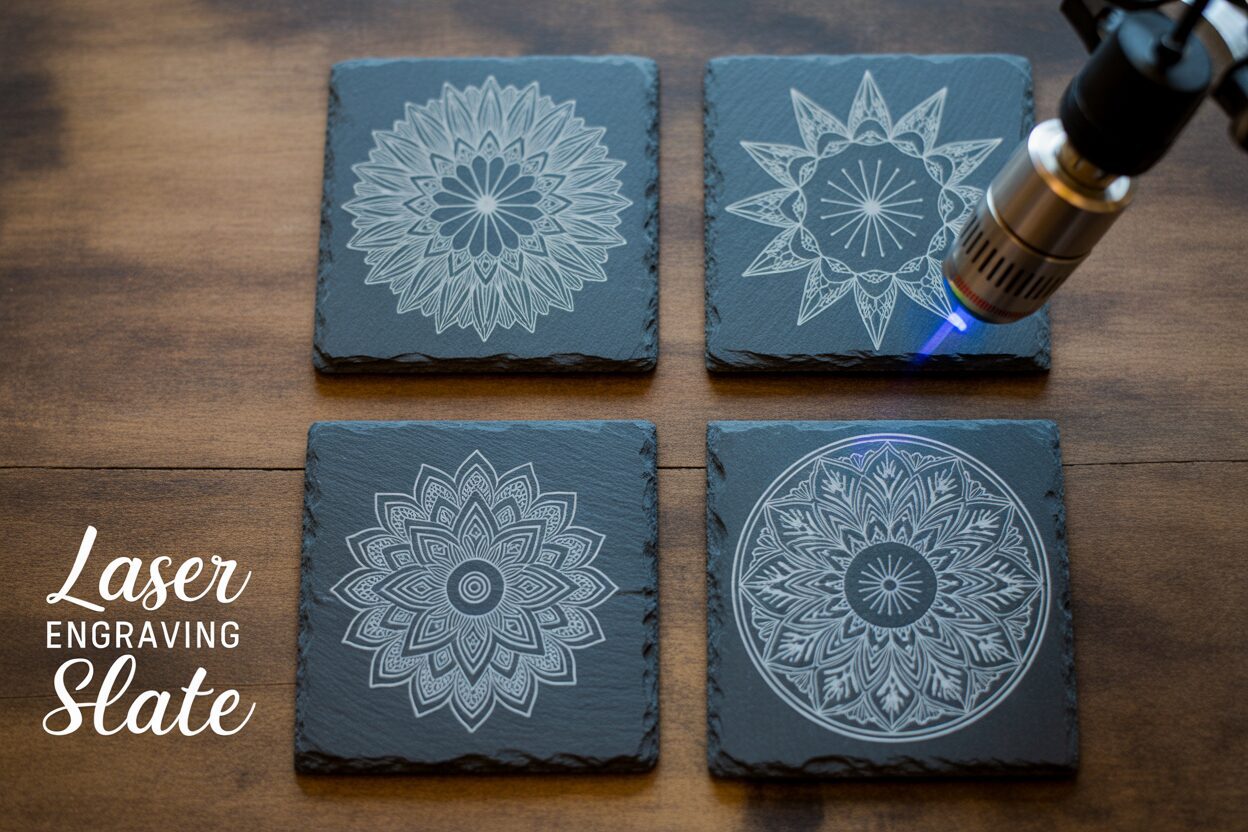
Discover the art of laser engraving on slate, a unique material that yields beautiful, high-contrast results. This guide will walk you through the entire process of creating your own custom slate coasters, perfect for gifts or starting a new product line. We’ll explore everything from selecting your design to the final finishing touches for a professional-quality product.
Why Slate is an Ideal Material for Laser Engraving
When you first venture into laser engraving, the sheer number of materials can be overwhelming. Woods, acrylics, metals, and leathers all offer unique possibilities. However, for creating products that are both beautiful and functional, slate stands in a class of its own. Its unique geological properties make it an exceptionally rewarding and forgiving material for beginners and professionals alike. Unlike organic materials that burn, slate undergoes a fascinating transformation under the laser beam, resulting in a crisp, permanent, and visually striking mark.
The magic of engraving on slate lies in its composition and how it reacts to focused heat. Slate is a fine-grained metamorphic rock formed from shale under intense heat and pressure. This process creates a layered, or foliated, structure. When a laser beam hits the dark gray surface, it doesn’t burn or char the material as it would with wood. Instead, the intense, localized energy from the laser heats the surface minerals so rapidly that they fracture and flake away in a process called ablation. This ablation reveals the lighter-colored rock layer just beneath the surface. The result is a stunningly bright, almost white mark that creates a brilliant contrast against the dark background. This physical change is permanent; the design is etched into the stone itself and will not fade, peel, or wash away, ensuring your creations last a lifetime.
Durability and Practicality in Every Piece
Beyond the beautiful engraving it produces, slate is an inherently practical material, making it perfect for items like coasters that see regular use. Its natural properties include impressive durability and resistance to both heat and water. A hot coffee mug or a cold, sweating glass of iced tea will not damage the surface or the engraving. This resilience is why slate has been used for centuries as roofing tiles and flooring. When you create an engraved slate coaster, you are making a product that is not just decorative but highly functional. The engraved design remains pristine through countless uses and gentle cleanings. This durability gives customers and gift recipients confidence in the product, knowing it’s a high-quality item built to endure daily life.
Interested in more Coaster? Check out our Coaster laser file designs: Click here!
The contrast between slate and other common laser-engraving materials is stark. With wood, the laser carbonizes the fibers, creating a dark burn mark for a rustic, branded look. With acrylic, the laser vaporizes the material, leaving a frosted or clear etching. Slate, however, offers the opposite of wood: a clean, light mark on a dark canvas. This provides incredible detail visibility and a sophisticated finish. Furthermore, the process is often faster and requires less power compared to deep wood engraving, making it an efficient choice for production. This unique combination of a rustic, natural-stone feel with a sharp, high-tech engraving gives any custom slate coaster set a unique aesthetic. It’s an elegant fusion of raw nature and precise design, which is why slate products are consistently popular for personalized gifts, wedding favors, and artisanal home decor sold online.
Essential Tools and Preparing Your Slate Coaster Design
With a solid understanding of why slate is a fantastic medium, it’s time to gather your tools and prepare your digital canvas. The success of your personalized slate coasters hinges just as much on proper preparation as it does on the laser itself. Fortunately, the list of required items is straightforward and accessible for most hobbyists.
Your essential toolkit includes:
- A Laser Engraver: Both diode and CO2 lasers are highly effective for engraving slate. Diode lasers are often more affordable and a great starting point for beginners, while CO2 lasers typically offer more power and speed, making them ideal for higher volume production.
- Raw Slate Coasters: These can be purchased from various online craft suppliers, home goods stores, or even directly from stone suppliers. Look for coasters that are relatively uniform in thickness and color for consistent results. Most come with small padded feet on the bottom to protect furniture.
- Digital Calipers: While a ruler works, digital calipers are invaluable for getting precise measurements of your coasters, which can vary slightly in size. Accurate measurements are crucial for centering your design perfectly.
- Cleaning Supplies: A bottle of isopropyl or denatured alcohol and a lint-free microfiber cloth are essential for cleaning the slate before and after engraving. A soft brush can also be useful for removing fine dust from the engraved areas.
Crafting and Preparing Your Design File
The design is where your creativity truly shines. For a slate coaster design, high-contrast graphics produce the most dramatic and visually appealing results. Because the laser creates a light mark on a dark surface, bold shapes, thick text, and clear silhouettes work exceptionally well. Intricate, wispy details or subtle gradients can sometimes get lost in the natural texture of the stone. You can work with two primary image types: raster and vector. Raster images (like .JPG, .PNG) are made of pixels and are perfect for detailed artwork or photographs. For the best quality, always start with a high-resolution image (300 DPI or higher). Vector images (like .SVG, .AI, .DXF) are based on mathematical lines and curves, making them ideal for logos, text, and geometric patterns because they can be scaled to any size without losing sharpness.
Once you have a design, preparing it for the laser is a critical step. Most laser software, like LightBurn or LaserGRBL, will interpret black areas in your design file as the parts to be engraved. Since the engraving on slate appears white or light gray, your design process should be WYSIWYG—What You See Is What You Get. If your design has black text on a white background, it will engrave perfectly as light text on the dark slate. If you are working with a logo that is white on a dark background, you may need to invert it so the logo itself is black in the file. Always double-check this in your software’s preview window. Ensure all text is converted to paths or curves to avoid font substitution issues. Finally, size your design to fit your coaster, leaving a small, even margin of at least 3-5mm around the edge for a professional, centered appearance.
Optimal Laser Engraving Settings for Slate
Now that your design is ready and your materials are prepped, we arrive at the most critical technical step in the laser engraving slate process: dialing in your machine’s settings. This is where you control the interaction between the laser beam and the stone to create the perfect mark. The three fundamental parameters you will manipulate are power, speed, and interval (also known as lines per inch or LPI). Mastering the balance between these three settings is the key to transforming a plain piece of slate into a beautifully finished product.
Power: This setting determines the intensity of the laser beam, expressed as a percentage of your machine’s maximum output. For slate, you don’t want to use excessive power. Too much power can cause the material to overheat, resulting in excessive chipping or a less refined, “blasted” look. Too little power, and the mark will be faint and uneven. The goal is to find a power level that is just enough to cleanly ablate the top surface, revealing the bright layer underneath.
Speed: This is the velocity at a which the laser head moves across the slate’s surface. Speed and power have an inverse relationship. A slower speed allows the laser beam to dwell on one spot for longer, transferring more energy, which has an effect similar to increasing power. A faster speed results in less energy transfer. For slate, a relatively fast speed is often preferred to achieve a clean, crisp mark without overheating the surrounding area.
Interval (LPI): This setting controls the spacing between each horizontal pass of the laser. A higher LPI (e.g., 300) means the lines are closer together, creating a smoother, more solid-looking engraving. A lower LPI (e.g., 200) will have more space between the lines, which can be faster but may result in a “lined” appearance. For most engraved slate coasters, an LPI between 254 and 300 provides an excellent balance of quality and engraving time.
Finding Your Sweet Spot: Starting Settings and the Power of Testing
Every laser is different, and slate itself can vary in density and composition from one batch to another. Therefore, the following settings should be treated as starting points. The single most important step you must take is to run a material test grid on a spare coaster or the back of one. This will allow you to see exactly how different combinations of power and speed affect your specific material.
Here are some general starting points:
- For Diode Lasers (10-20W Optical Power): Start with a speed of around 3000 mm/minute and a power setting of 70-85%. Run a test grid by varying the speed from 2000 to 4000 mm/min and the power from 60% to 90%.
- For CO2 Lasers (40-60W): CO2 lasers are much more powerful, so your settings will be different. Start with a speed of around 300 mm/second and a power of 15-20%. Your test grid could vary speed from 200 to 400 mm/s and power from 12% to 25%.
When you analyze your test grid, look for the square that produces the brightest, most consistent white mark with the sharpest edges. Some settings might produce a slightly brighter result but with more chipping around the edges. You want to find the “sweet spot” that balances brightness and cleanliness. This careful testing ensures that every one of your engraved slate coasters comes out looking professional and pristine, removing all the guesswork from the process.
The Engraving Process and Finishing Touches
With your optimal settings dialed in, you are ready for the most exciting part: watching your design come to life on the stone. This final stage involves the physical engraving process followed by crucial finishing touches that will make your project look truly professional. Following these steps carefully will ensure a clean, impressive result every time.
First, prepare your workspace. Begin by cleaning the surface of your slate coasters with a lint-free cloth and isopropyl alcohol. This removes any finger oils, dust, or residue that could interfere with the laser. Place the coaster on the laser bed. For a single coaster, position it under the laser head. If you are making a set, using a simple jig made from wood or cardboard with cutouts for the coasters will guarantee perfect, repeatable placement for each piece. Next, and this is critically important, set the laser’s focus. The laser beam is cone-shaped, and its power is most concentrated at its finest point. An unfocused laser will produce a blurry, weak mark. Use your machine’s focusing tool—whether it’s a fixed-focus block, an auto-focus probe, or manual adjustment—to set the correct distance between the laser lens and the slate surface. Once focused, double-check your safety measures: ensure your ventilation system is running to extract dust and put on your laser safety glasses. Frame the job to confirm the design is centered, and then press start.
Post-Engraving Cleanup and Enhancement
As the laser works, you’ll see it systematically etch your design, kicking up a fine gray powder. Don’t be alarmed by the dusty appearance; this is a normal and desired part of the process. Once the machine completes the job, your beautiful design will be hidden under this layer of residue. The post-processing cleanup is what reveals the magic. Let the coaster cool for a moment before handling it. The first step is to gently remove the loose dust. You can use a soft-bristled brush (like a paintbrush or a soft toothbrush) to sweep away the majority of the powder from the engraved areas. Next, take a clean microfiber cloth dampened with isopropyl or denatured alcohol and wipe the entire surface. The alcohol will lift the remaining fine dust out of the engraving’s microscopic crevices and then quickly evaporate, leaving behind a brilliantly crisp, white design that contrasts sharply with the dark slate.
At this point, your coaster is technically finished and looks fantastic. However, to elevate your custom slate coaster to a premium product, consider an optional finishing step. Applying a thin coat of food-safe mineral oil is a popular and highly effective technique. Simply put a small amount of oil on a clean cloth and wipe it evenly over the entire coaster. The oil will be absorbed by the slate, dramatically deepening its natural dark gray color to a rich, near-black luster. This enhancement makes the bright white engraving pop even more. Let the oil sit for 10-15 minutes, then use a dry part of the cloth to buff off any excess. This not only improves the appearance but also adds a layer of moisture resistance. For an even more durable finish, a food-safe matte or gloss stone sealant can be applied, which offers greater protection against stains and wear, ensuring your creation remains beautiful through years of use.
Conclusions
You now have the knowledge to confidently tackle your own laser engraving slate projects. By following these steps, you can create beautiful engraved slate coasters that are both durable and stylish. Don’t hesitate to experiment with different slate coaster designs and settings to develop your unique style and produce stunning, personalized pieces for yourself or your customers.
Frequently Asked Questions
Q: What type of laser is best for engraving slate?
A: Both diode and CO2 lasers work exceptionally well for engraving slate. Diode lasers are a great, affordable option for beginners, while more powerful CO2 lasers are ideal for faster, higher-volume production. The key is to find the correct power and speed settings for your specific machine.
Q: How do I get the brightest, whitest mark on slate?
A: The brightest mark comes from finding the “sweet spot” in your laser settings. This is typically achieved with relatively high speed and moderate power. It’s crucial to run a material test grid on a spare coaster to identify the power and speed combination that ablates the surface cleanly without overheating or “blasting” it.
Q: Do I need to treat or coat the slate before engraving?
A: No, slate does not require any pre-treatment or coating before engraving. The only preparation needed is to thoroughly clean the surface with isopropyl alcohol and a lint-free cloth to remove any dust or oils that could interfere with the laser.
Q: What is the best way to clean an engraved slate coaster after engraving?
A: After engraving, first use a soft brush to sweep away the loose dust. Then, wipe the entire coaster with a microfiber cloth dampened with isopropyl alcohol. This will lift the fine residue from the engraved crevices and leave a crisp, clean design. For regular use, coasters can be hand-washed with mild soap and water.
Q: Can I use mineral oil on my engraved slate coasters?
A: Yes, applying a thin coat of food-safe mineral oil is a popular and recommended finishing step. It deepens the slate’s natural dark color, which makes the bright white engraving pop even more. It also adds a layer of moisture resistance. Simply wipe on a thin coat, let it sit for 10-15 minutes, and buff off the excess.

Subscribe to Our Newsletter
And enjoy FREE Download Files, SALE Alerts and Inspiring TIPS
How to Price Your Laser Engraving and Cutting Services
The Ultimate Guide to Crafting a Laser Cut Box
How to Make a Stunning Laser Cut Box: A Step-by-Step Guide
Charcuterie Board Engraving File – Wine & Grapes 3D Illusion…
$4.00Original price was: $4.00.$3.00Current price is: $3.00.(25% off)
Bee and Honey Jar Charcuterie Board Engraving File | PNG Download #007…
$4.00Original price was: $4.00.$3.20Current price is: $3.20.(20% off)
Valentine Love Captions: 6 Charcuterie Board Engraving Files…
$8.00Original price was: $8.00.$5.60Current price is: $5.60.(30% off)
American Eagle Flag Laser Engraving File for Charcuterie & Cutting…
$4.00Original price was: $4.00.$2.80Current price is: $2.80.(30% off)